Takeout & Delivery
1 Module Overview
Welcome to the Takeaway & Delivery Management Module.
This module enables you to map your group’s stores and dishes to major domestic and international delivery platforms (e.g., Uber Eats, DoorDash, Meituan). Complete three core configurations: — store authorization binding, product mapping, and delivery rule setup — then choose either Brand Mode or Service Provider Mode to connect to multiple platforms at once.
You can then manage multi-channel order receiving, product listing/delisting, and order fulfilment for each store end-to-end, with seamless order sync across POS, KDS, and other terminals.
2 Store Binding
STEP 1: Access the Store Binding Page
From the group view, navigate to Takeout & Delivery > Third-Party Platforms > Store Binding. Once the page loads, it will display the binding status of all stores across various delivery platforms (e.g., Uber Eats, HungryPanda, Meituan, Douyin).
STEP 2: Confirm the Group’s Takeaway Cooperation Mode
Before signing contracts and binding stores, confirm whether the group’s takeaway cooperation mode is Brand Mode or Service Provider Mode. The authorization and binding processes differ between the two modes; select the corresponding operation based on your actual cooperation type.
STEP 3: Obtain Platform Authorization Credentials (Meituan as an Example)
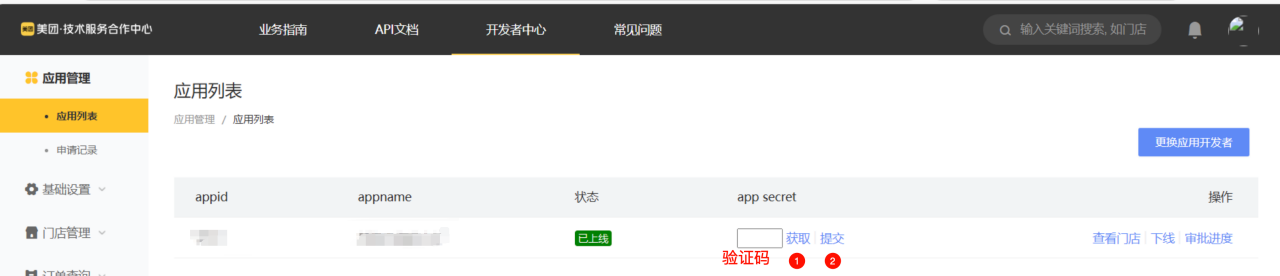
To integrate with the Meituan platform, you first need to obtain the required appId and secret. Follow these steps:
- Go to Meituan Technical Service Cooperation Center > Console.
- Select Brand > Takeaway Management > Takeaway Developer Platform > Application List in sequence.
- Click Get Verification Code. After submitting the verification code, copy the corresponding appId and
secretand save them for later use.
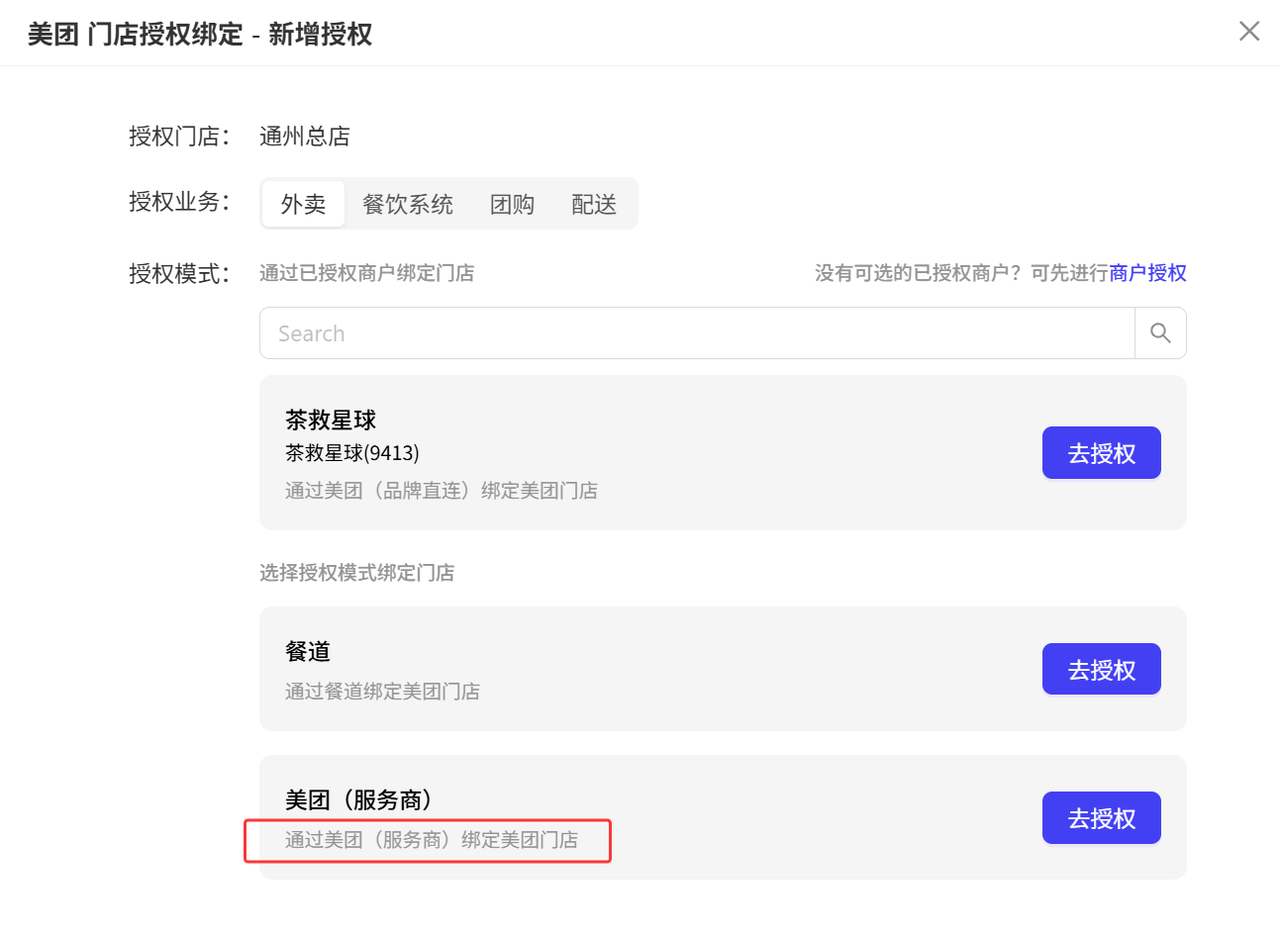
STEP 4: Store Authorization Binding in Service Provider Mode
If the group selects the Service Provider Mode, follow this process for unauthorized store records:
- Locate the target unauthorized store, click Authorization Management, and select the business types to authorize (Takeaway, Group Buying, Delivery) in the pop-up dialogue box.
- Choose an authorization method to complete binding:
-
Method 1: Bind via Authorized Merchant
- Click Authorize, then directly confirm in the merchant authorization dialog box to complete binding.
-
Method 2: Authorize via Platform Redirect
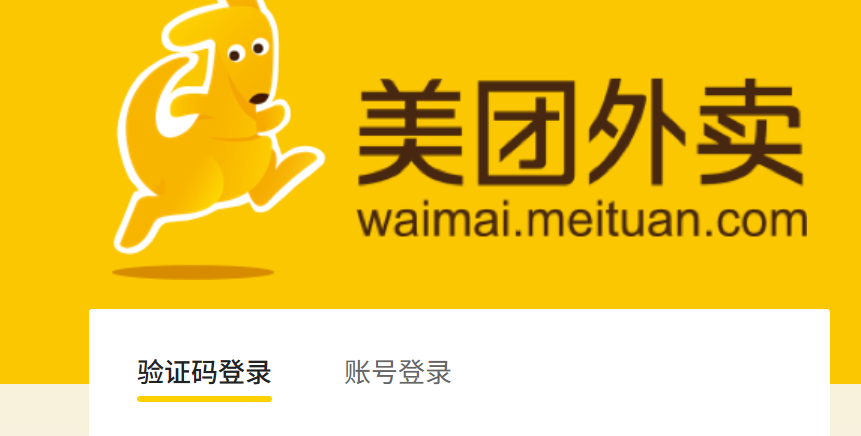
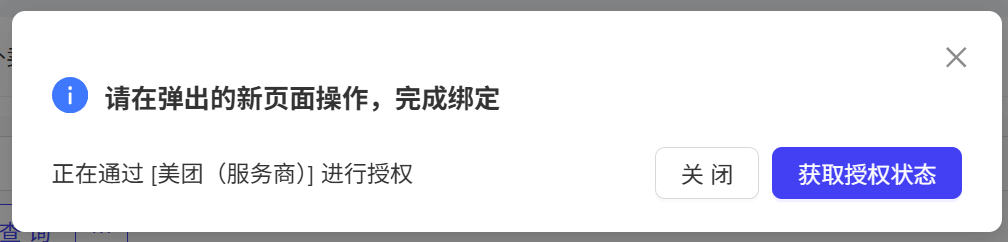
- For example, select Meituan (Service Provider) and click Authorize. The system will redirect you to the Meituan external page (open-erp.meituan.com ). Log in with your Meituan account and password, confirm the binding, and the system will automatically sync the final authorization status.
- Authorization for Other Platforms (Douyin, Grab, Uber Eats, DoorDash, etc.)
- Click【Authorize】and submit the authorization request in the corresponding platform business authorization dialog box that pops up.
STEP 5: Store Authorization Binding in Brand Mode
If the group selects the Brand Mode, follow this process for unauthorized store records (Meituan as an example):
- Click Meituan Merchant Authorization in the upper right corner of the page. In the pop-up dialog box, select the authorized merchant record. Available authorized business types include Takeaway, Group Buying, Delivery, and Membership.
- Select the Brand Direct Connection Authorization method: Click Authorize, enter the brand application name, brand application ID, and secret in the merchant authorization dialog box, then submit to complete the authorization binding. One group can bind multiple merchant accounts.
- View Authorization Information:Go to the Authorized Merchants page to view all bound merchant information and initiate additional authorization operations if needed.
- Associate Meituan Stores with System Stores
- On the Takeaway & Delivery > Third-Party Platforms > Store Binding page, locate the target store and click Authorization Management. Select the Takeaway business type, choose the added brand application, then select the corresponding store from the list of stores pulled from the Meituan platform to complete the association and binding.
STEP 6: Authorization Binding for Other Platforms
Authorized business types mainly include Takeaway, Group Buying, Membership, and Delivery.
Example: JD Instant Delivery
The authorization process for platforms like JD Instant Delivery follows the same logic and supports takeaway business authorization. Follow these steps:
- Choose to redirect to the official JD Instant Delivery page for login authorization;
- Or directly enter the parameters required by the platform to complete authorization;
- After successful authorization, complete store binding through the Authorized Merchants list.
2.1 Store Unbinding
Bound stores can be unbound as needed in two scenarios:
2.1.1 Batch Unbinding in Group Brand Mode
Locate the authorized brand record, click the corresponding × button in the merchant list, and confirm the unbinding.
Note: This operation will invalidate the authorization of all bound stores under the merchant.
2.1.2 Single Store Unbinding
- On the Store Binding list, locate the target store. Hover over the corresponding icon in the Authorized Business Types column to display the × Unbind button.
- Click the button to bring up the unbinding dialog box, confirm the action, and the system will redirect you to the corresponding platform’s external page for secondary confirmation to complete the unbinding.
2.2 Managing Bound Stores
After completing store binding, you can perform subsequent operational configurations for the store in the following steps:
STEP 1: From the group view, go to Takeaway & Delivery > Third-Party Platforms > Store Binding page to view all bound store records.
STEP 2: Locate the target store and click the Configure button in the Business Configuration column to set takeaway parameters, including simplifying order information and enabling/ disabling the Group Meal function.
STEP 3: View Store Authorization Status
Check the account status in the Authorized Business Types column. A Pending Association or Suspended status will automatically disable the takeaway service, while an Overdue Payment status will trigger a recharge reminder.
3 Item Mapping
This module is used to establish associations between the system’s products and those on third-party delivery platforms (e.g., Uber Eats, HungryPanda), supporting single/ batch binding and unbinding operations.
3.1 Single Store Item Mapping
STEP 1: Access the Product Mapping Page
From the group admin view, navigate to Takeaway & Delivery > Third-Party Takeaway > Product Mapping. The page displays product mapping status for all stores, categorized by Store + Delivery Platform (e.g., XX Store + Uber Eats Products).
3.1.1 Single Item Binding
STEP 1: Select the contracted target store on the left side of the page.
STEP 2: The main display area will show the third-party platform products that are not bound to the store (only one menu is active per store on each delivery platform, so only products within this menu are displayed).
STEP 3: Locate the product to be bound, click the【Bind】button in its operation column, and the Select Third-Party Platform Product dialog box will pop up.
STEP 4: Select the corresponding third-party platform product in the dialogue box and click【Confirm】to complete the mapping between the system product and the third-party product.
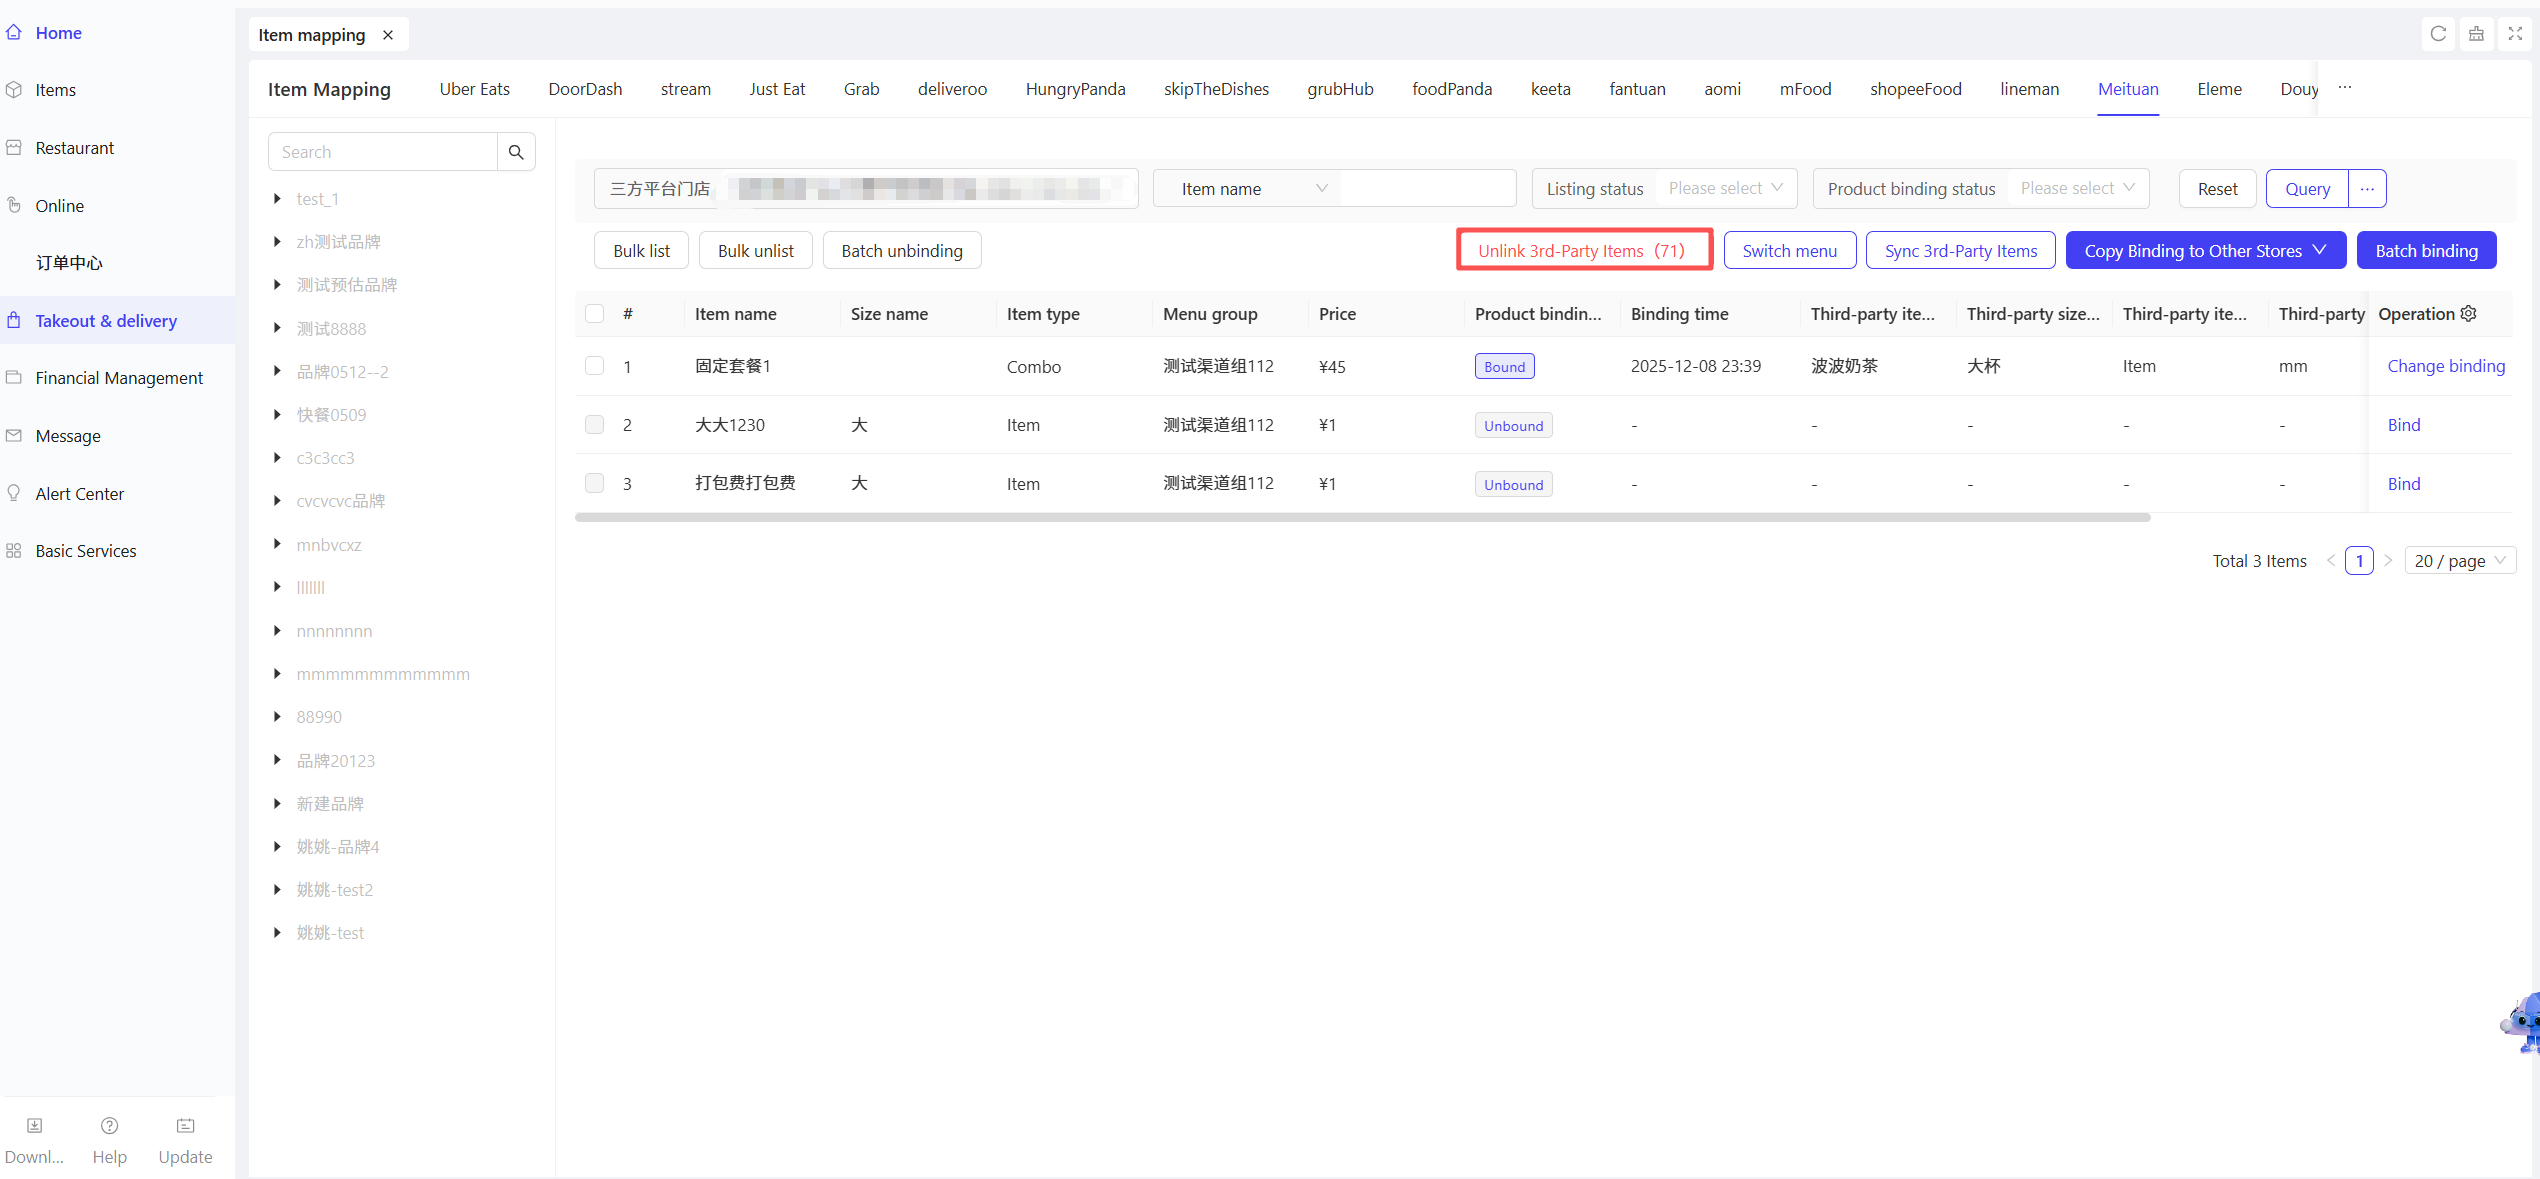
3.1.2 Post-Binding Operations

- After binding, the product status changes to Bound. You can click Rebind (to switch the associated third-party items) or Unbind (to terminate the current association) in the operation column.
- You can directly【List】or【Delist】bound items.
- One system item can be bound to multiple third-party platform items.
3.1.3 Sync Third-Party Product Information
Click the【Sync Third-Party Items】button on the page to retrieve the latest item information from third-party platforms and sync it to the current page. You can also set item category information during the synchronization process.

3.1.4 Batch Operations
3.1.4.1 Batch Item Binding
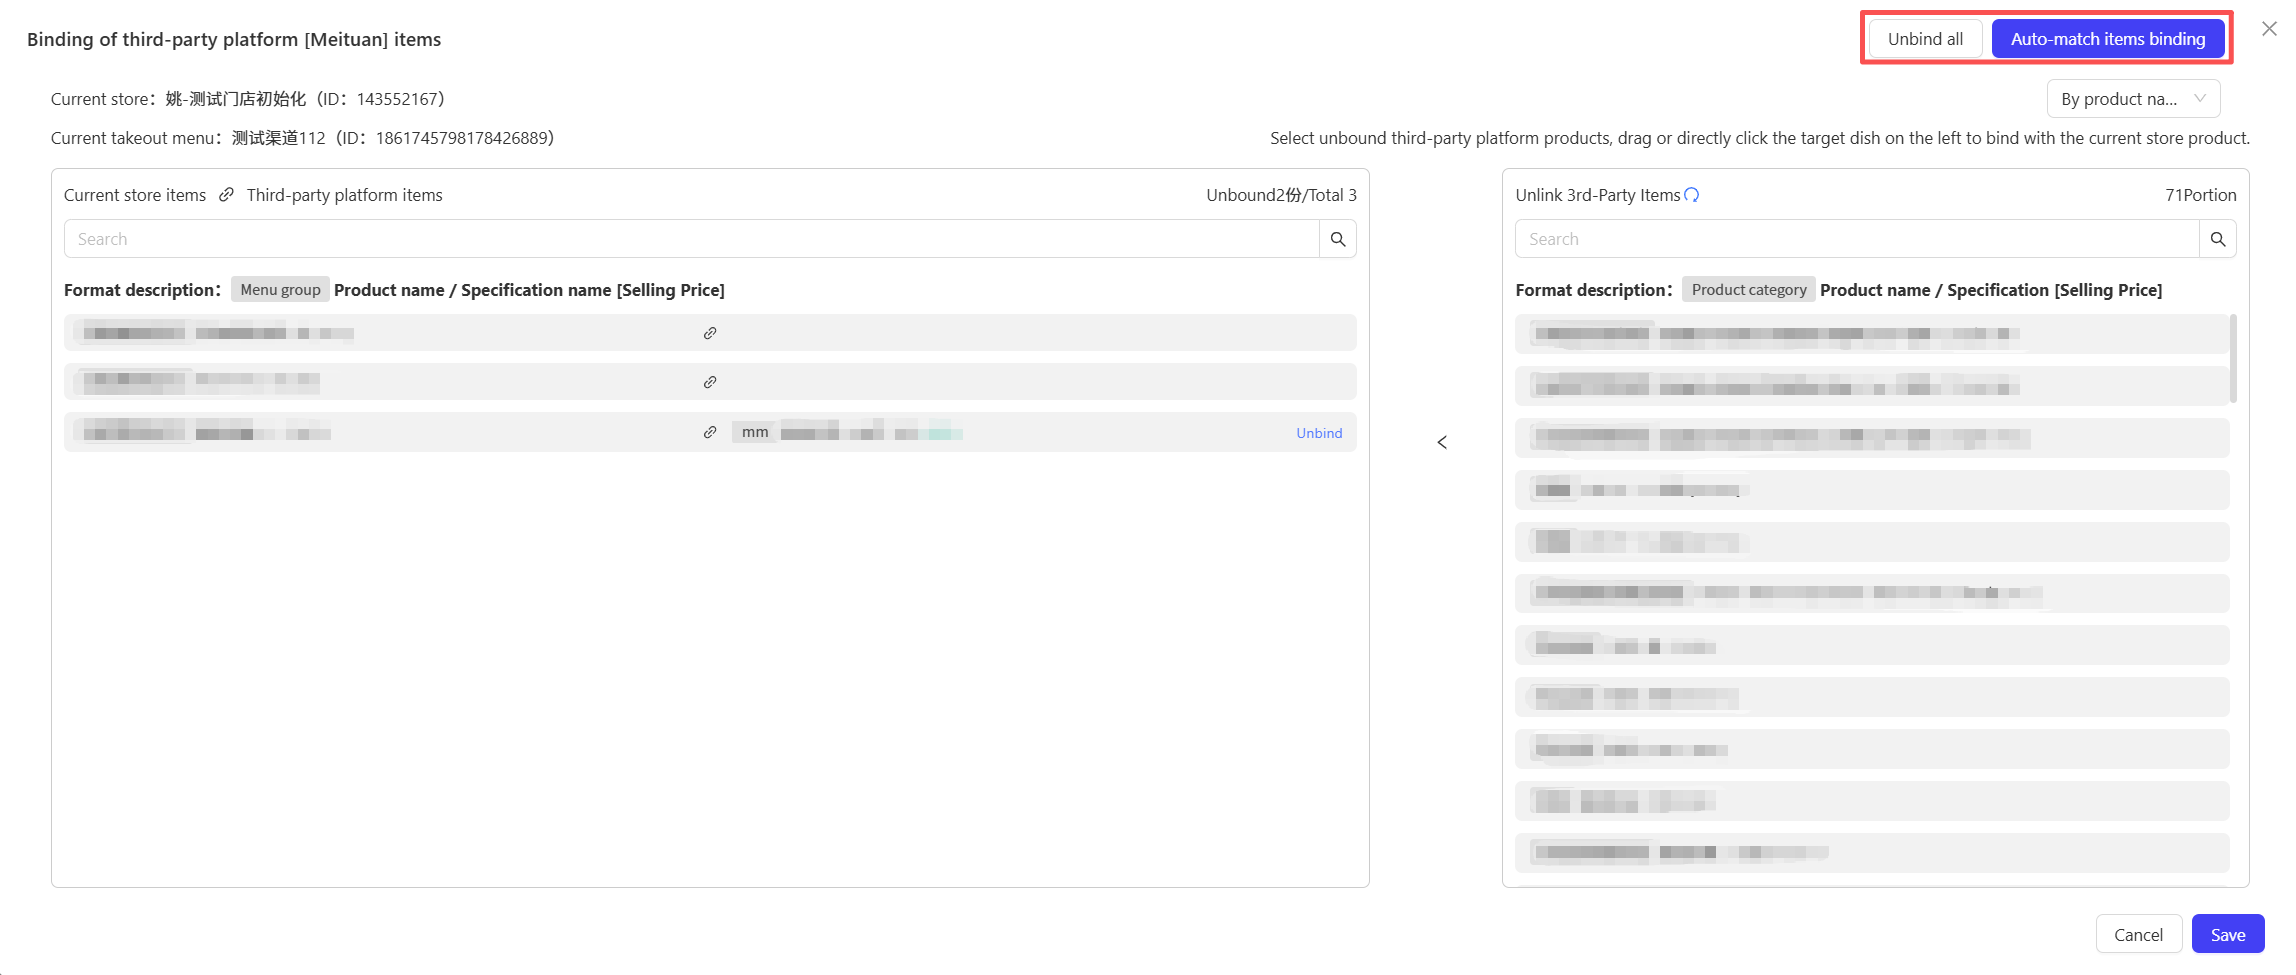
STEP 1: The left side of the page displays the system’s dishes for the current store, and the right side displays unbound third-party platform products.
STEP 2: Complete batch association by either dragging dishes from the left to corresponding products on the right or directly clicking target dishes on the left.
STEP 3: Auto-Match Binding is supported: The system automatically identifies dishes with matching names and specifications between the system and third-party platforms and establishes binding relationships automatically.
3.1.4.2 Batch Unbinding
Click the One-Click Unbind button on the page to unbind all selected products.
3.1.4.3 Batch Listing/ Delisting
The system supports batch Listing or Delisting of bound products to improve operational efficiency.
3.1.4.4 Item Information Update and Synchronization
When system dish information is modified (e.g., name or price changes), click the Sync Third-Party Products function to update the latest information to bound third-party products.
3.1.4.5 Publish Menu Dishes to Third-Party Platforms
Use the corresponding function on the page to publish product mapping relationships and other information to third-party delivery platforms, completing information synchronization.
4 Platform Item Mapping
STEP 1: Access the Platform Product Mapping Page
From the group admin view, navigate to Takeaway & Delivery > Third-Party Takeaway > Platform Item Mapping in sequence. The page displays a summary of product information across all third-party platforms and supports querying items by platform.

4.1 Menu Switching
STEP 1:Click the【Set Menu】button on the page to open a dialog box displaying the currently active takeaway menu.
STEP 2:Select the target menu and click【Confirm】to complete the menu switch.
Note:
After switching the menu, the binding relationships between products in the original menu and third-party platform products will be cleared and need to be re-established.
4.2 Sync Menu
Click the【Sync Menu】button, and the system will sync the latest menu status and automatically download the updated menu from the third-party platform.
4.3 Batch Menu Binding
Click the【Batch Bind Menus】button to specify multiple menus for synchronization in batches and sync third-party product information. It supports auto-matching menu binding and one-click unbinding of bound menus.
4.4 Third-Party Dish Binding Operations
Switch to the Third-Party Dish Binding tab. The page displays a list of all third-party platform dishes, allowing you to bind, rebind, unbind, list, or delist items.

5 Delivery Rule Settings
This function is used to configure group-level delivery rules, supporting automatic/ manual order dispatching settings that can be assigned to specific stores.
STEP 1: Access the Delivery Rule Settings Page
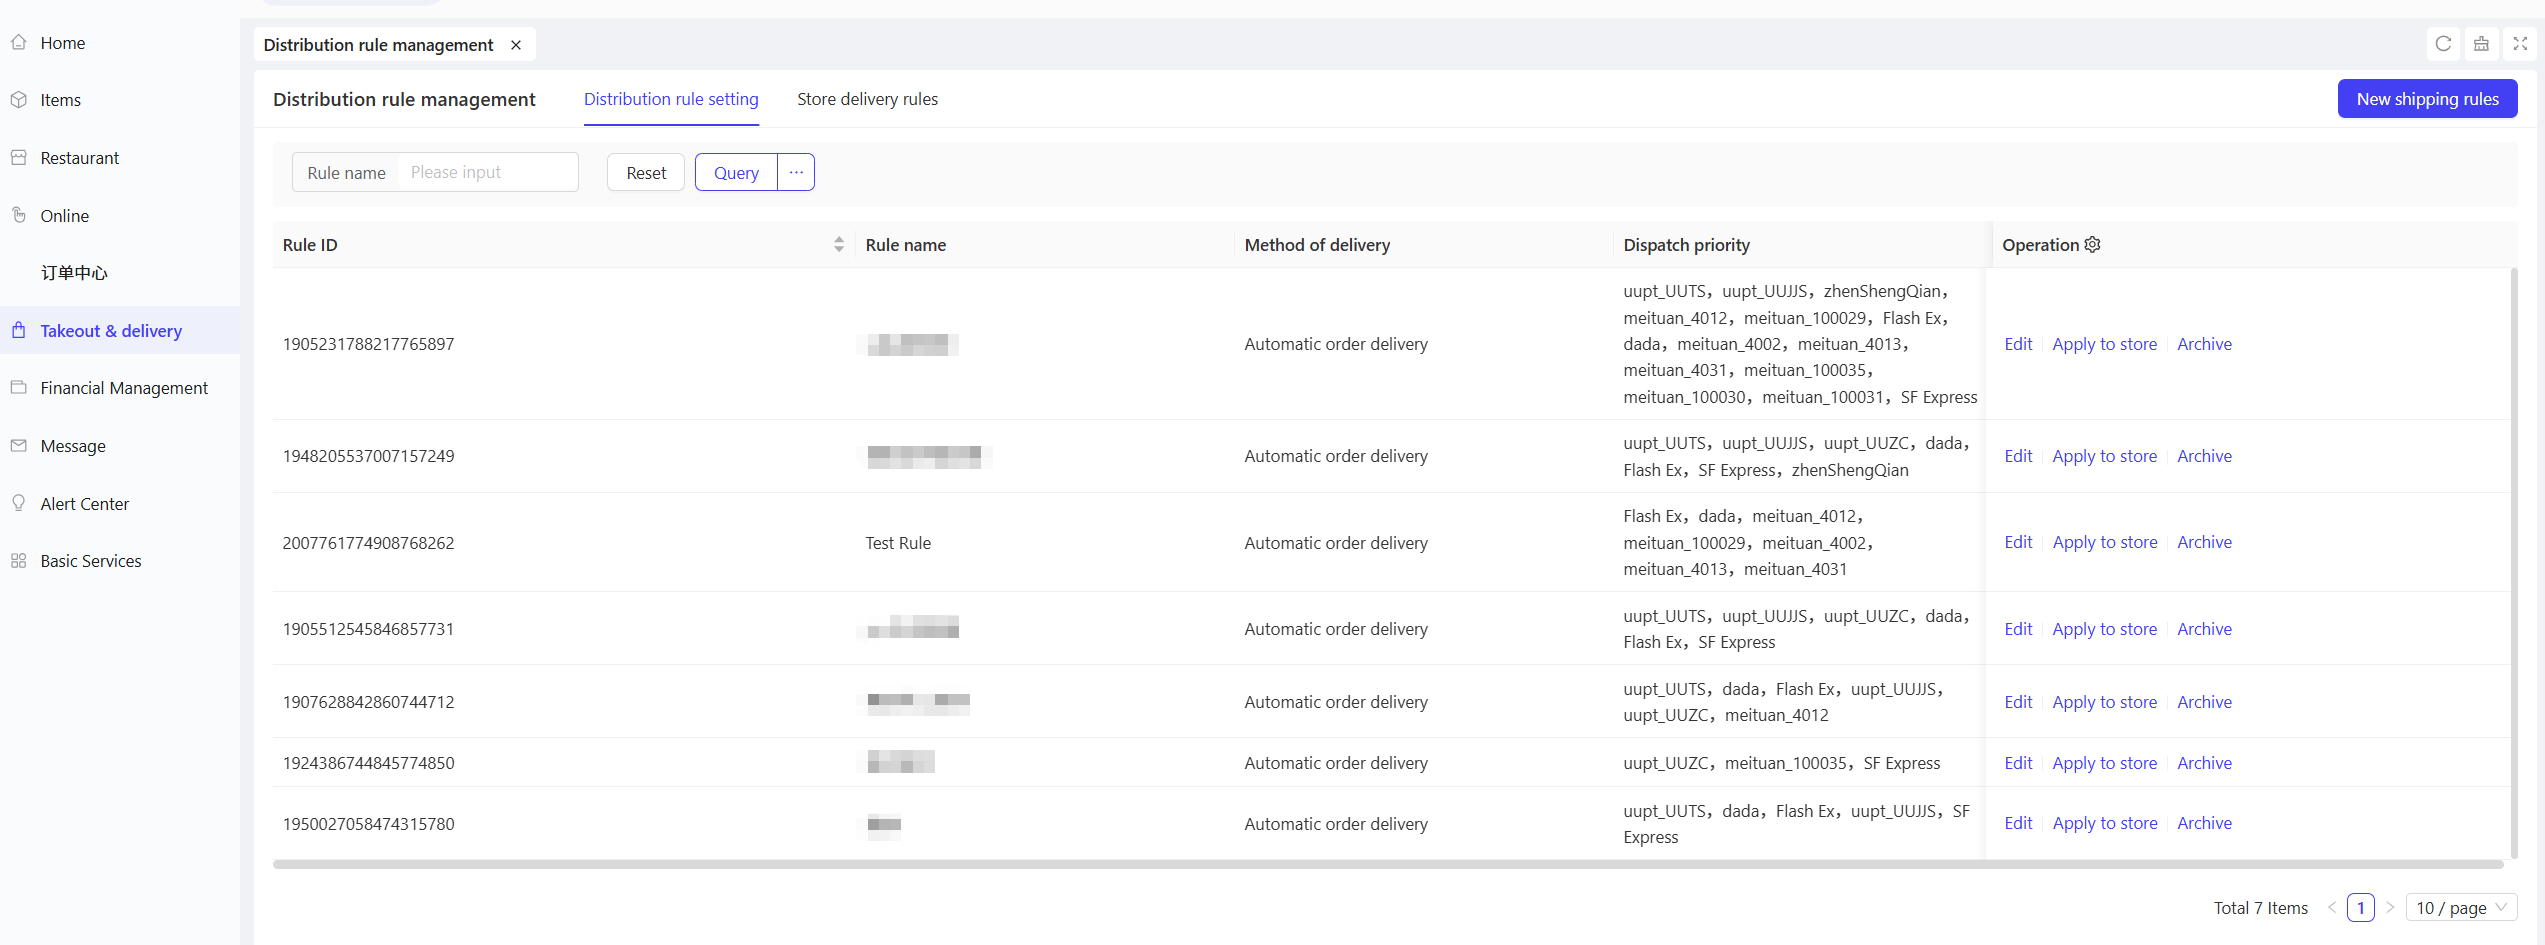
From the group view, navigate to Takeaway & Delivery > Delivery Rule Management > Delivery Rule Settings. The page displays all delivery rules configured by the group by default, allowing you to directly edit existing rules or assign rules to specific stores.
5.1 Add a Delivery Rule (Auto-Dispatch)
STEP 1:Click【Add Delivery Rule】in the upper right corner of the page.
STEP 2:Configure the following information on the pop-up settings page:
Configuration Item | Configuration Description |
|---|---|
Rule Name | Enter a name for the auto-dispatch rule (e.g., "XX Group Default Auto-Dispatch Rule") to distinguish it from other rules. |
Dispatch Method | Select Auto-Dispatch. |
Single Manual Dispatch Duration | Enter a specific duration (e.g., "30 minutes"). This only takes effect when temporarily switching to manual dispatch later. |
Dispatch Timing | Select one of the two options: |
Auto-Dispatch Duration | Enter the duration for auto-dispatch in minutes. The system will execute auto-dispatch continuously by default until the rule is modified or deactivated. |
Add Delivery Companies | Click the Add Delivery Companies button to select and add multiple cooperating delivery companies to the rule. |
Dispatch Priority | Sort the added delivery companies by dragging. Higher-ranked companies have higher dispatch priority (the system will dispatch orders to higher-priority companies first). |
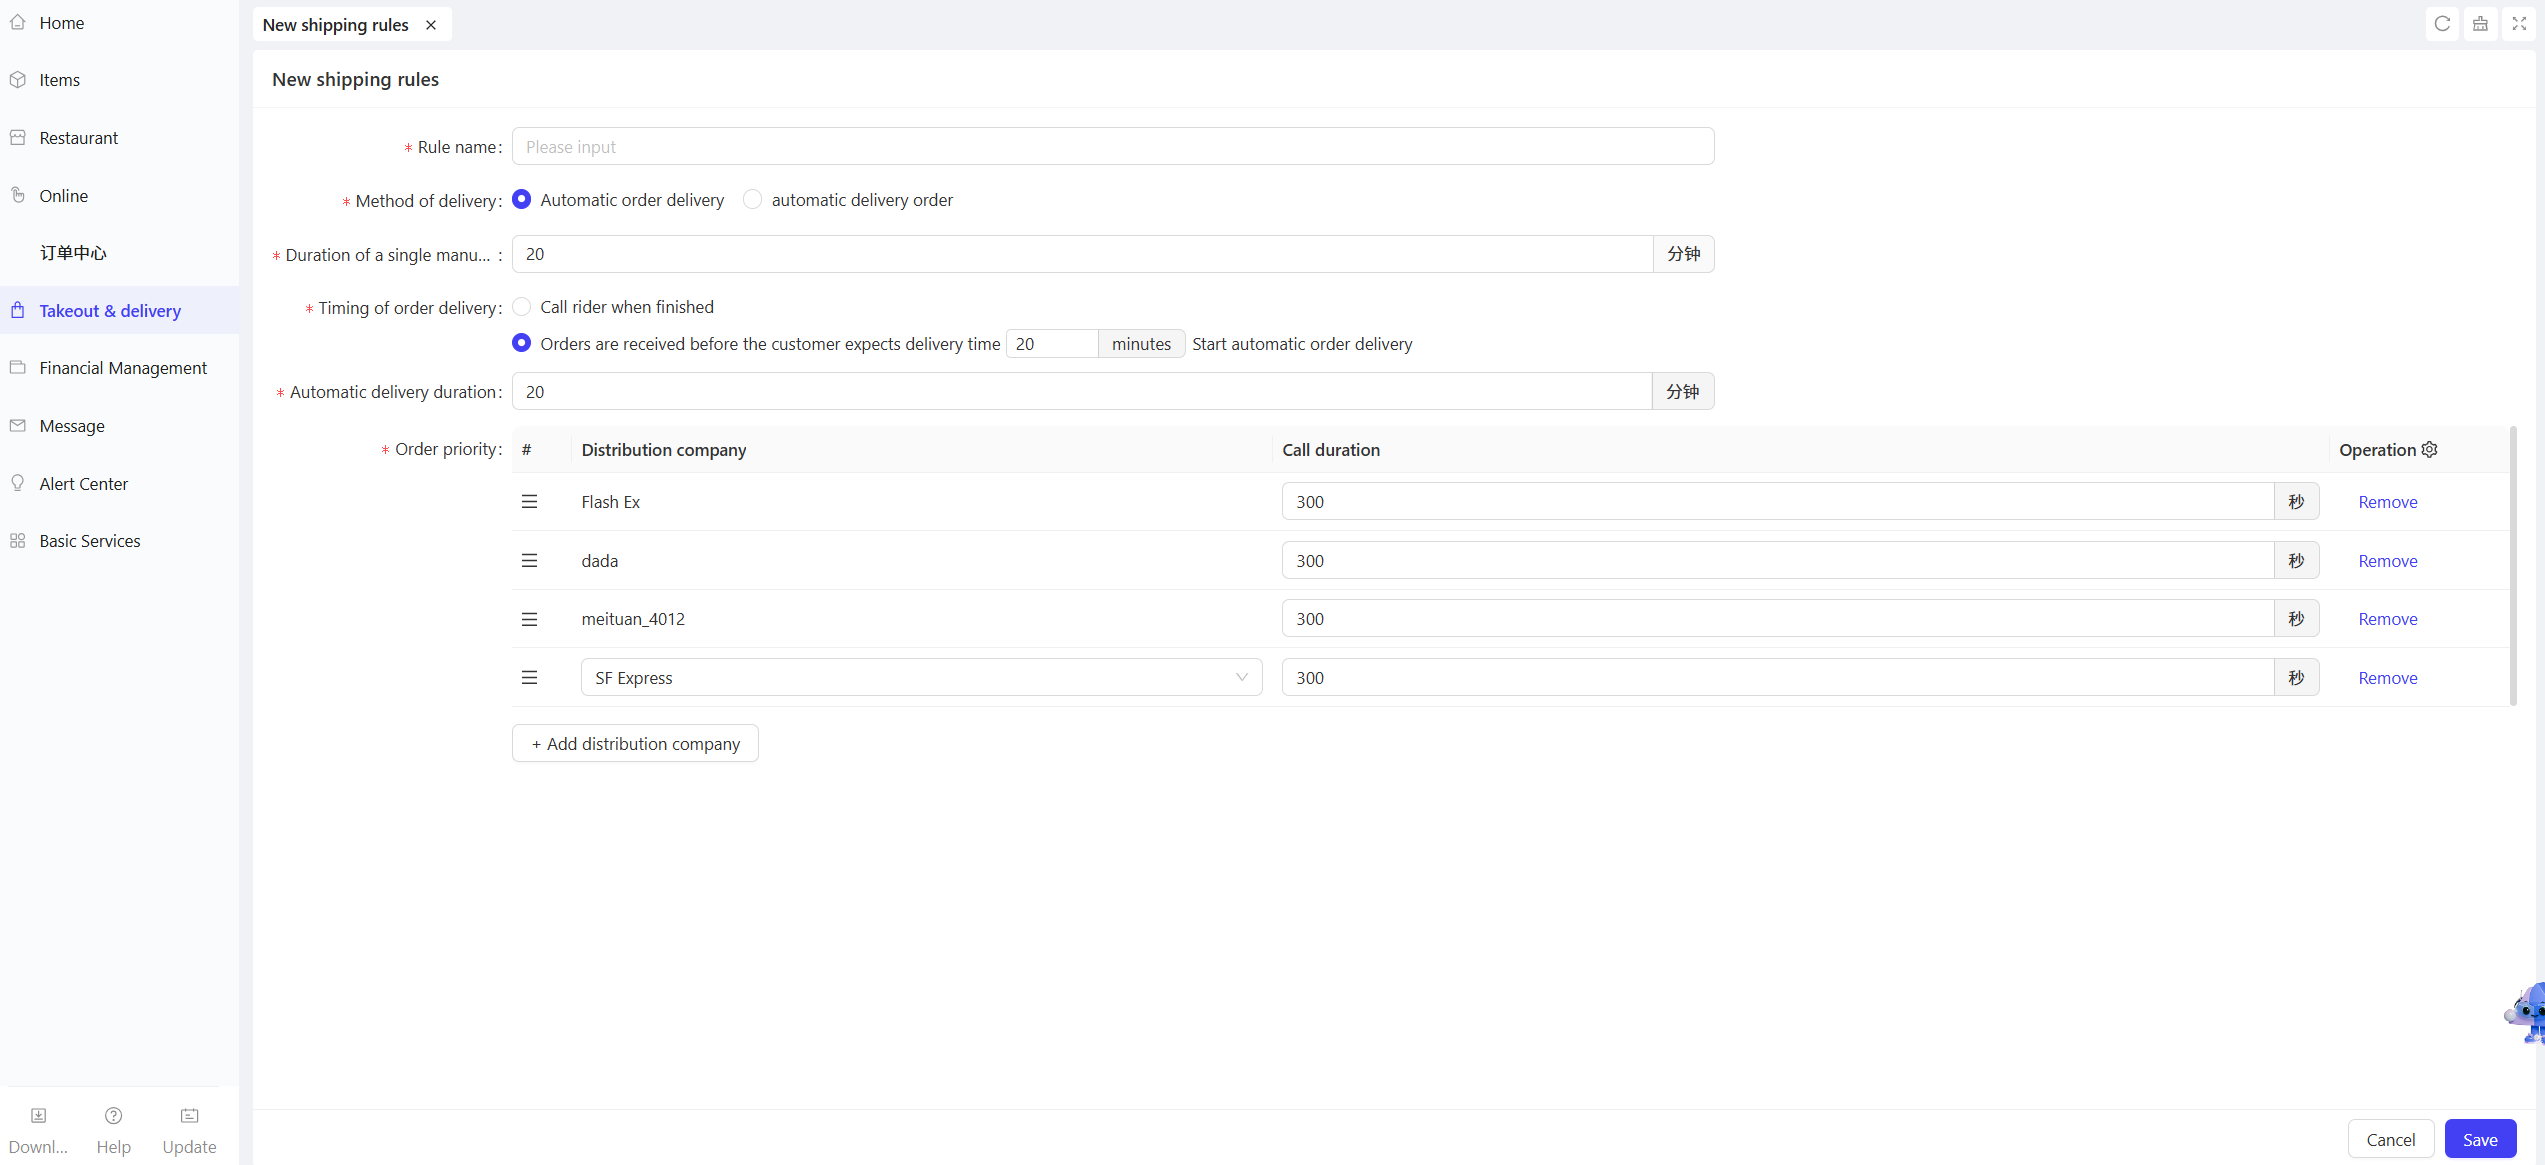
STEP 3:Click【Save】after completing the configuration to activate the new rule.
5.2 Add a Delivery Rule (Manual Dispatch)
STEP 1:Click【Add Delivery Rule】in the upper right corner of the page.
STEP 2:Configure the following information in the pop-up settings page:
Configuration Item | Configuration Description |
|---|---|
Rule Name | Enter a name for the manual dispatch rule (e.g., "XX Group Default Manual Dispatch Rule") to distinguish it from other rules. |
Dispatch Method | Select Manual Dispatch. |
Single Manual Dispatch Duration | Enter a specific duration (e.g., "30 minutes"). |
STEP 3:Click【Save】after completing the configuration to activate the new rule.
6 Store Delivery Rule Configuration
This function assigns configured group delivery rules to individual stores; each store can only be bound to one delivery rule.
STEP 1: Access the Store Delivery Rule Page
From the group admin view, navigate to Takeaway & Delivery > Delivery Rule Management > Store Delivery Rule. The page displays a list of all stores under the group for operators to configure delivery rules.
STEP 2: Assign a Delivery Rule to a Store
- Locate the target store and click the【Set Rule】button in its operation column.
- The Select Delivery Rule dialog box will pop up; choose the delivery rule to assign to the store.
- Click【Confirm】to complete the assignment. All subsequent takeaway orders for the store will be fulfilled according to this rule by default.
STEP 3: Switch a Store’s Delivery Rule
- To change a store’s delivery rule, first click【Cancel Setting】in the store’s operation column to unbind the current rule.
- Click【Set Rule】again, select the new delivery rule, and confirm the change.
7 FAQs
Q: What should I do if the store shows “Already bound to another application”?
A: This prompt indicates that the Meituan store has previously been bound to another third-party application or is currently authorized under Service Provider Mode. Follow these steps to resolve the issue:
STEP 1: Unbind the Original Authorization
First, unbind the store from the originally bound application or Service Provider Mode.
STEP 2: Rebind the Store
After unbinding, initiate the store binding process again.
Special Scenario Note
If the store was previously authorized under RestoExpand Service Provider Mode, we recommend entering the Meituan Store ID (displayed on the leftmost side of the input field) as the value of appPoiCode during rebinding. This ensures the inheritance of existing dish binding relationships configured under the previous Service Provider Mode, eliminating the need for reconfiguration.