Kitchen Management
1 Module Overview
The Kitchen Management Module is a core functional module designed for the operation and management of restaurant kitchens. It focuses on standardizing and streamlining kitchen production workflows, covering key business processes such as production department management, serving sequence planning, meal preparation configuration, and sales forecasting. It helps restaurants achieve refined management and collaborative optimization of kitchen operations.
2 Production Department
The module supports the full-lifecycle management of production departments, meeting the flexible configuration needs of kitchen organizational structures. After configuring production departments, you can select them in product categories.
2.1 Glossary
- Production Department: Primarily used for associating products with print management. One or more production departments can be assigned to product categories or specific products.
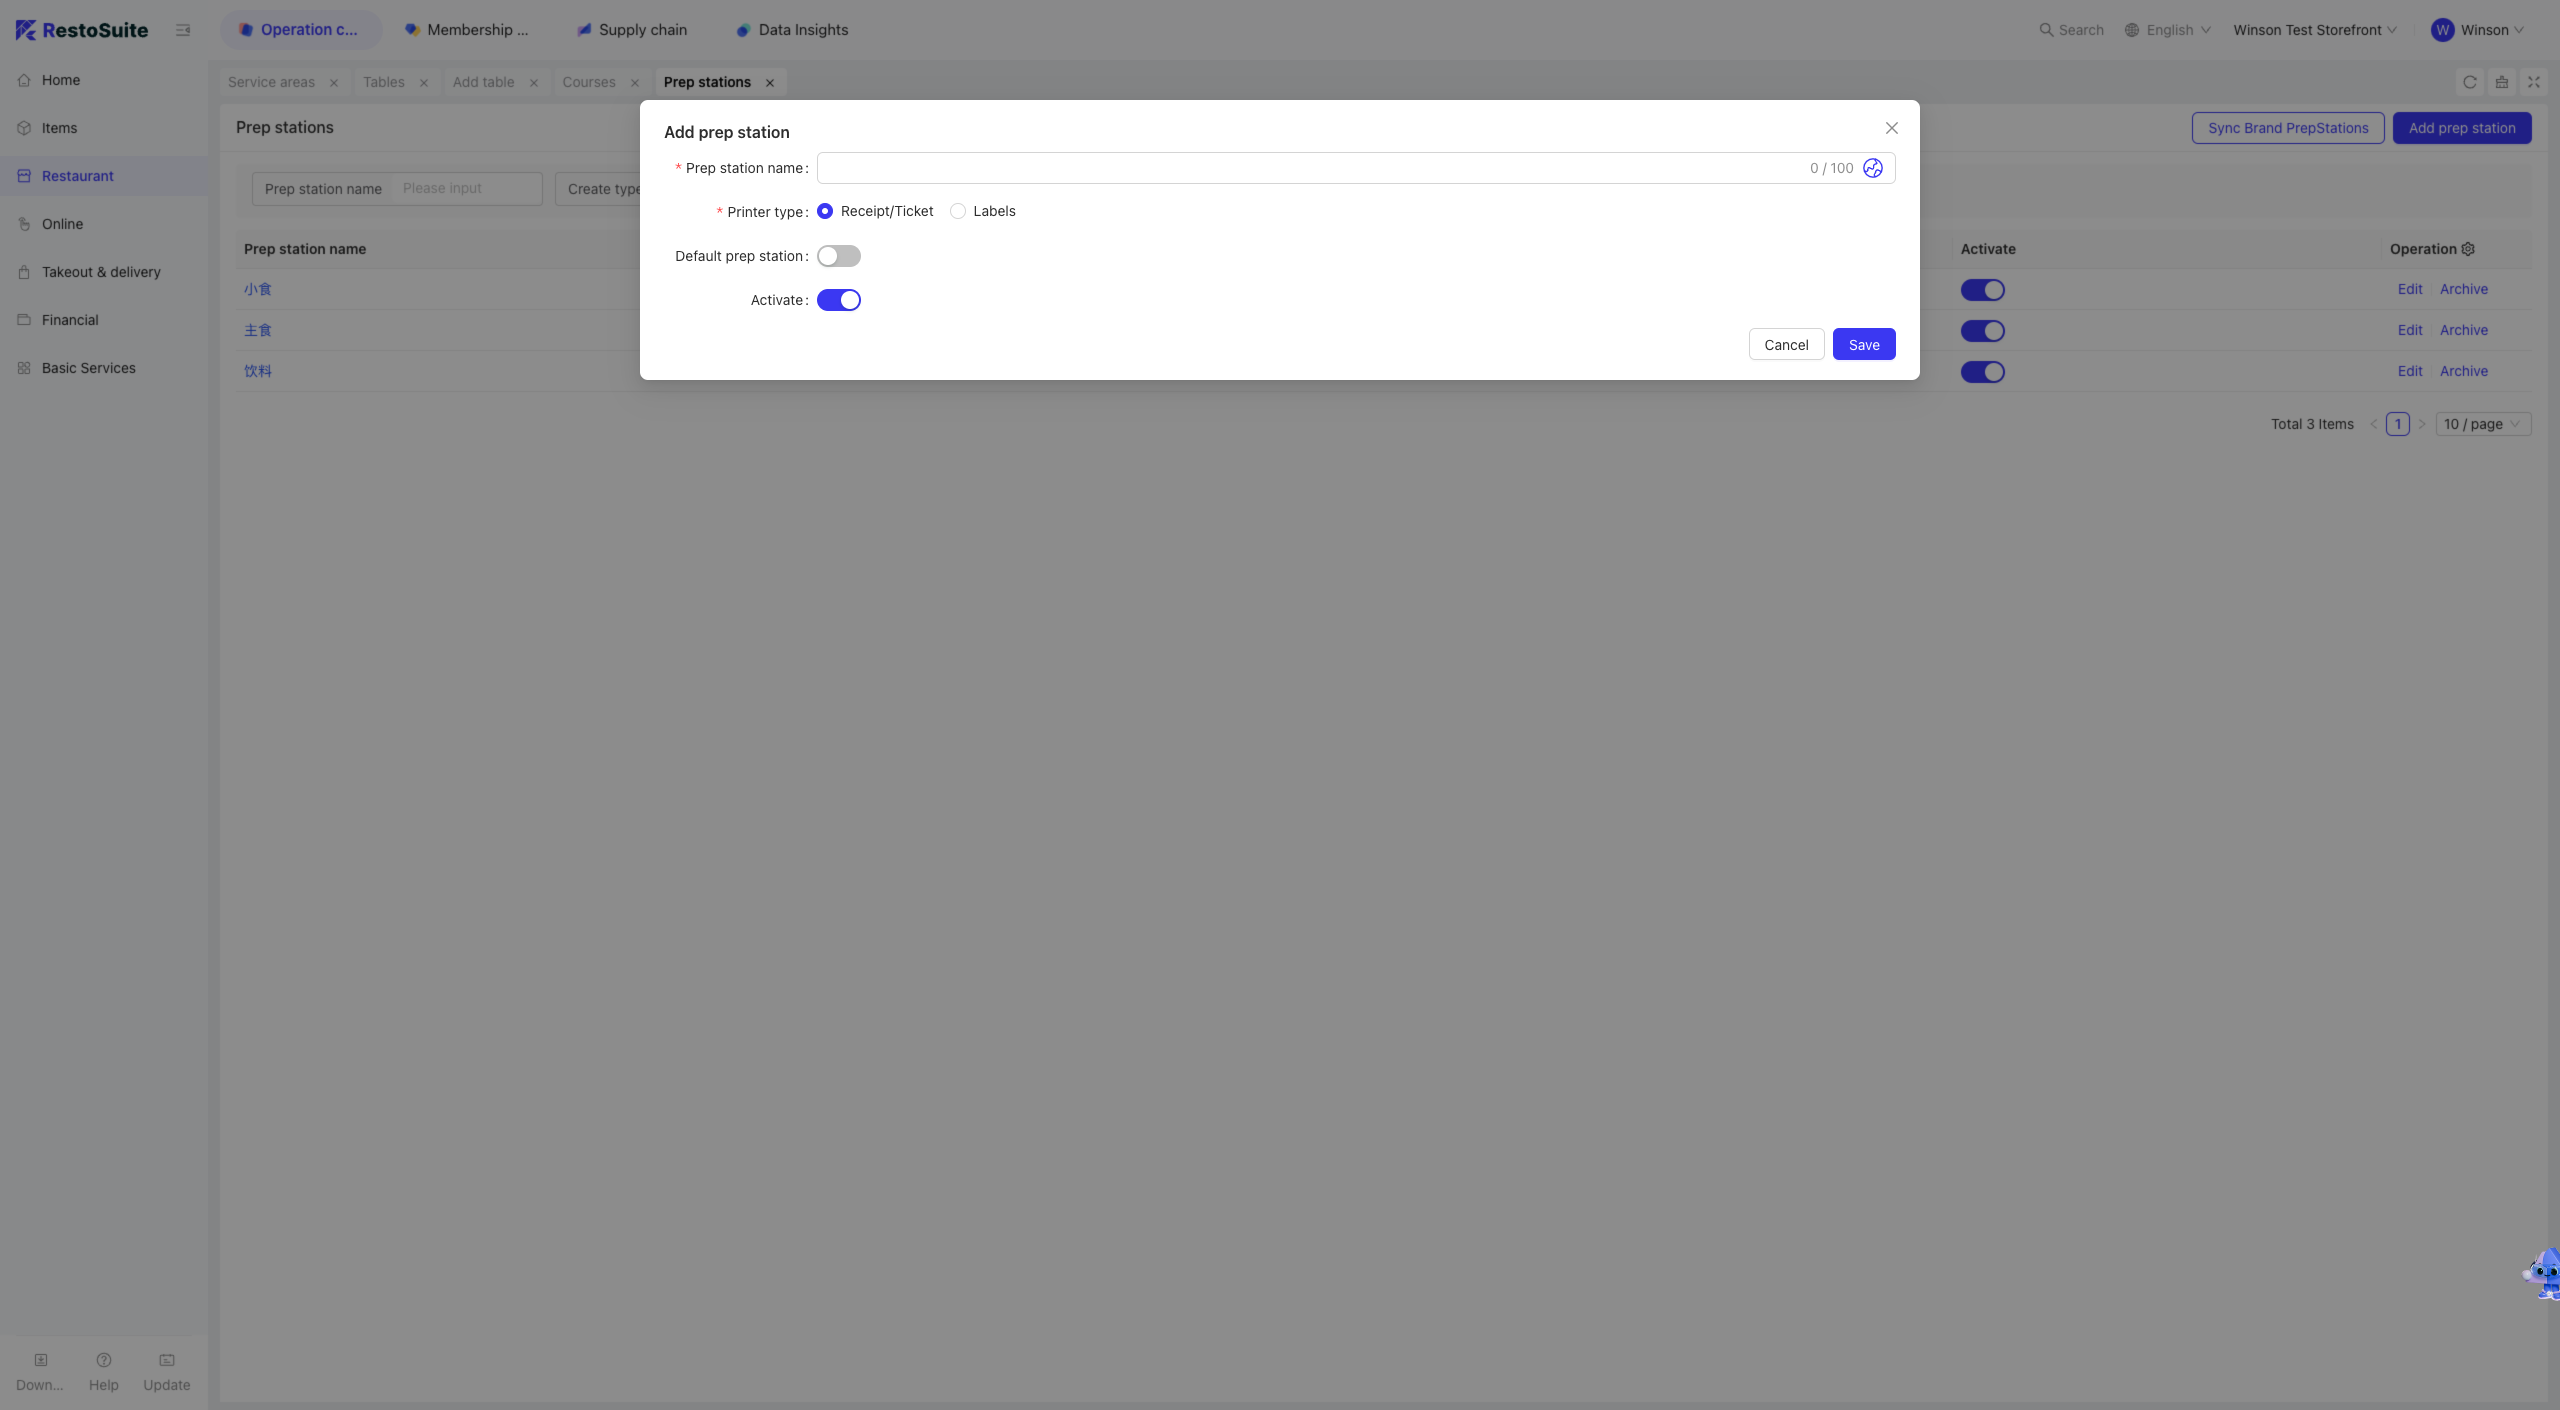
2.2 Adding a New Production Department
Step 1: Switch Perspective: Select the level at which you want to add a production department, e.g., Group, Brand, or Store.
Step 2: Navigate to the Restaurant Management > Production Departments page and click the Add Production Department button.
Step 3: On the Add Production Department page, fill in the following fields and save:
- Production Department Name
- Print Type
- Default Production Department
- Status
Note: Generally, POS systems use the Receipt type to trigger printer output. The Label type is mostly applicable to beverage stores, where label printers are used to print product labels.
2.3 Editing and Archiving Production Departments
Step 1: Switch Perspective: Select the level of the production department you want to edit or archive, e.g., Group, Brand, or Store.
Step 2: Navigate to the Restaurant Management > Production Departments page, locate the target production department, and click the Edit or Archive button in the operation column.
Step 3: On the Edit Production Department page, modify the relevant information and save.
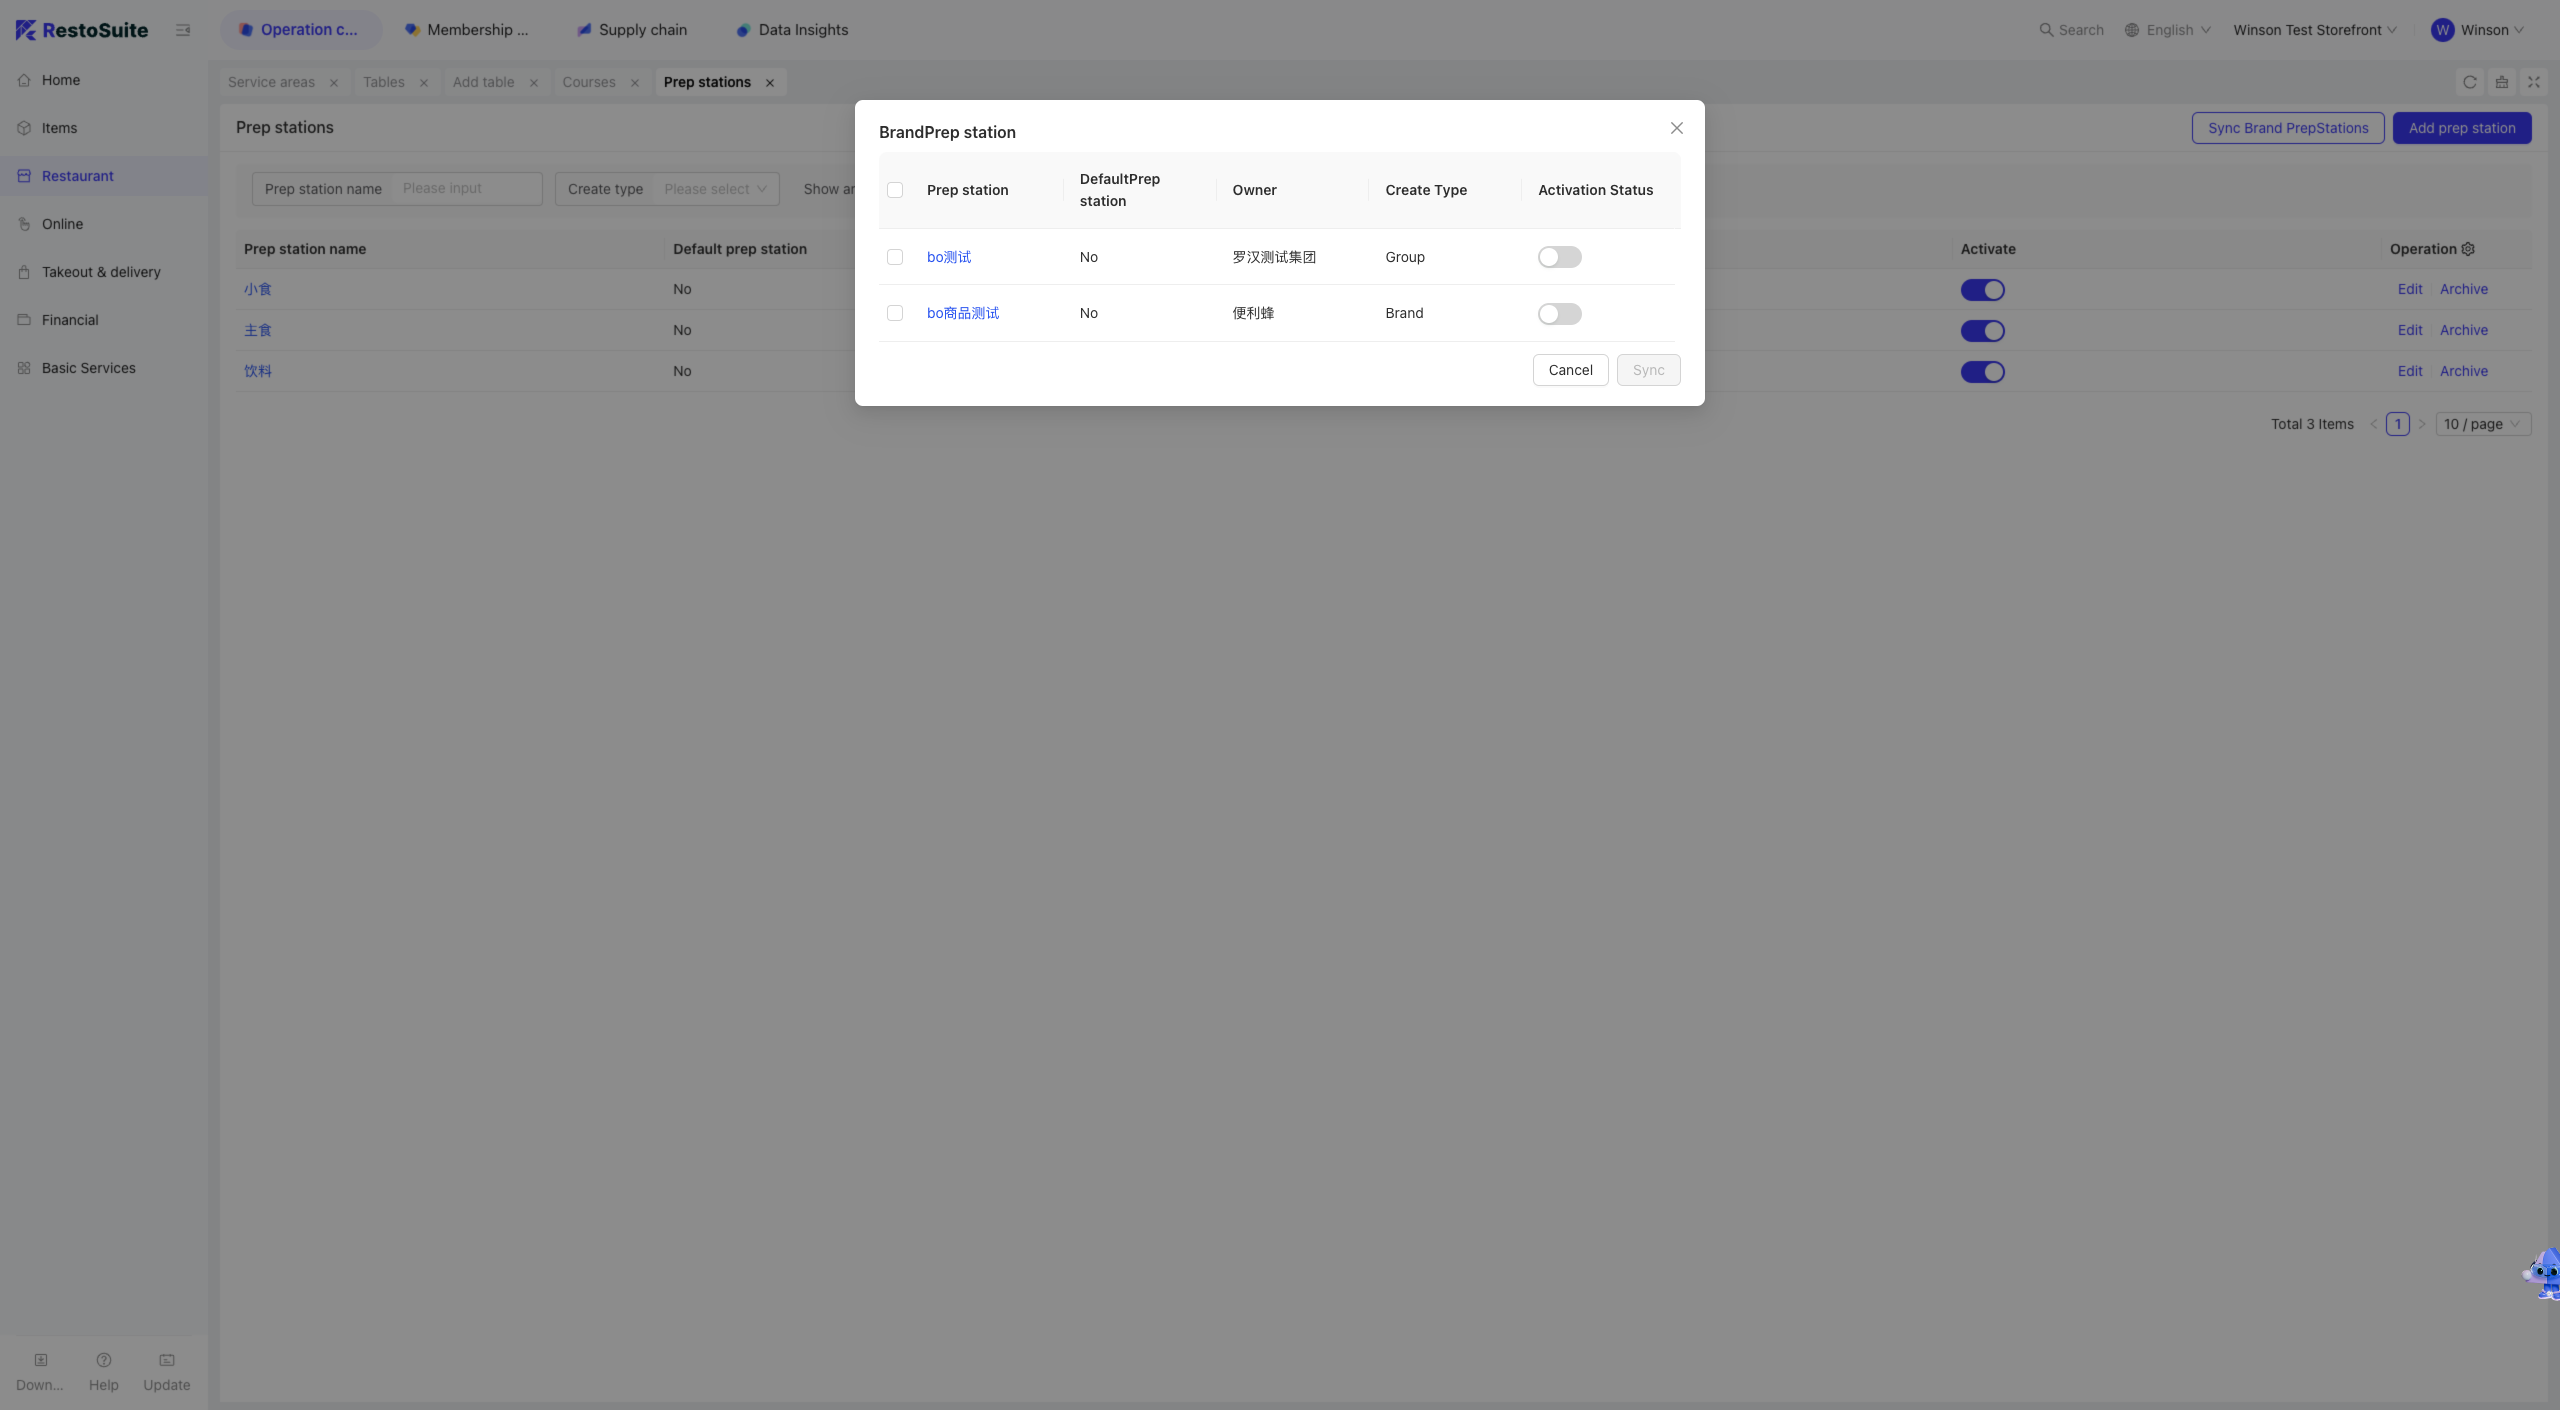
2.4 Syncing Brand Production Departments
Step 1: Switch Perspective: Select the store that needs to sync production departments.
Step 2: Navigate to the Restaurant Management > Production Departments page and click the Sync Brand Production Departments button.
Step 3: In the pop-up window, select the production departments configured by the brand to which the store belongs, then click Sync.
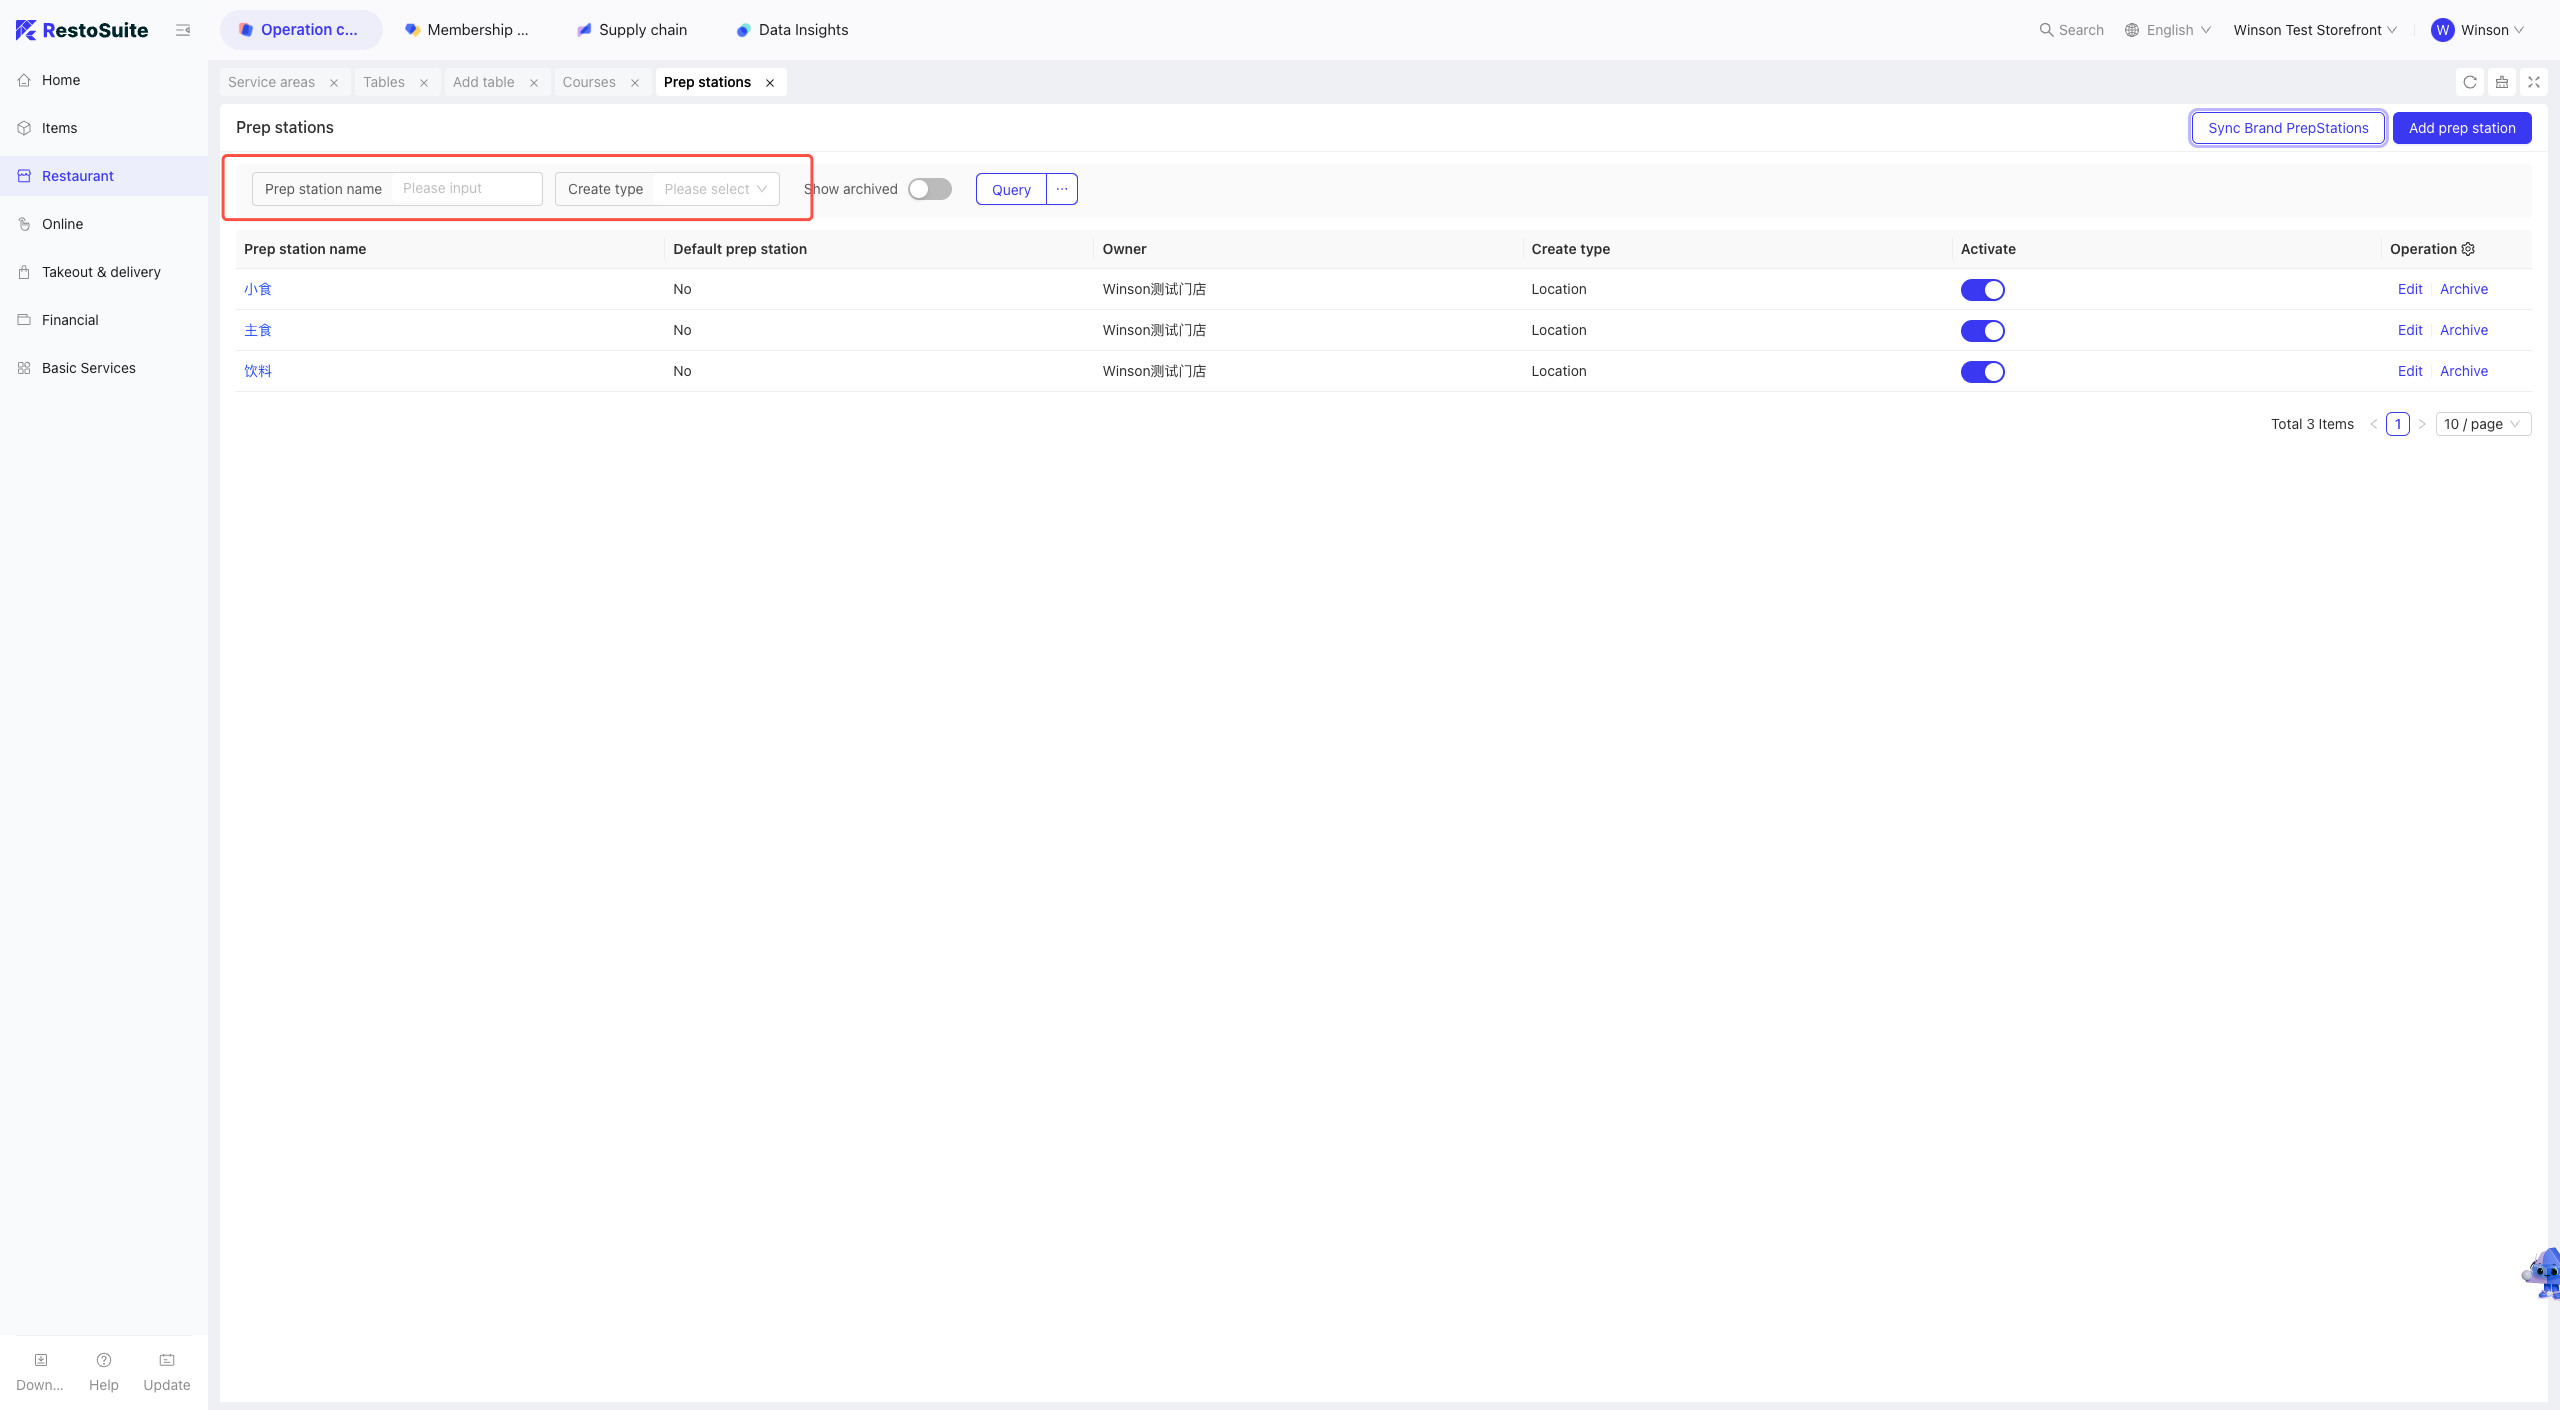
2.5 Filtering and Searching Production Departments
Step 1: Switch Perspective: Select the level of the production departments you want to search for, e.g., Group, Brand, or Store.
Step 2: Navigate to the Restaurant Management > Production Departments page and filter departments by Production Department Name or Creation Type.
2.6 FAQs
Q: How to use a production department after configuration?
A:
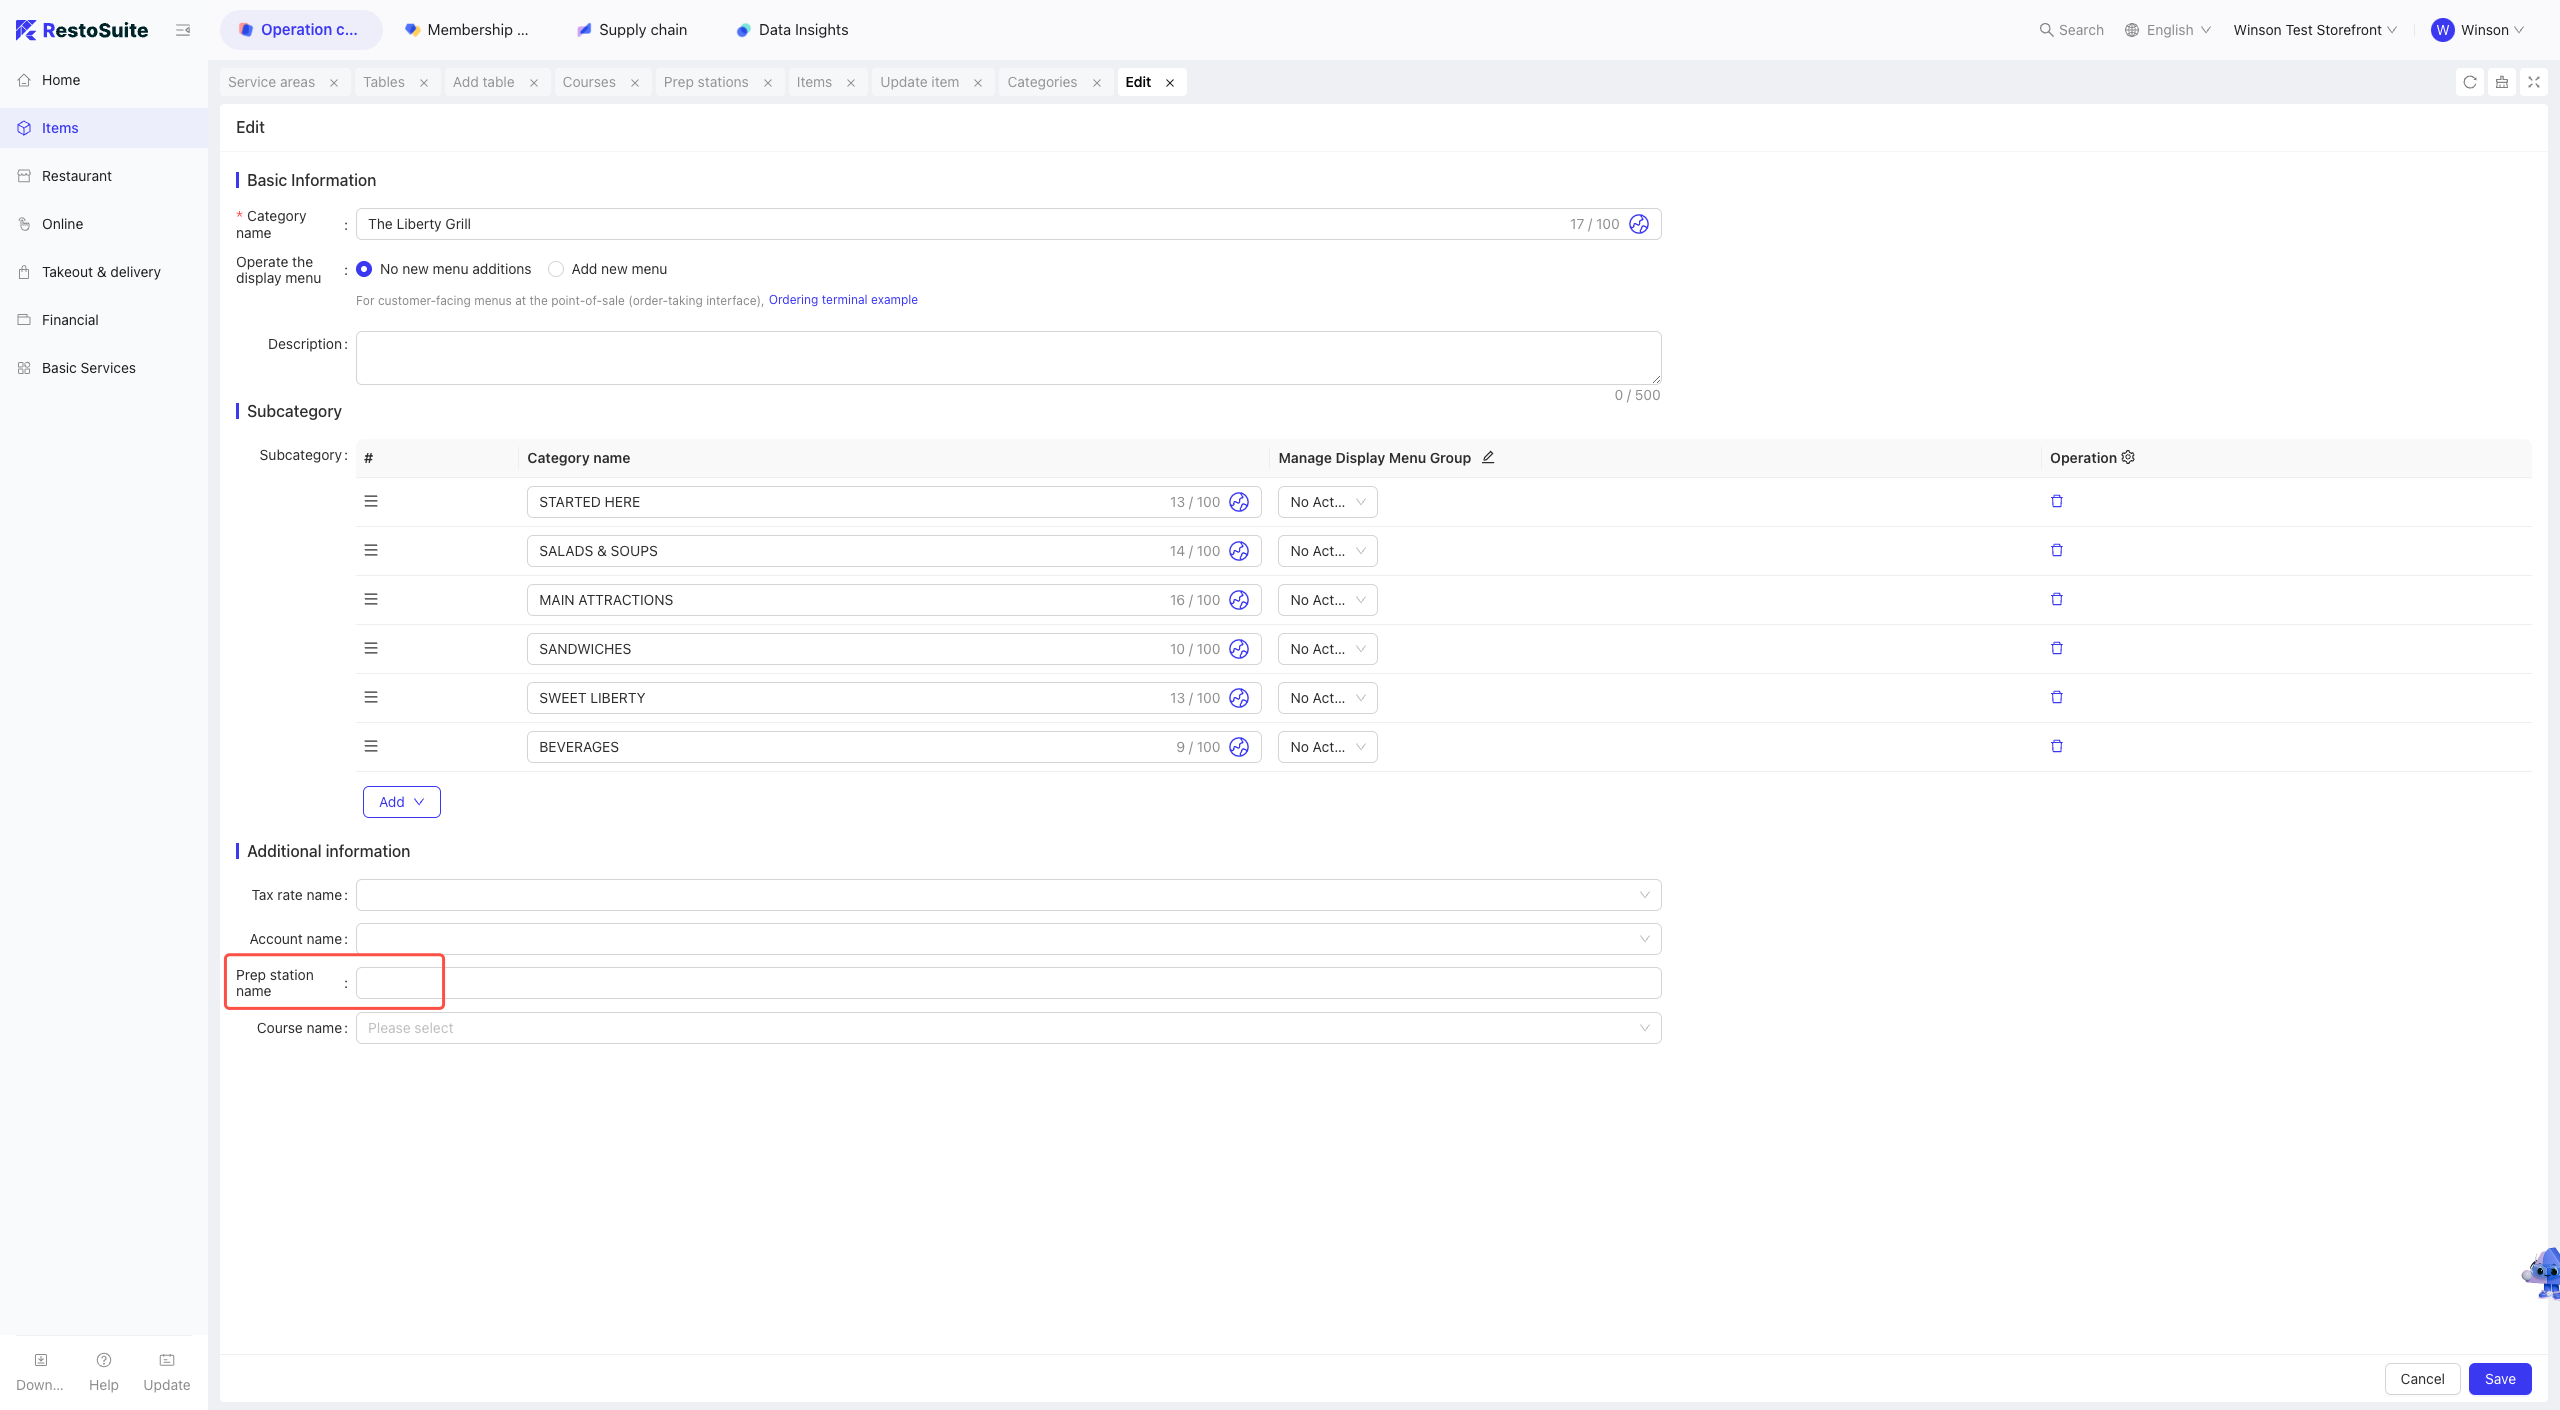
Step 1: When adding or modifying a product category in Product Management > Product Categories, assign the products under this category to an existing production department.
Step 2: You can edit the production department, e.g., configure it to use a specific label printer.
3 Serving Sequence
3.1 Glossary
- Serving Sequence: Primarily used for associating products with KDS (Kitchen Display System) management. A serving sequence can be assigned to product categories or specific products. During order placement, dishes in the cart are sorted by the serving sequence configured for individual dishes or their categories. Dishes assigned the same sequence are grouped together for display. Dishes without a configured serving sequence are displayed at the top of the cart.
3.2 Adding a Serving Sequence
Step 1: Switch Perspective: Select the level at which you want to add a serving sequence, e.g., Group, Brand, or Store.
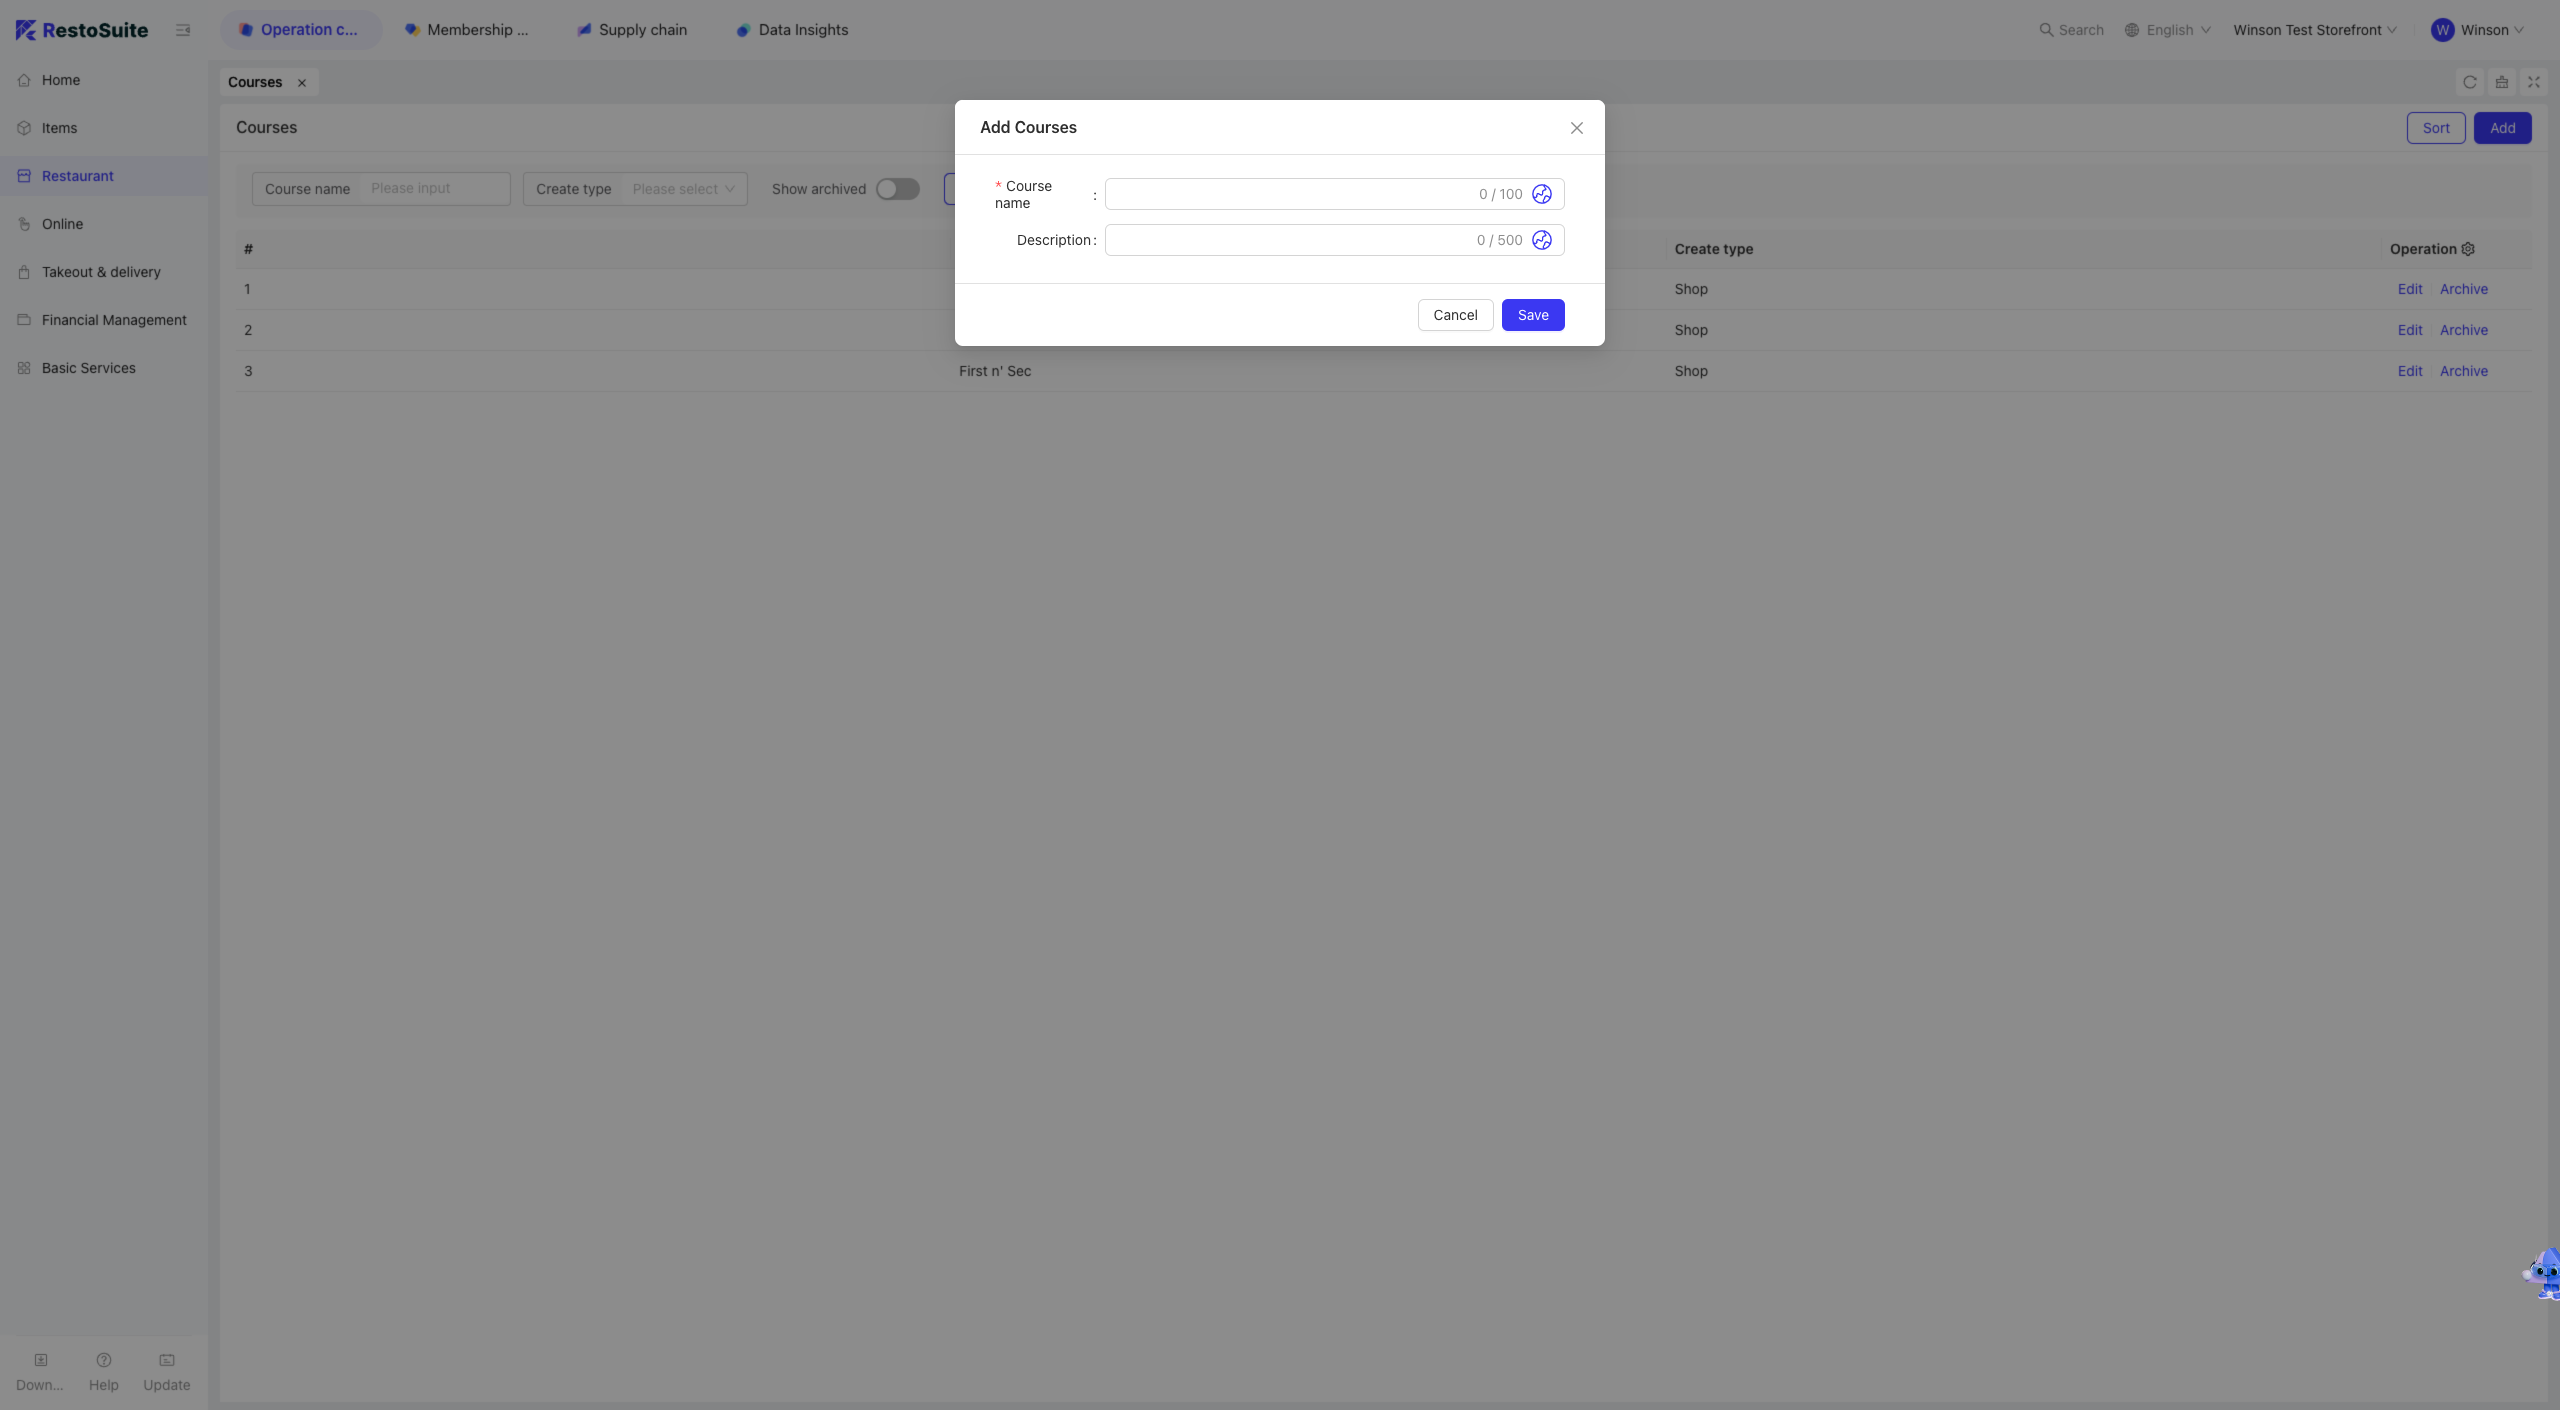
Step 2: Navigate to the Restaurant Management > Serving Sequence page and click the Add Serving Sequence button.
Step 3: On the Add Serving Sequence page, fill in the following fields and save:
- Serving Sequence Name
- Brand
- Description
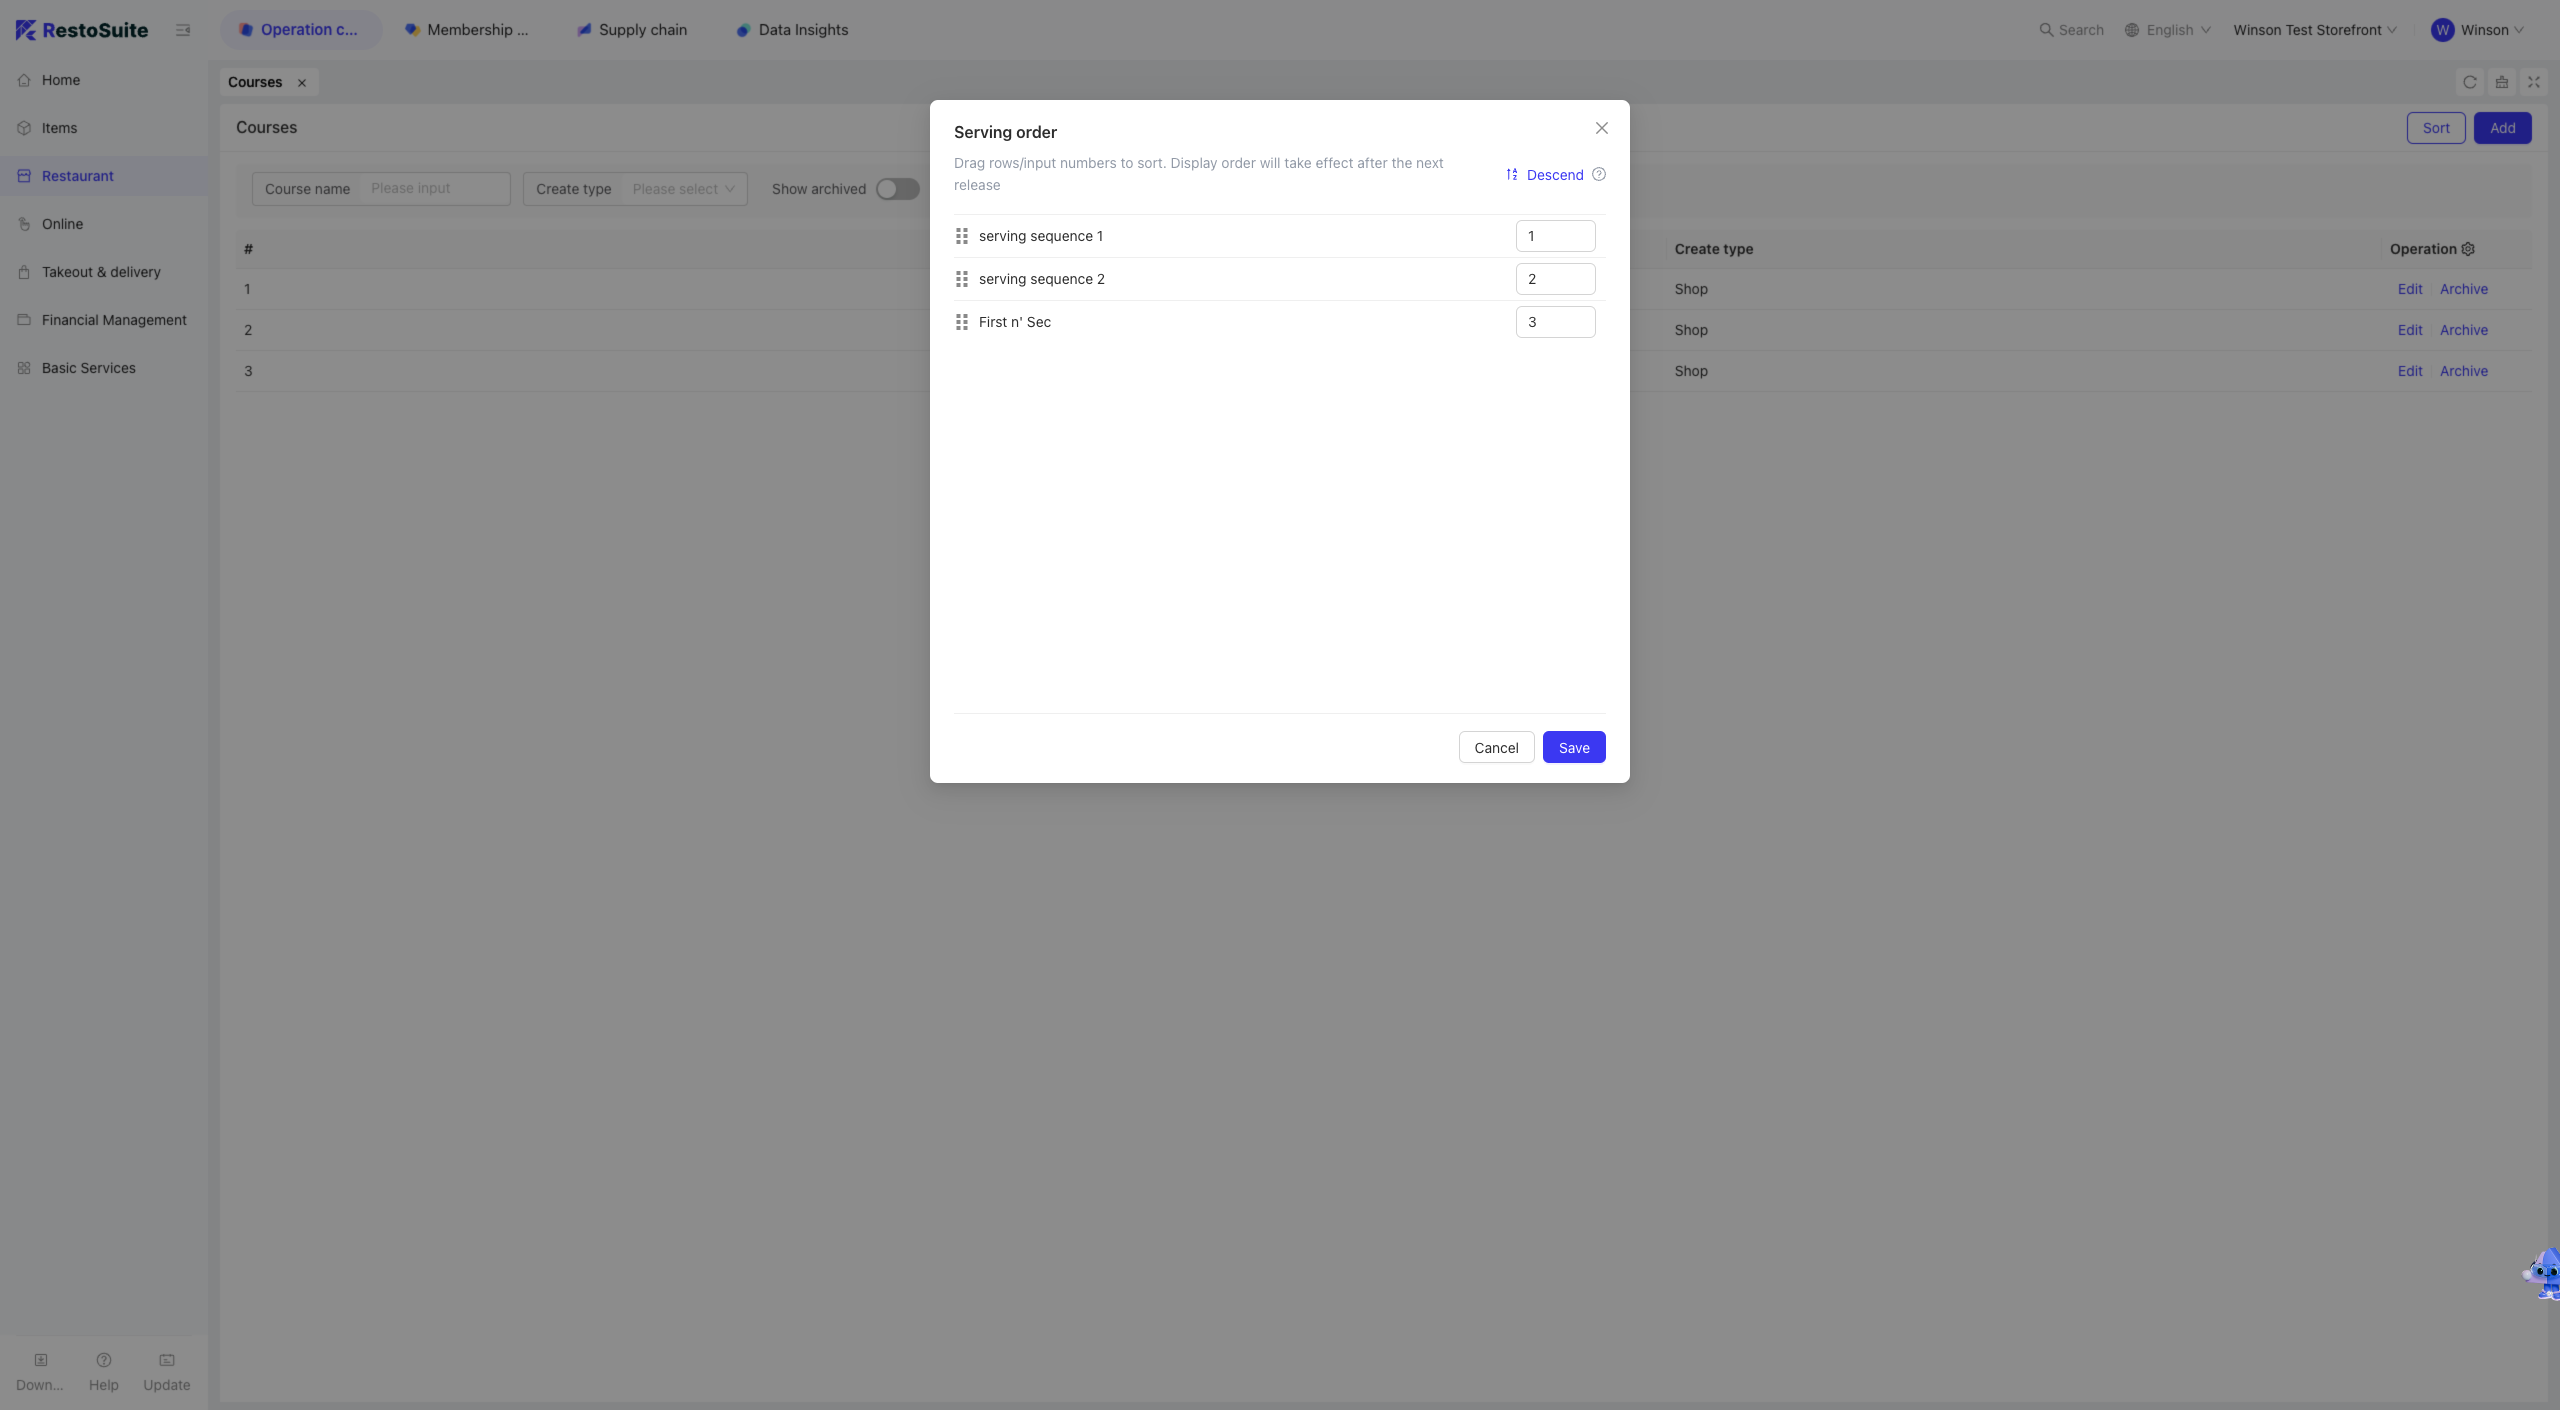
3.3 Sorting Serving Sequences
The sort order of serving sequences affects their display order in the shopping cart.
Step 1: Switch Perspective: Select the level at which you want to sort serving sequences, e.g., Group, Brand, or Store.
Step 2: Navigate to the Restaurant Management > Serving Sequence page and click the Sort button.
Step 3: Drag and drop to adjust the order, then click Save.
4 Meal Preparation Configuration
(Store Perspective)
4.1 Glossary
- Meal Preparation Management: Configurations related to dish preparation, including base preparation time, large-order preparation time, and rules for sending orders to the KDS.
4.2 Configuration Steps
Step 1: Switch Perspective: Select the store for which you want to configure meal preparation settings.
Step 2: Navigate to the Restaurant Management > Meal Preparation Configuration page.
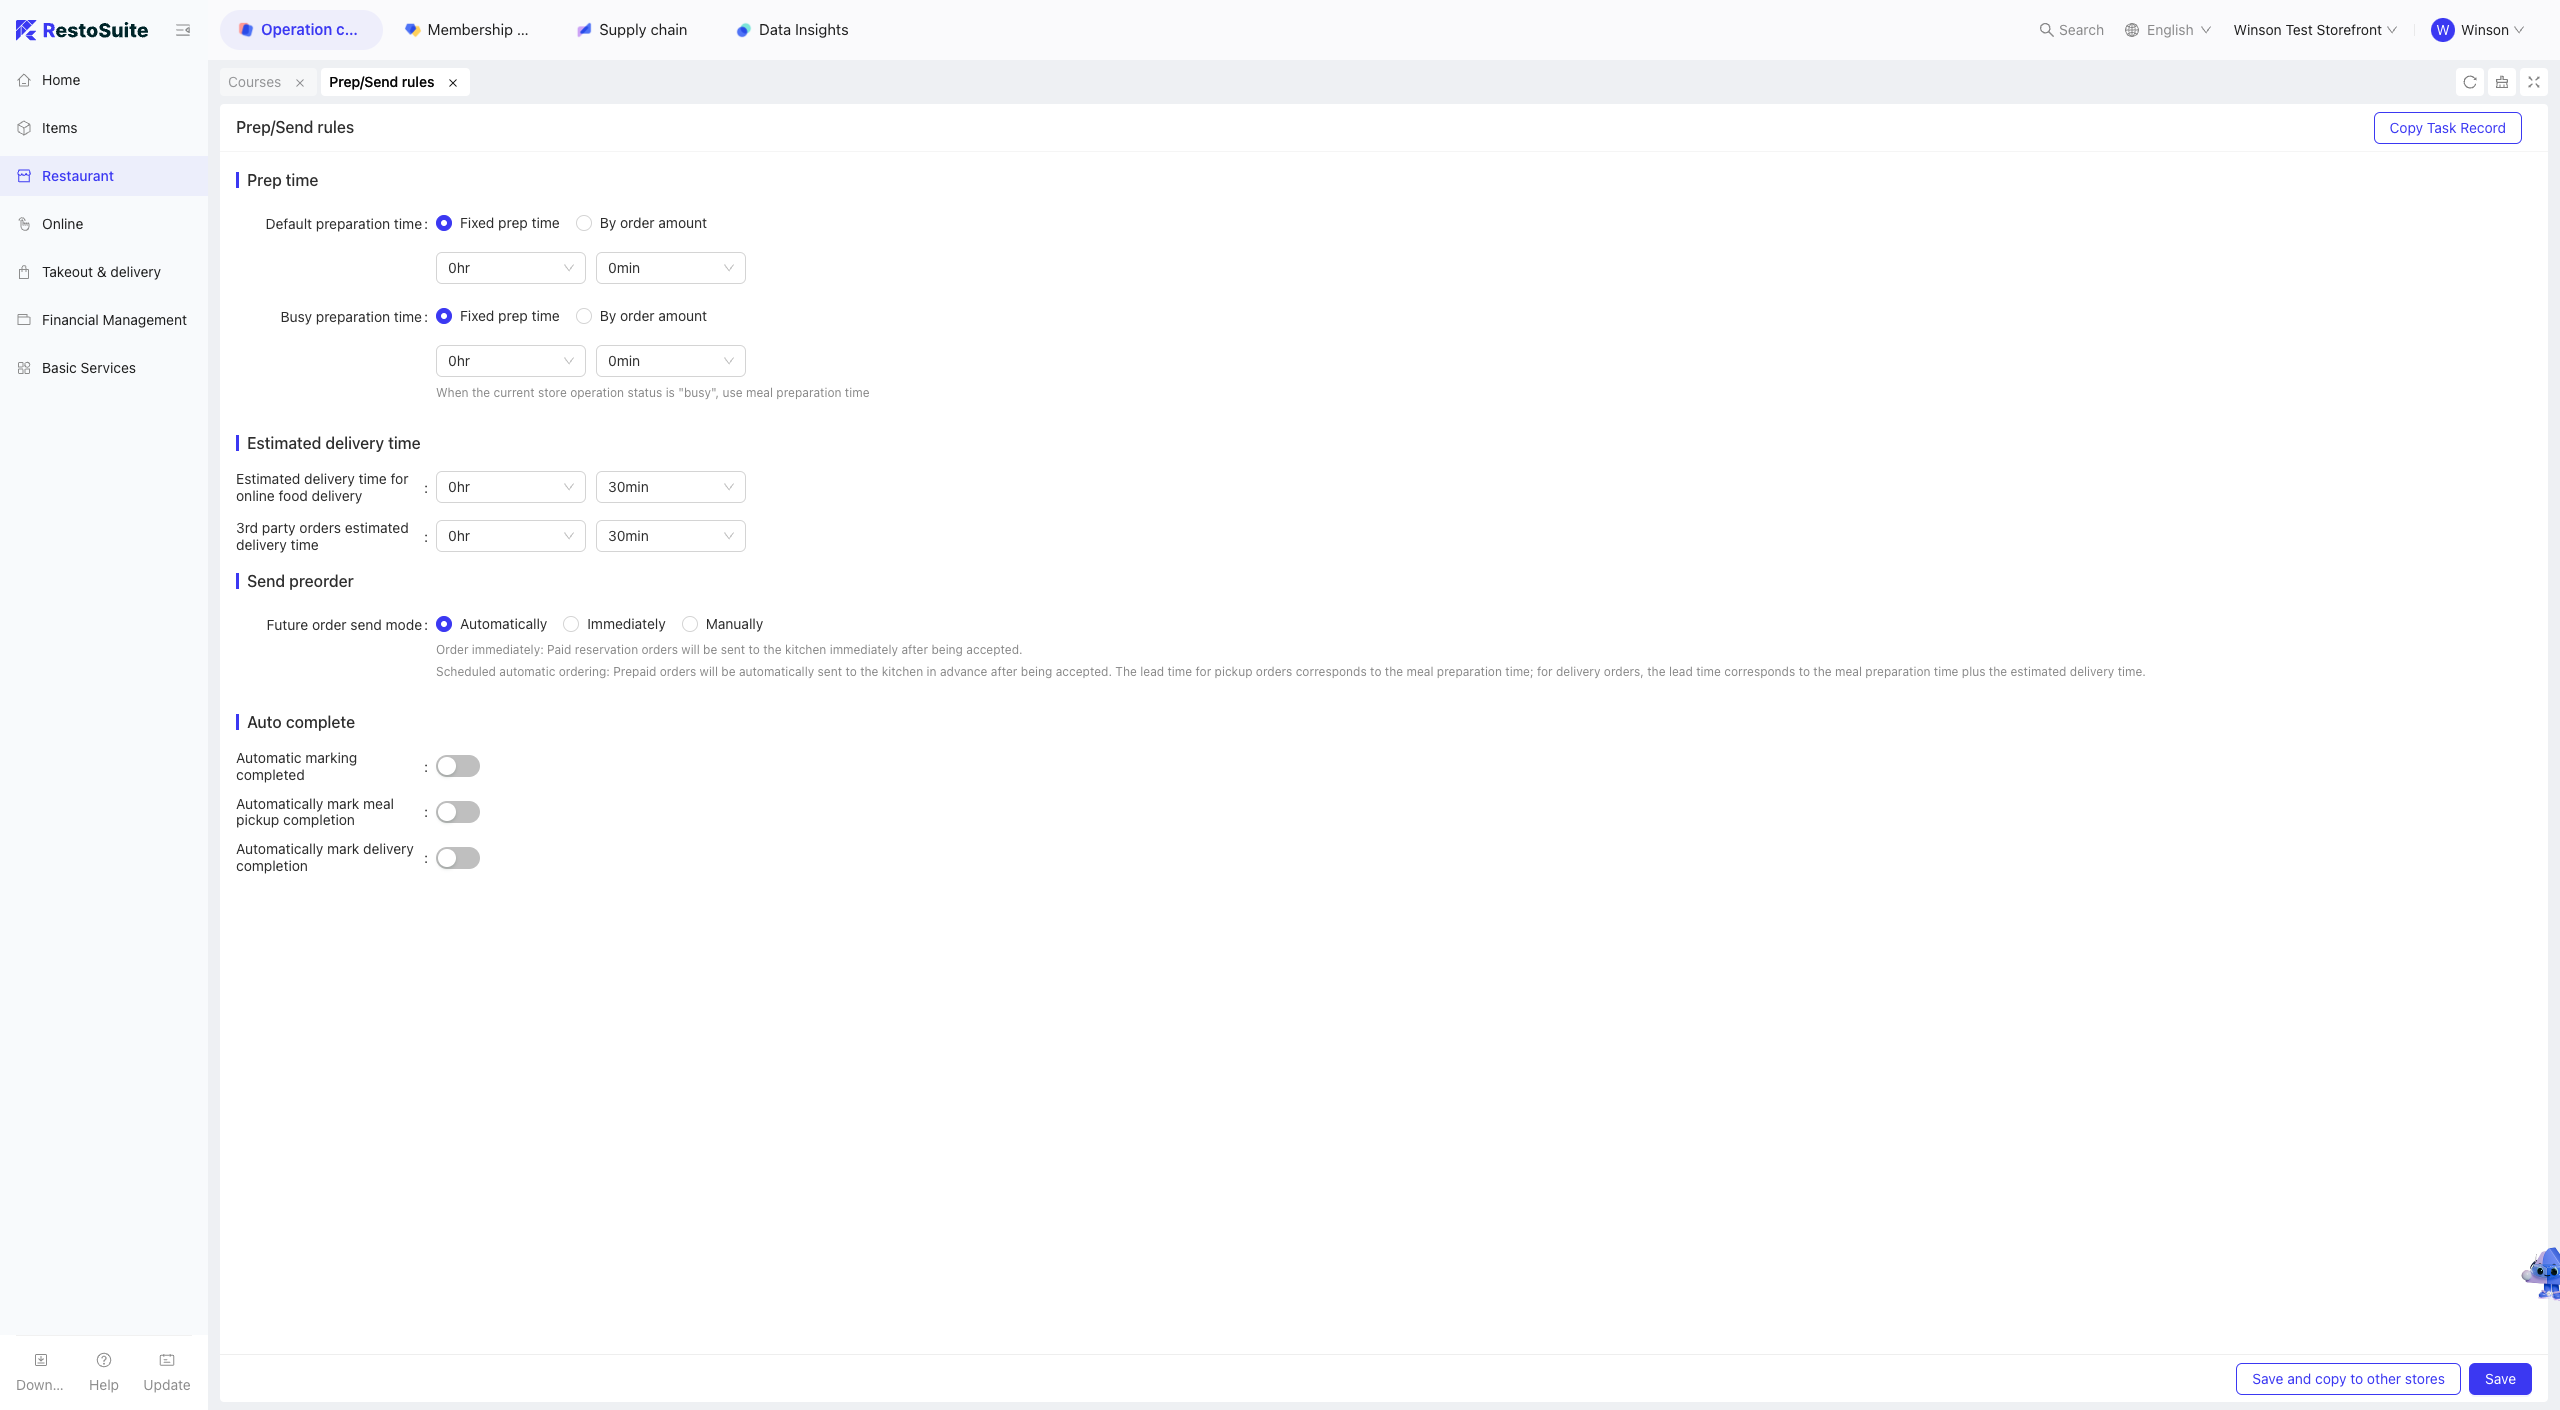
Step 3: On the Meal Preparation Configuration page, fill in the following fields and save:
- Preparation Time: Differentiates between default preparation time and peak-hour preparation time. Both can be set as fixed durations or calculated based on order value. The configured preparation time will be added to the serving time for online or POS orders.
- Estimated Delivery Time: Differentiates between in-house delivery and third-party delivery time estimates. This value is applied when placing delivery orders.
- Pre-order Placement Options:
- Place Immediately: Paid pre-orders are sent to the kitchen right after acceptance.
- Scheduled Auto-placement: Paid pre-orders are automatically sent to the kitchen in advance. For pickup orders, the lead time equals the preparation time; for delivery orders, the lead time equals preparation time + estimated delivery time.
- Auto-mark as Prepared: Orders are automatically marked as “Prepared” after a specified delay following the order placement time plus preparation time. Note: This setting is overridden by the KDS if the KDS is enabled.
- Auto-mark as Collected: Pickup orders are automatically marked as “Collected” after a specified delay following the “Prepared” status. Note: Scan-to-collect takes priority if this feature is enabled.
- Auto-mark as Delivered: Delivery orders are automatically marked as “Delivered” after a specified delay following the order placement time + preparation time + delivery time. Note: Delivery status updates from third-party platforms take priority.
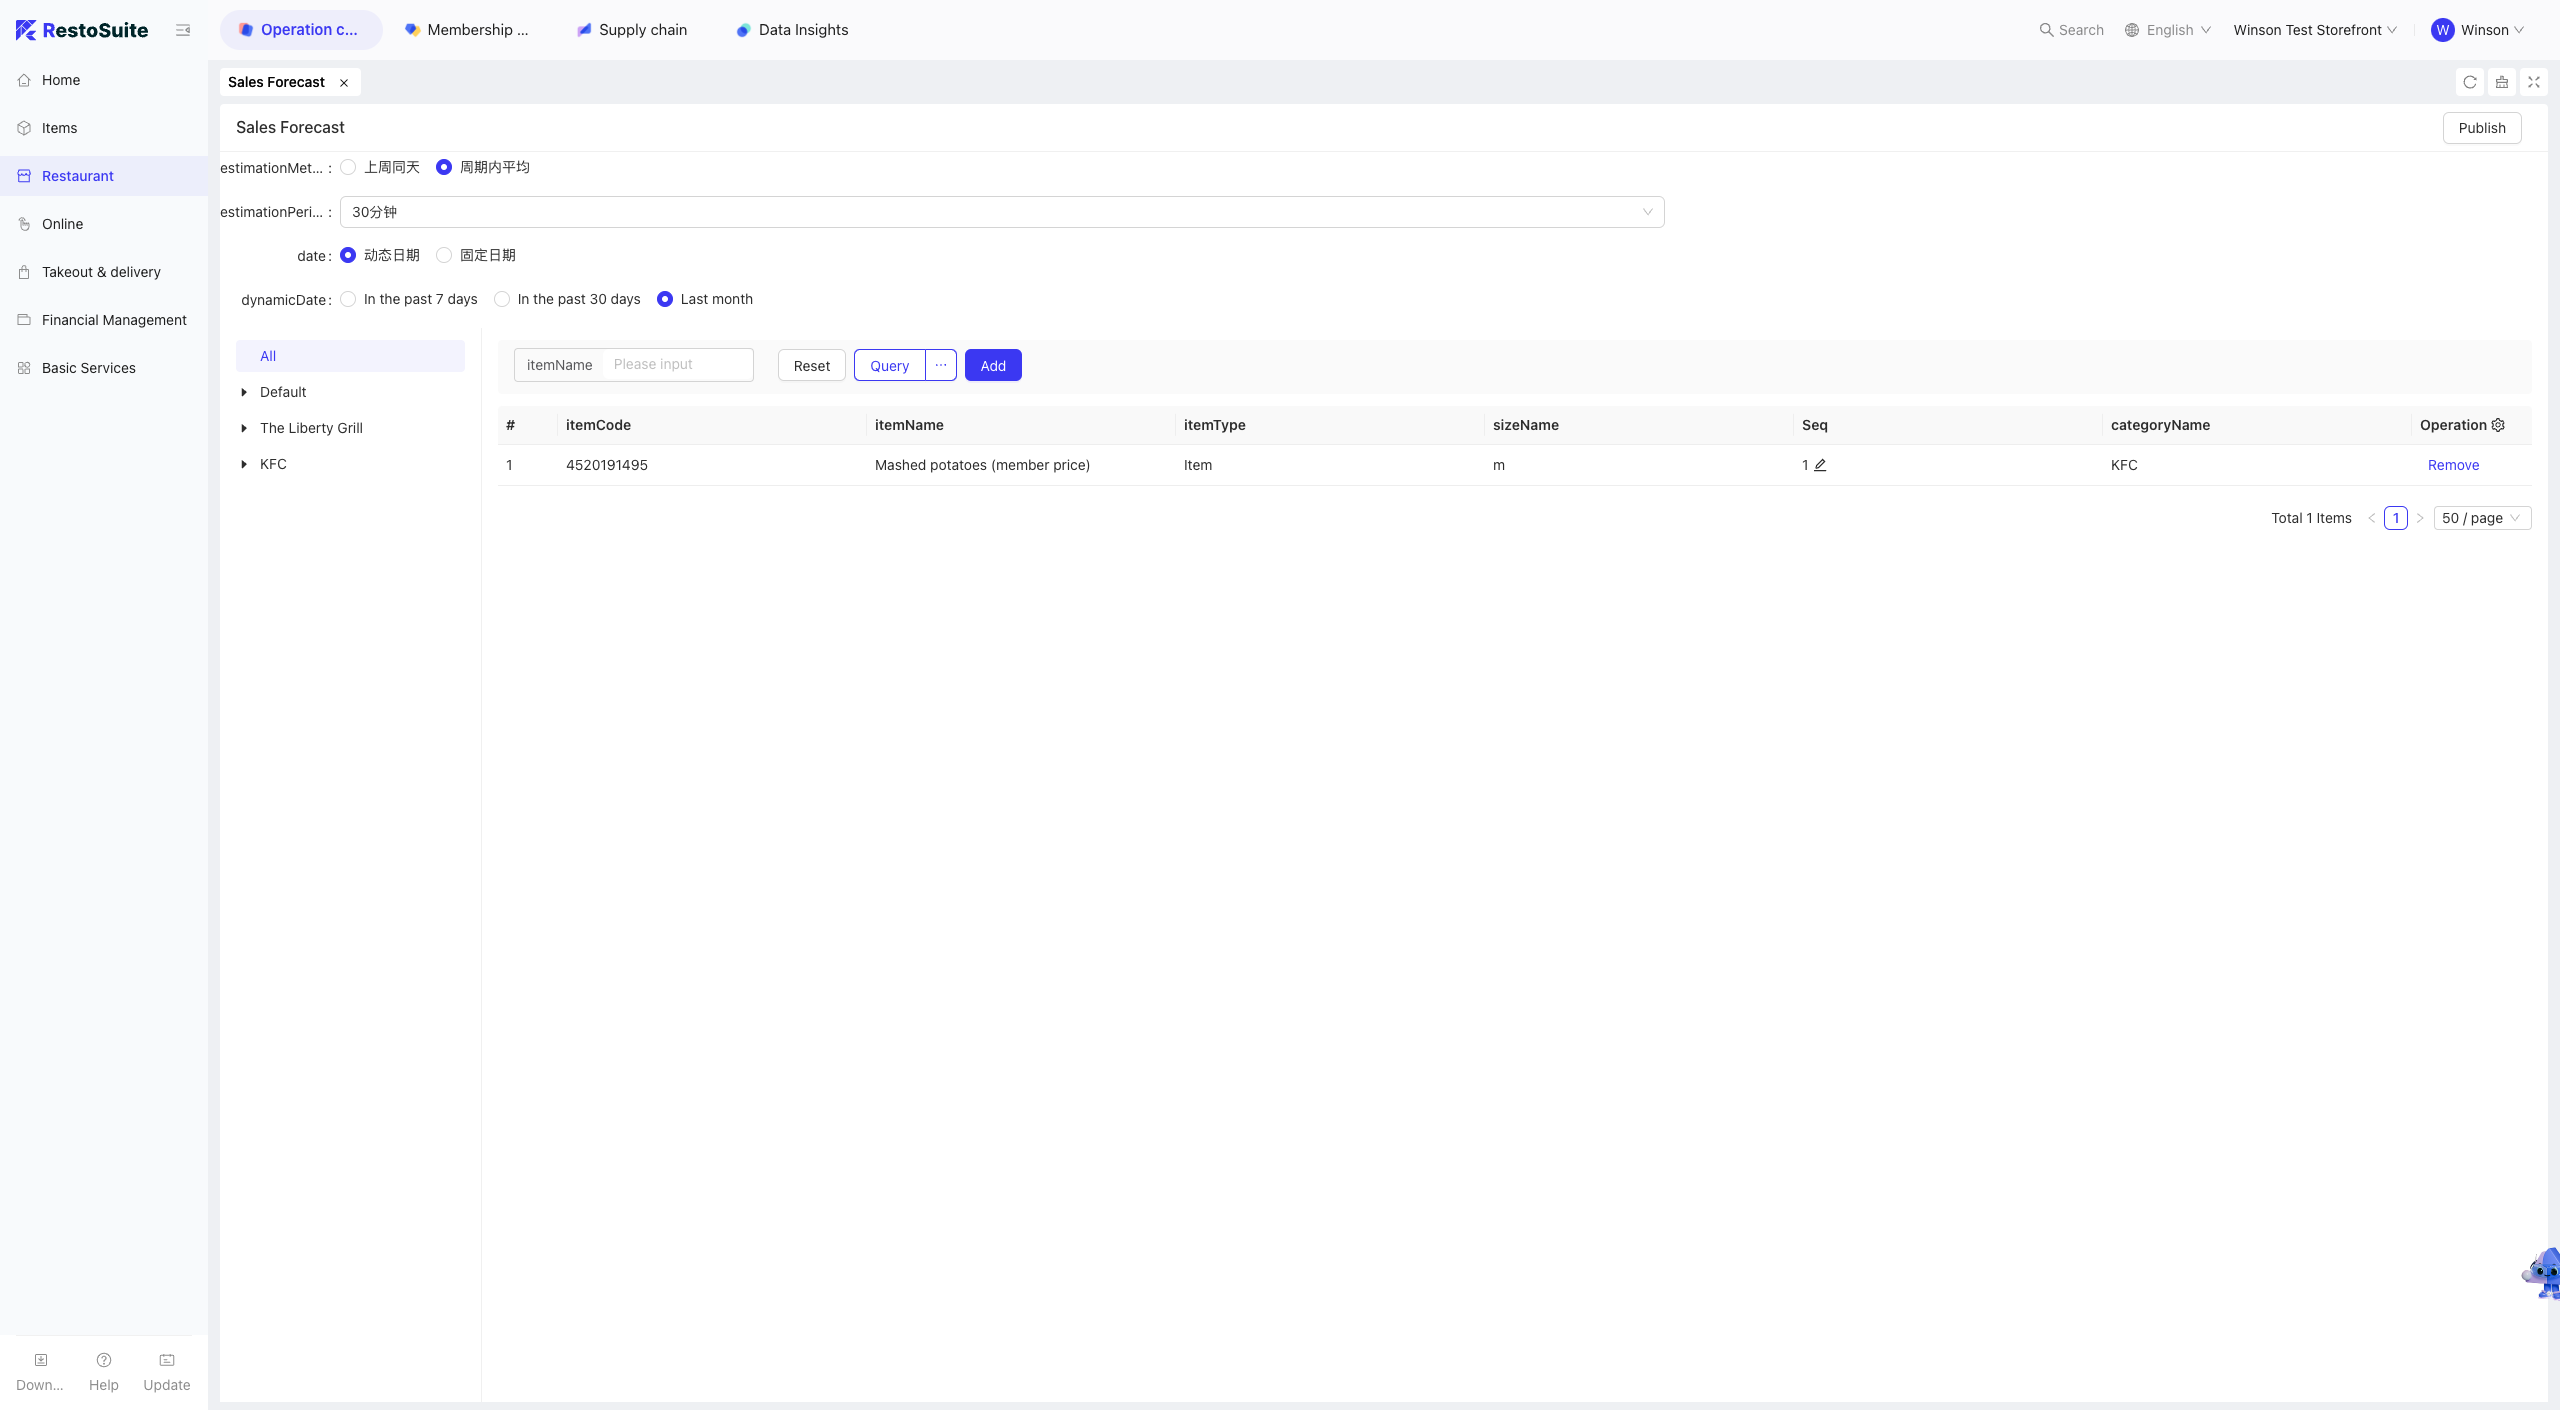
5 Sales Forecasting
5.1 Editing and Publishing Sales Forecasts
Step 1: Switch Perspective: Select the store for which you want to configure sales forecasts.
Step 2: Navigate to the Restaurant Management > Sales Forecasting page.
Step 3: On the Sales Forecasting page, fill in the following fields and save:
- Forecasting Method:
- Same Day Last Week: The hourly sales forecast for each dish equals the hourly sales volume of the same dish on the same day last week.
- Forecast Intervals: 30 minutes, 60 minutes, 120 minutes
- Average in Cycle: The hourly sales forecast for each dish equals the total hourly sales volume of the dish in the selected cycle divided by the number of days in the cycle.
- Forecast Intervals: 30 minutes, 60 minutes, 120 minutes
- Dynamic Date Range: Last 7 days, Last 30 days, Last Month
- Fixed Date Range: Select dates up to T-1 (the previous day). The maximum selected period cannot exceed 365 days, with a maximum span of 31 consecutive days.
- Select Dishes
- Same Day Last Week: The hourly sales forecast for each dish equals the hourly sales volume of the same dish on the same day last week.
Step 4: Publish the sales forecast.