Front-of-House Management
1 Introduction
The Front of House(FOH) Management module provides comprehensive support for all configuration requirements throughout the ordering process—whether initiated via POS systems or online platforms. It integrates core functional modules including Remark Management, Service Area Configuration, Table Management, Customer Facing Screen (CFS) Style, E-menu, Tip Management, Calling Screen.
2 Remark Management
Users can add and edit remark information at the Group, Brand, and Store levels. Remarks created at the Group or Brand level can be distributed to specific stores.
2.1 Glossary
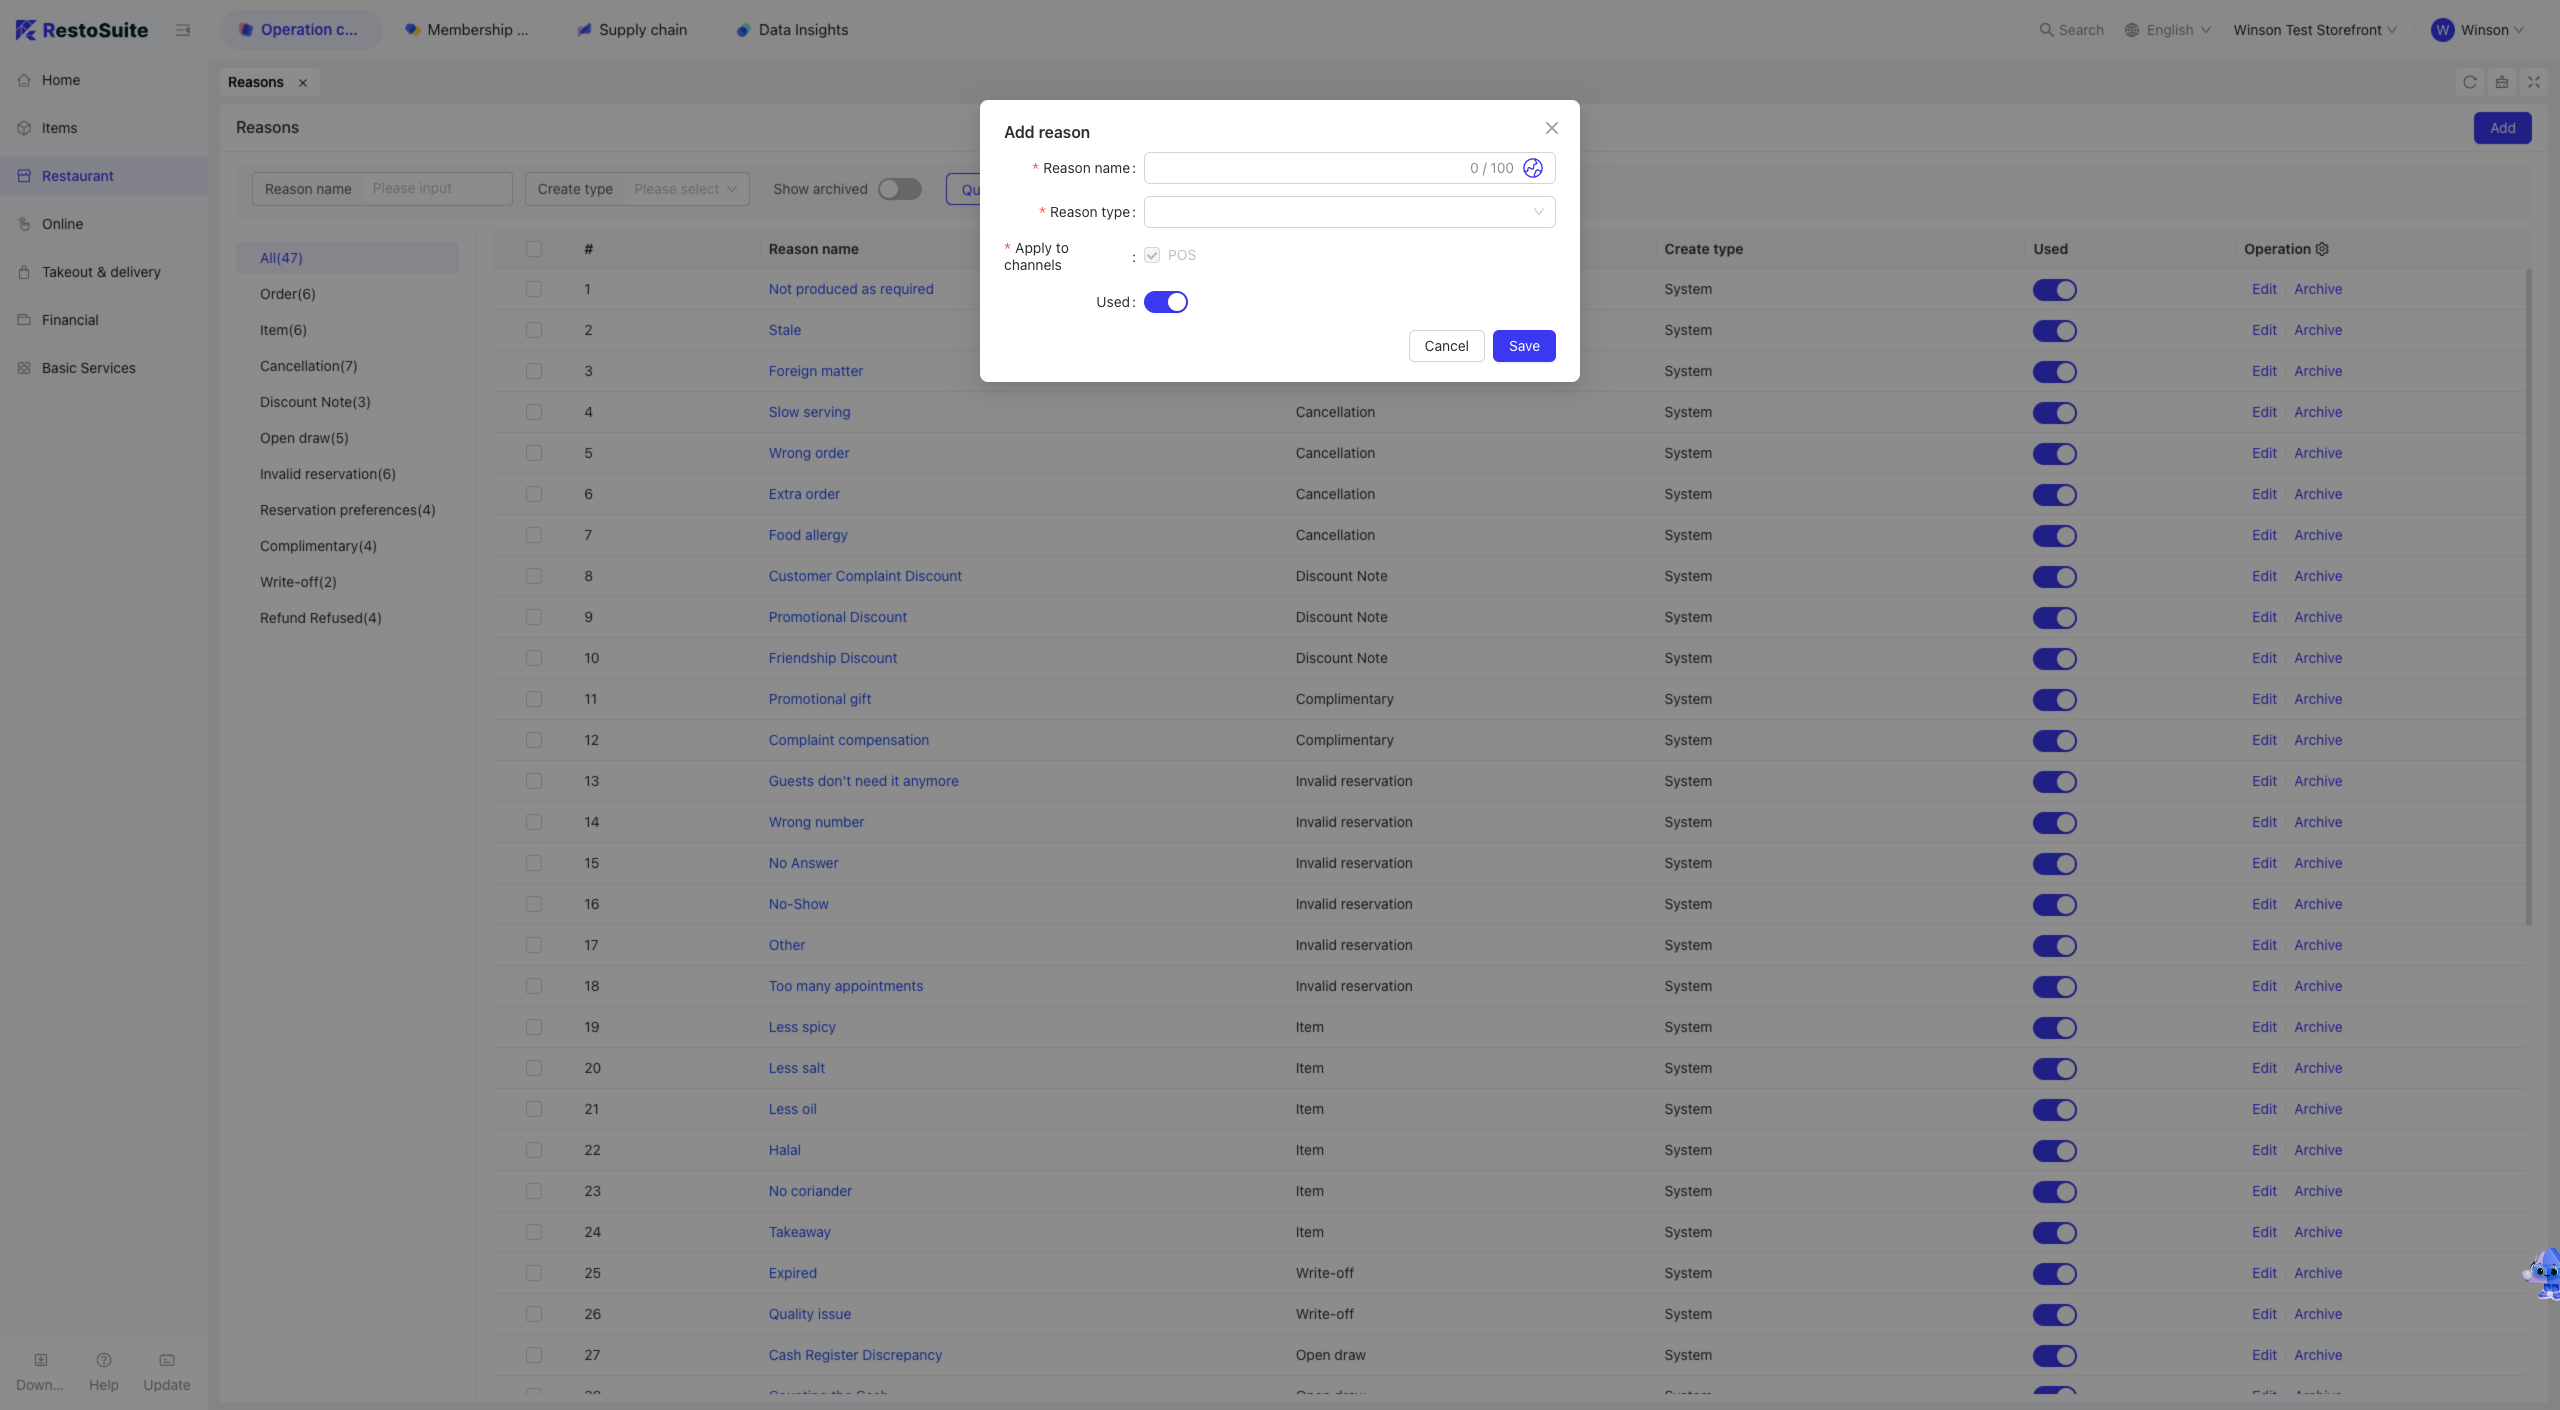
- Remark Management: During the ordering process, servers or customers may have special requirements or preferences that need to be noted on the order. Scenarios include: Order-Level Remarks, Dish-Level Remarks, Dish Return Reasons, Discount Reasons, Active Cash Drawer Reasons, Reservation Cancellations, and Reservation Preference Reasons.
2.2 Adding New Remarks
Step 1: Switch View: Select the level (Group, Brand, or Store) where you want to add remarks.
Step 2: Navigate to [Restaurant Management -> Remark Management] and click the [Add] button.
Step 3: On the [Add Remark] page, fill in the following fields and save:
- Remark Name: Name of the remark.
- Remark Type: Category of the remark.
- Application Channel: Channels where users can apply this remark (influenced by the selected Remark Type).
Note: The [Application Channel] changes based on the selected Remark Type, with POS as the default.
2.3 Editing Existing Remarks
Step 1: Switch View: Select the level (Group, Brand, or Store) where the remark to be edited resides.
Step 2: Navigate to [Restaurant Management -> Remark Management], find the target remark name, and click the [Edit] button in the operation column.
Step 3: On the [Edit Remark] page, modify the relevant information and save.

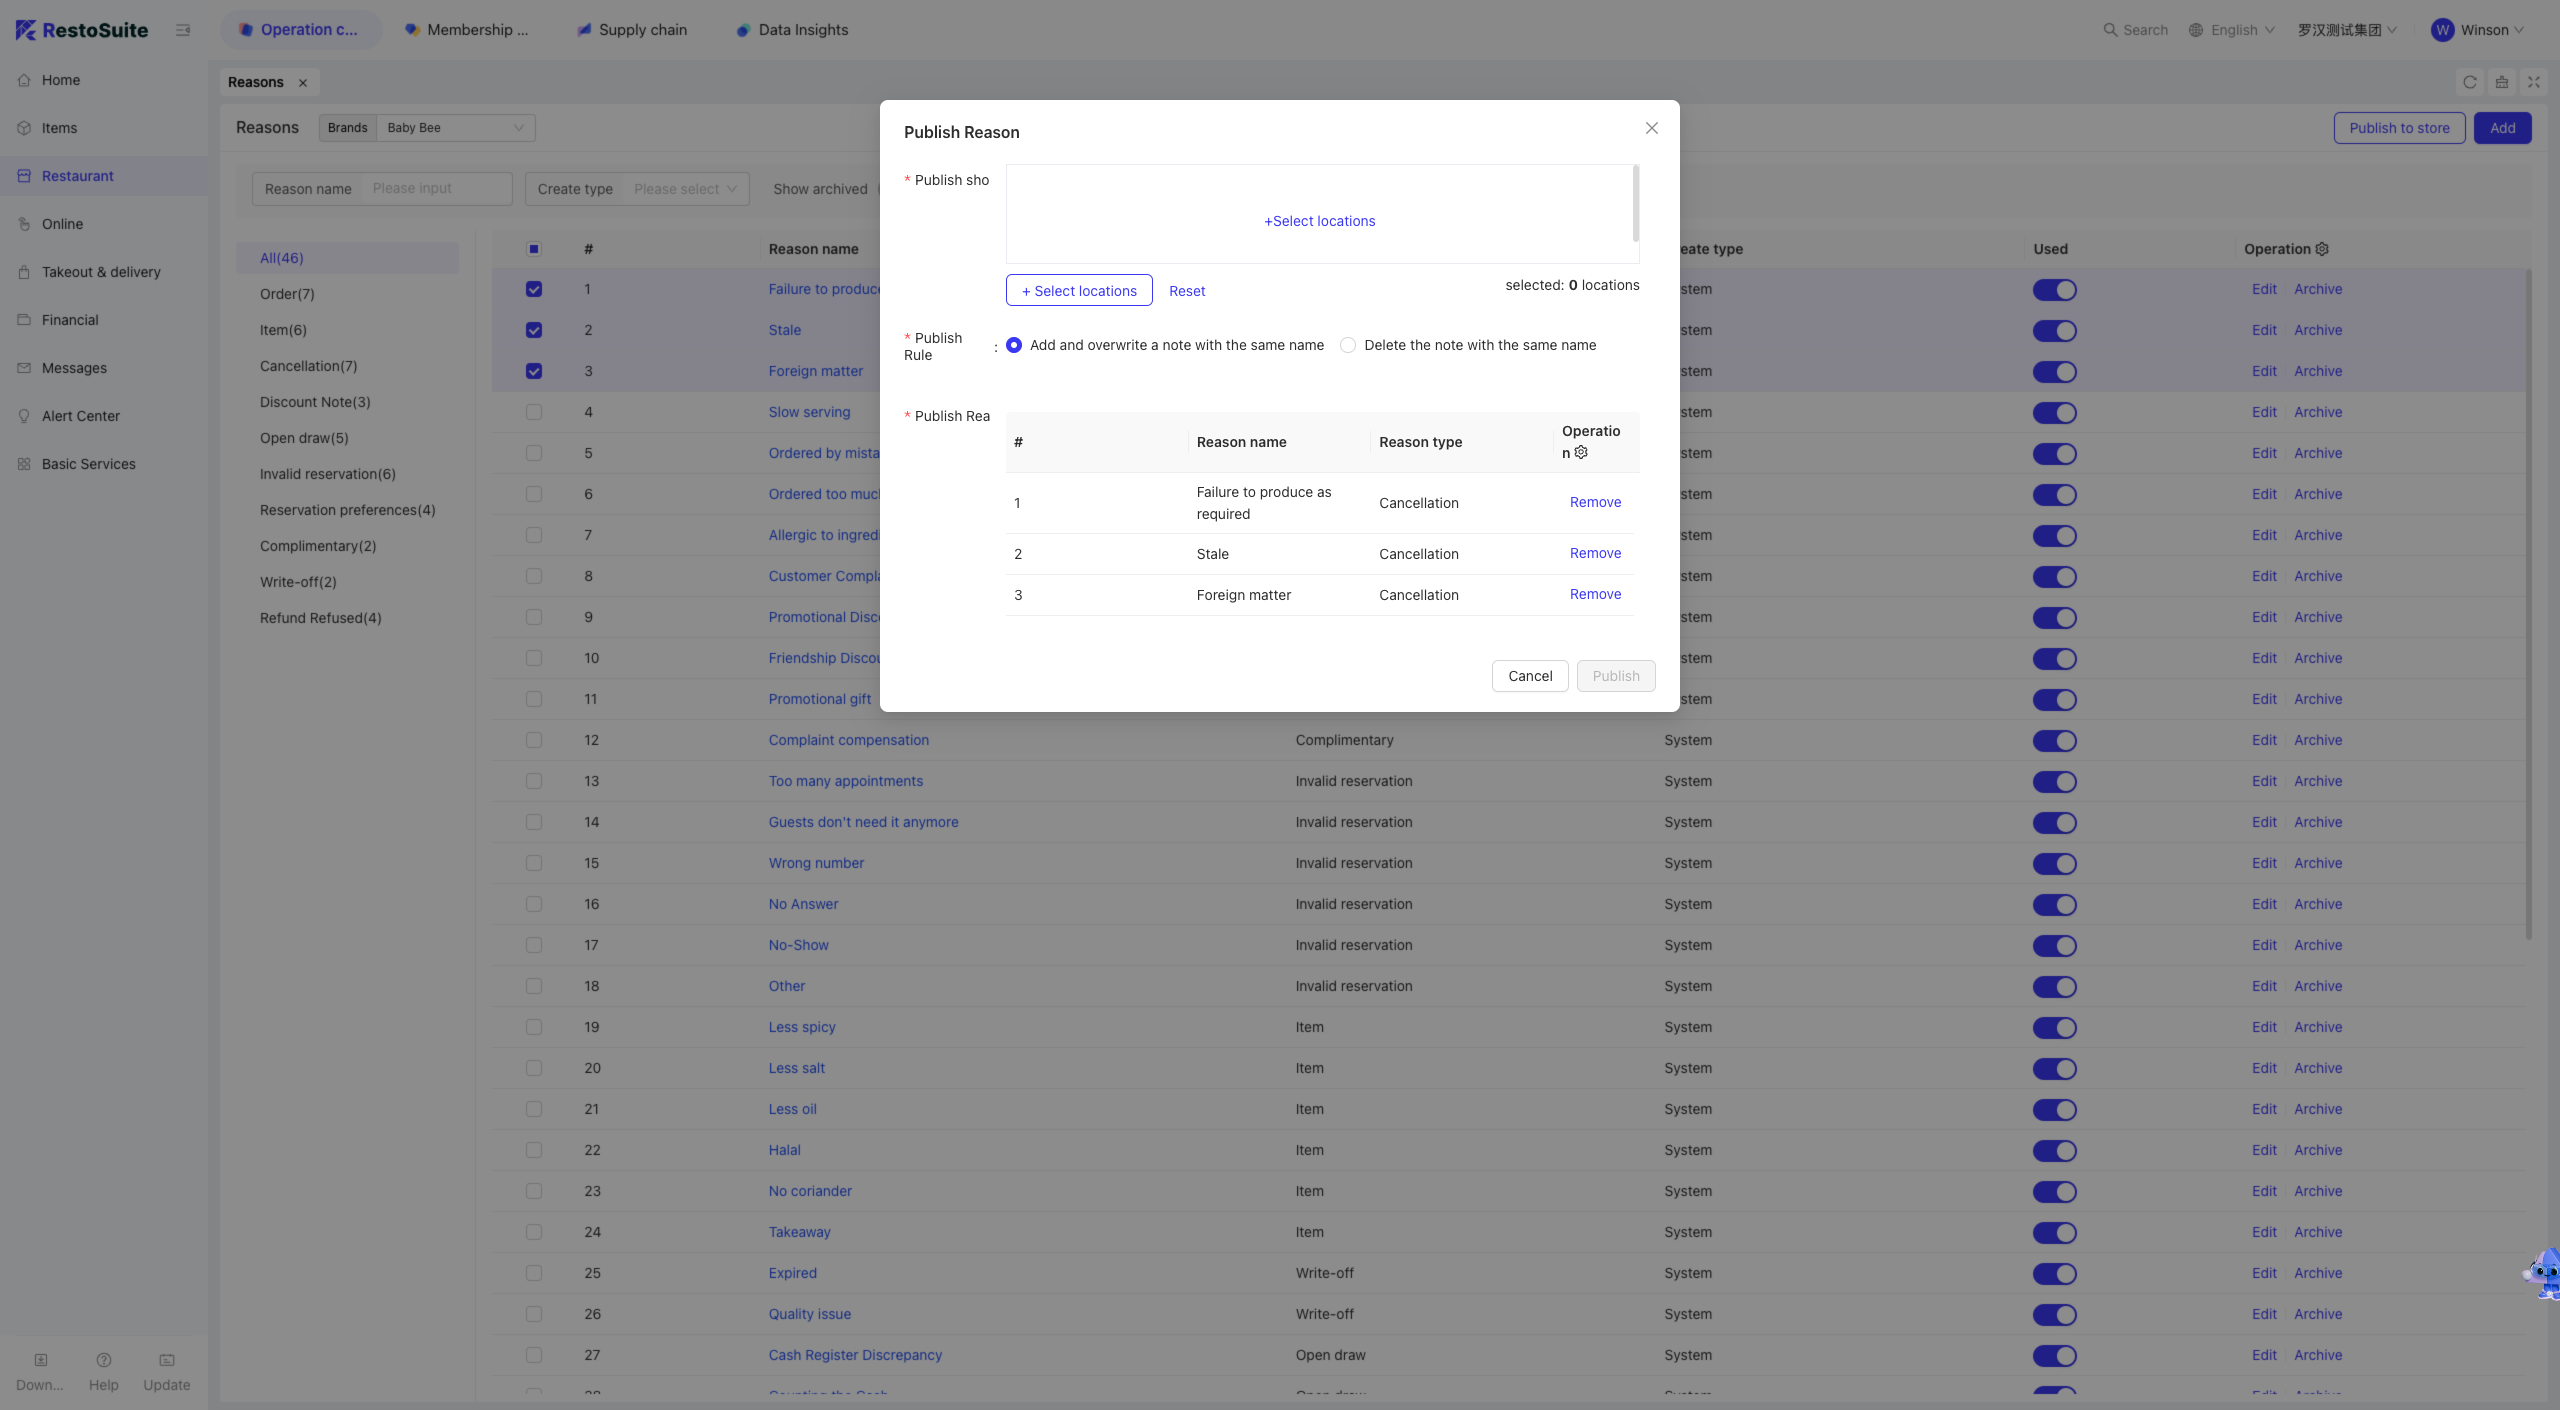
2.4 Distributing Group/Brand-Level Remarks to Stores
Step 1: Switch View: Select the level (Group or Brand) of the remarks to be distributed.
Step 2: Navigate to [Restaurant Management -> Remark Management] and select the remarks to distribute.
Step 3: Click [Distribute to Stores] to make the remarks available for viewing at specific stores.
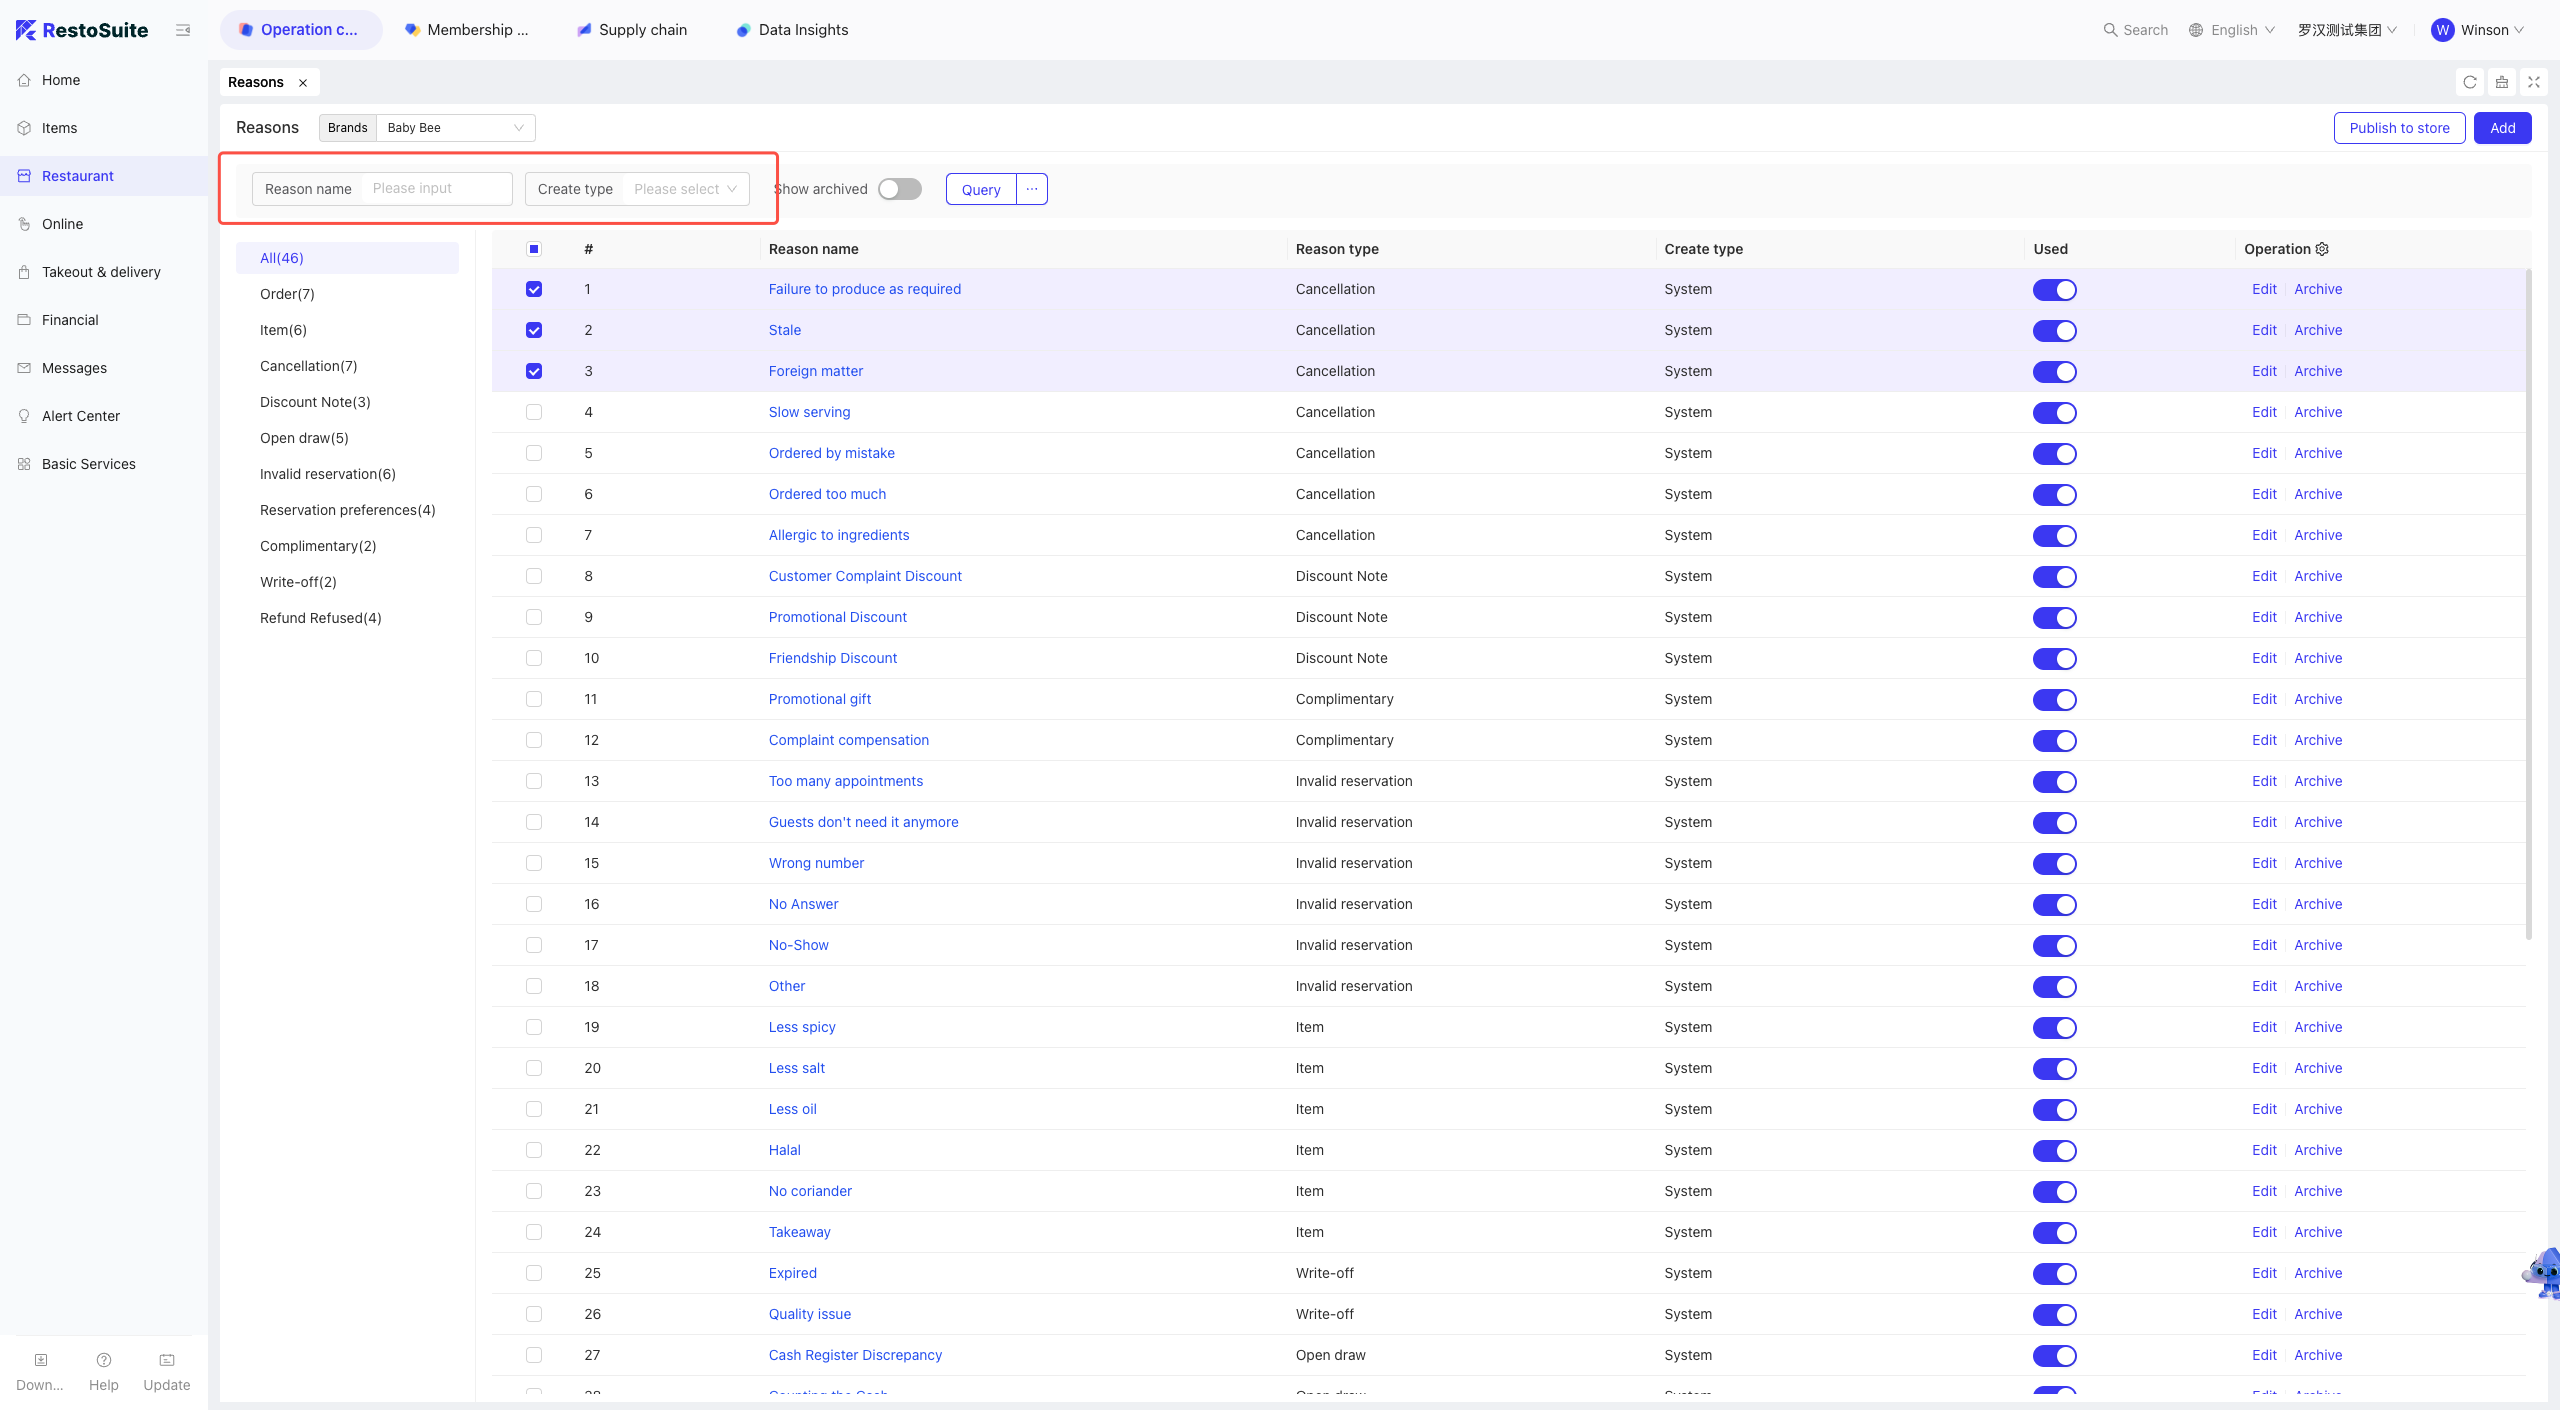
2.5 Searching for Remarks
Step 1: Switch View: Select the level (Group, Brand, or Store) of the remarks to search for.
Step 2: Navigate to [Restaurant Management -> Remark Management] and filter remarks by [Remark Name] or [Creation Type].
2.6 FAQs
Q: I want to create an Order-Level Remark at the Group level and distribute it to stores. Where can it be used at the store level?
A:
Step 1: Switch View to the Group level where the remark will be created.
Step 2: Navigate to [Restaurant Management -> Remark Management], click [Add], enter the [Remark Name], select [Order-Level Remark] as the [Remark Type], and save.
Step 3: Select the newly created remark and click [Distribute to Stores]. The remark will then be visible on the POS system.
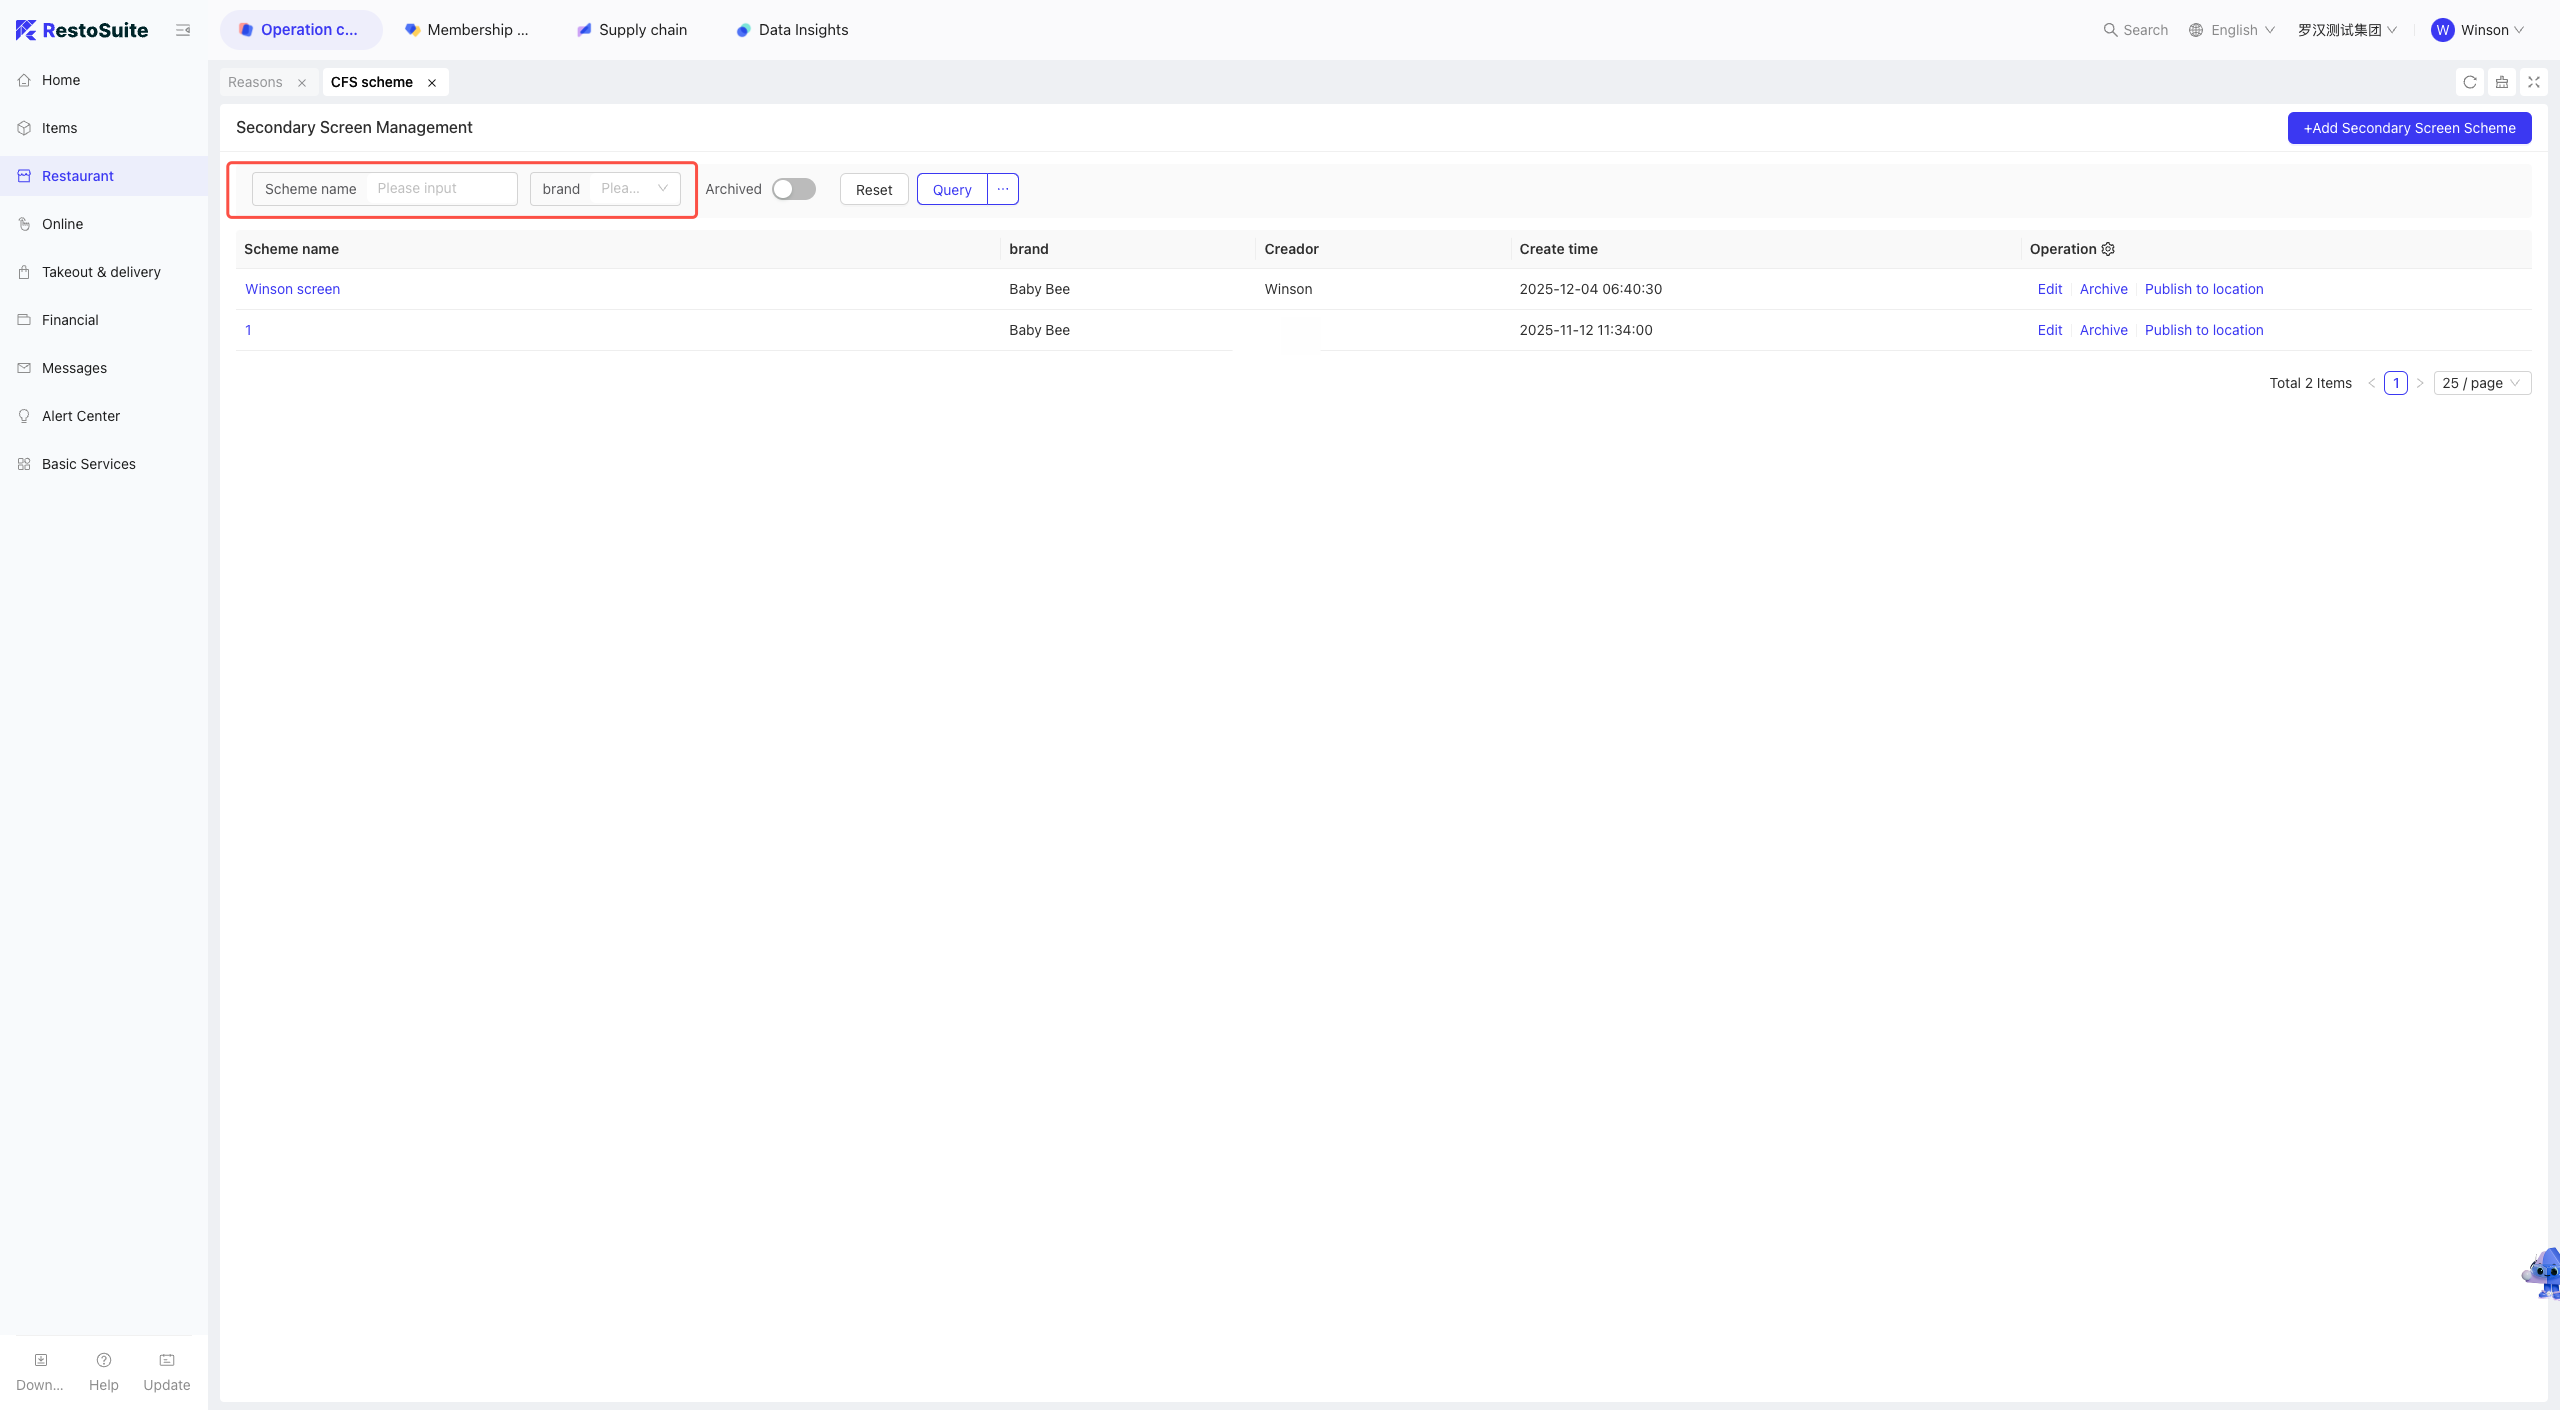
3 CFS Schema
Users can manage Secondary Screens at the Group and Brand levels and distribute configurations to stores.
3.1 Glossary
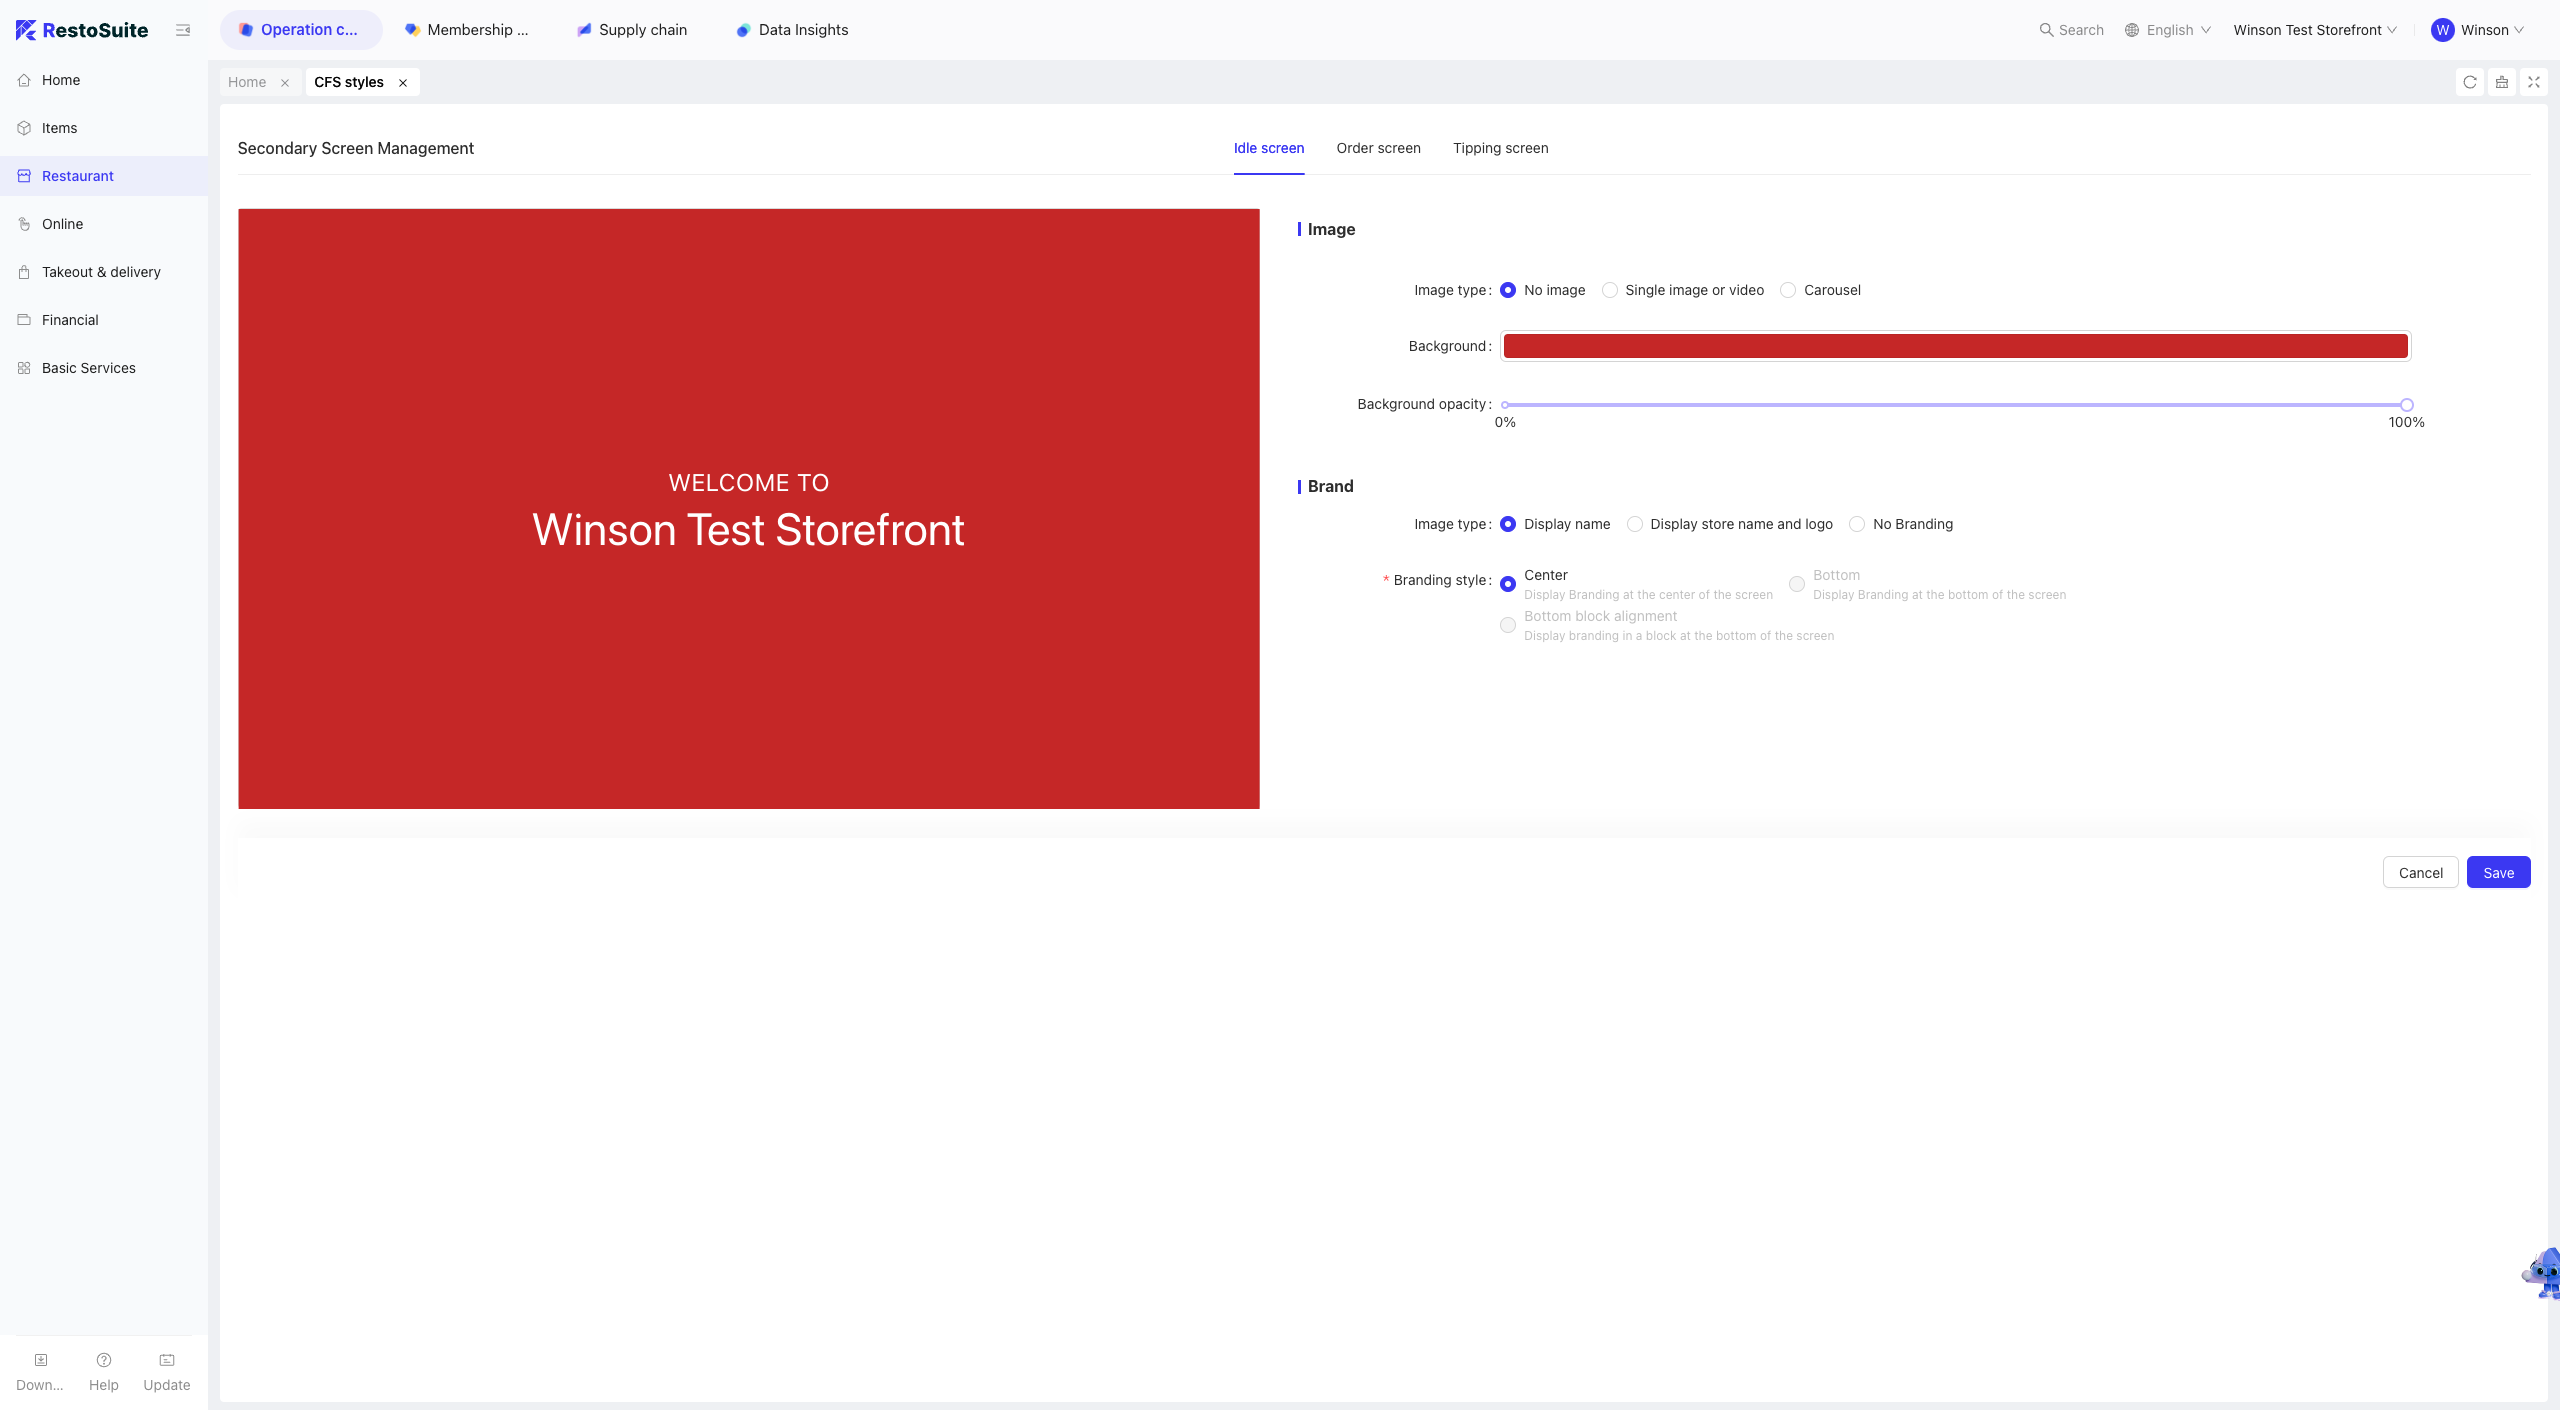
CFS Schema: In the restaurant industry, CFS (Customer Facing Screen) refers to displays provided for customers, typically placed near ordering counters or cash registers. These screens show order details, selected items, and price breakdowns, and include three types: Idle Screen, Order Screen, and Tip Screen.
Decoration: Refers to customizing the interface layout and display of software (e.g., POS or Mini Programs) to differentiate it from standard interfaces used by other groups or stores. The system supports personalized configuration of various interface elements, and this customization process is called "Decoration".
3.2 Learning to Add a Secondary Screen
Step 1: Switch View: Select the level (Group or Brand) where you want to add the Secondary Screen.
Step 2: Navigate to [Restaurant Management -> CFS Schema] and click to add a Secondary Screen Scheme.
Step 3: Enter the [Scheme Name] and select the [Brand], then click [Next Step].
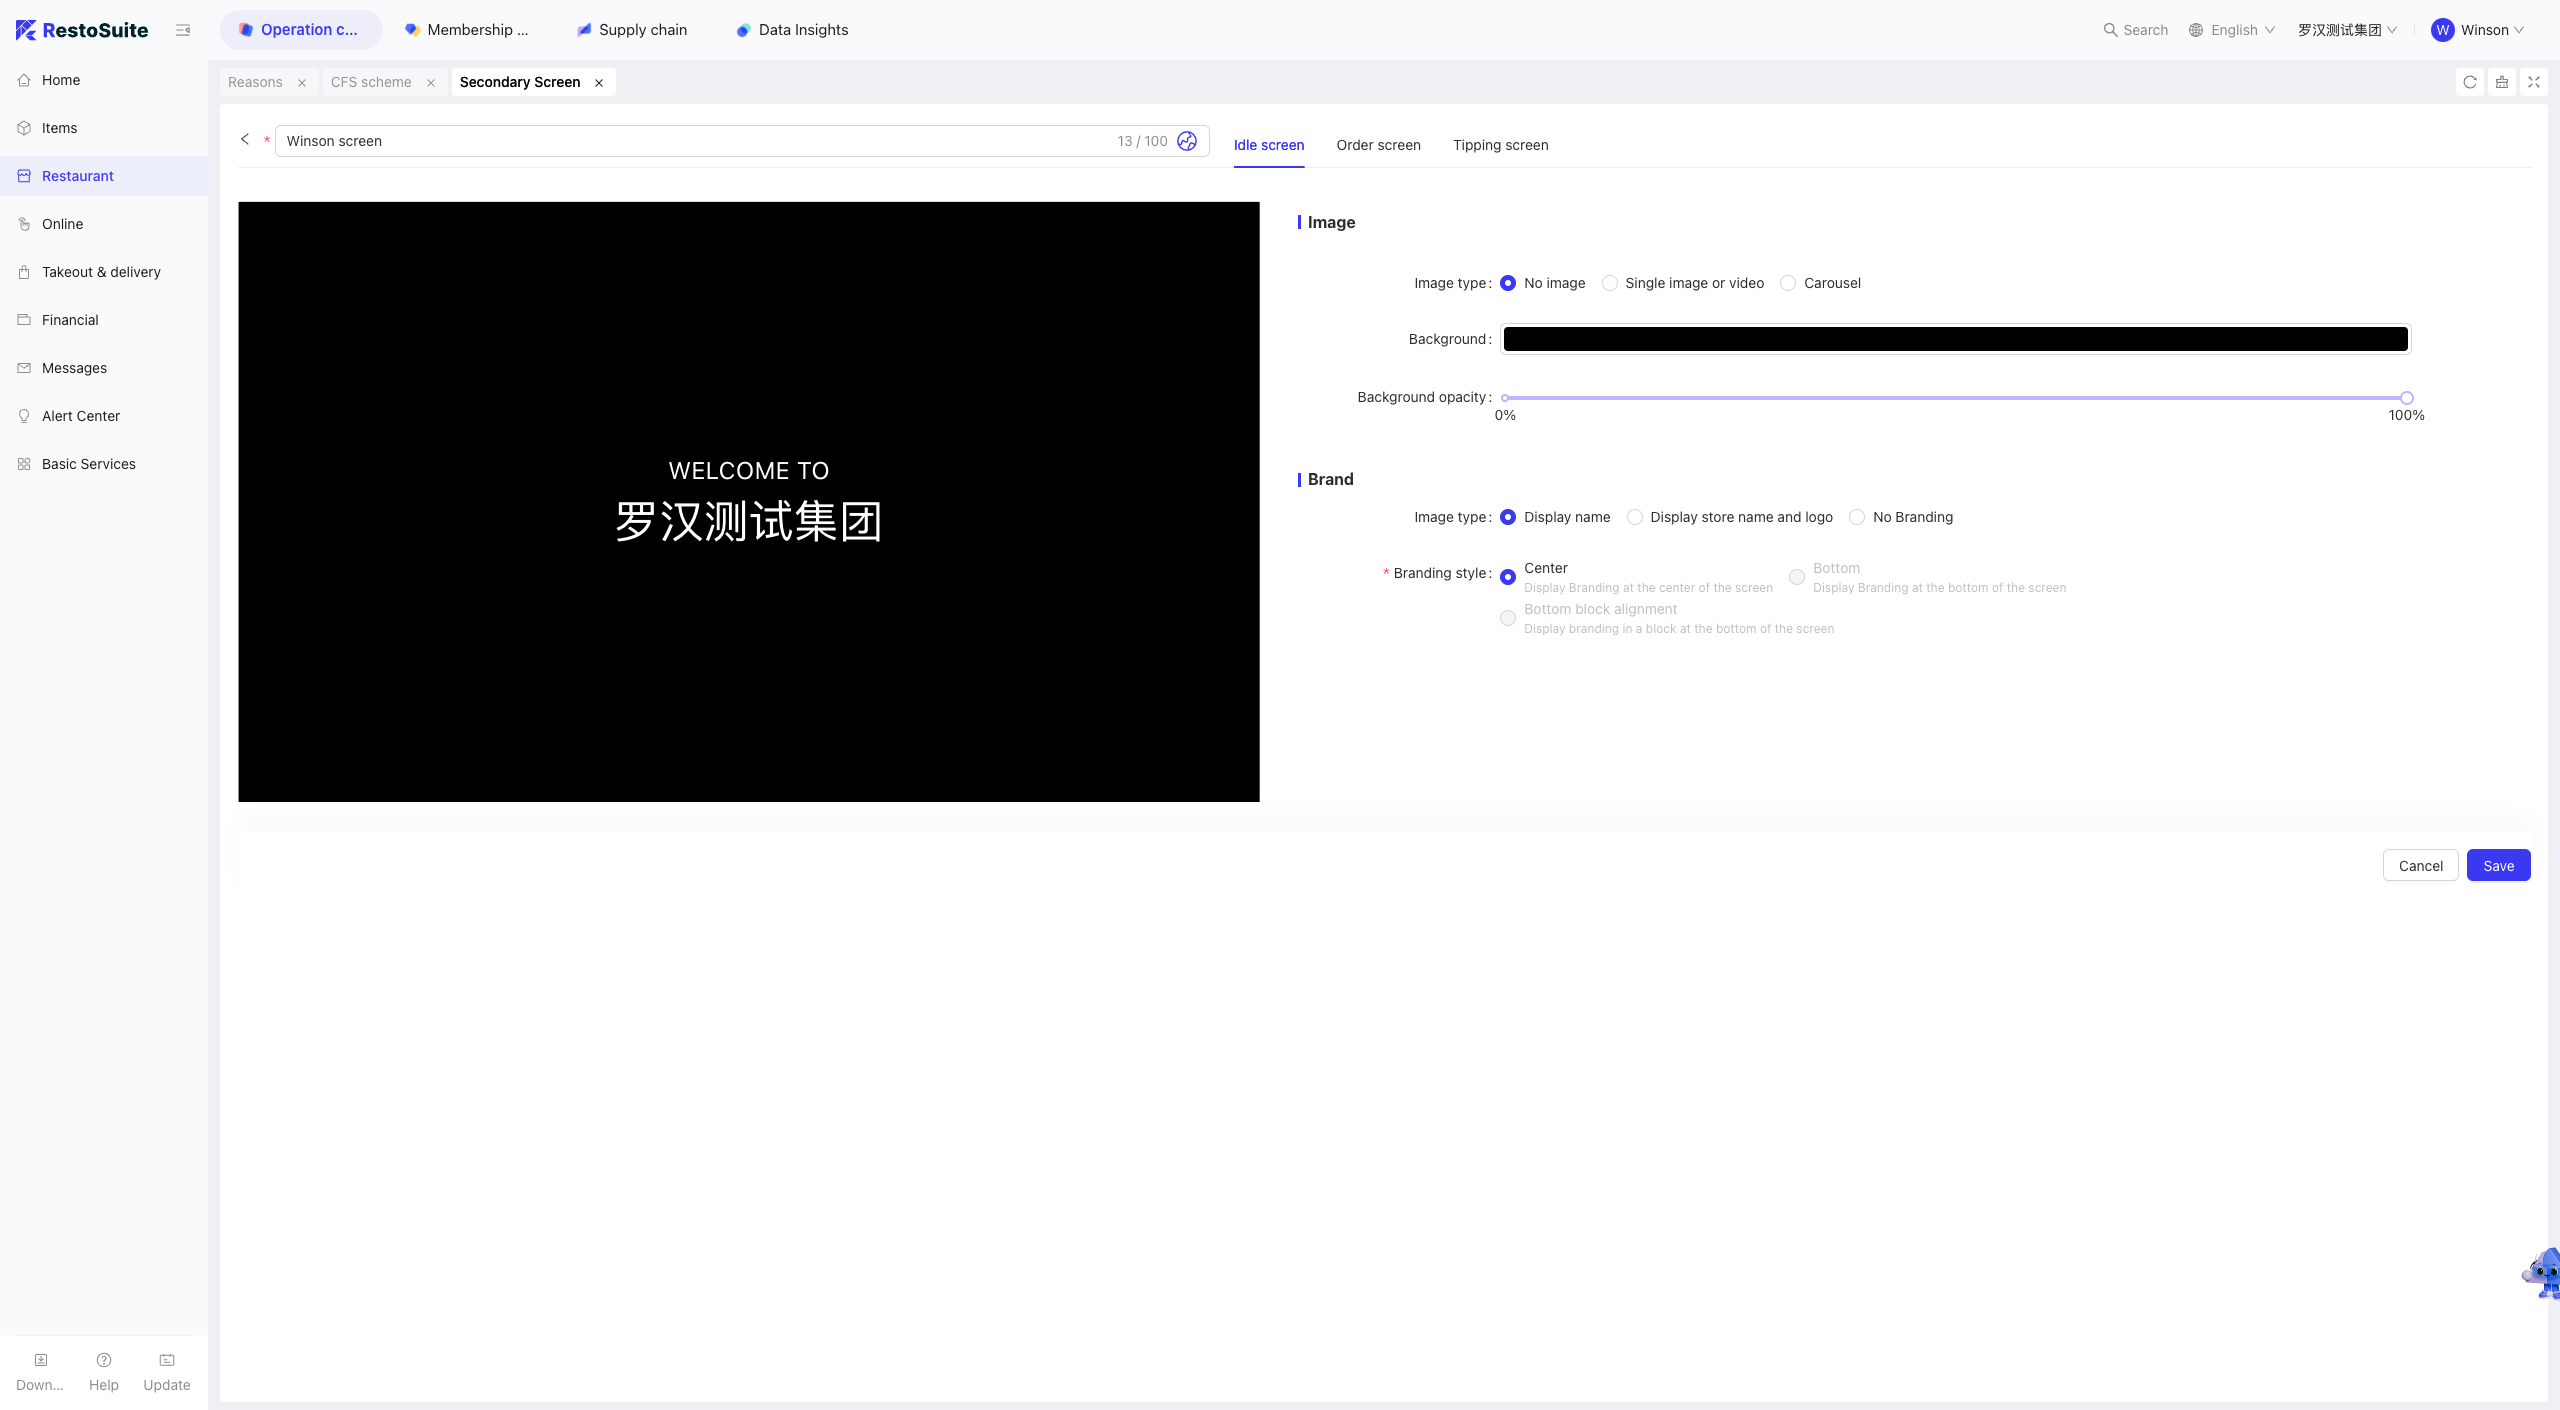
Step 4: Select the type of Secondary Screen to configure (three options supported):
-
Idle Screen
- Background Image Type: None, Single Image/Video, Carousel
- Background Color
- Background Color Transparency
- Brand Image Type: Show Name, Show Name & Logo, No Brand
- Brand Style: Center, Bottom, Bottom Block-Aligned
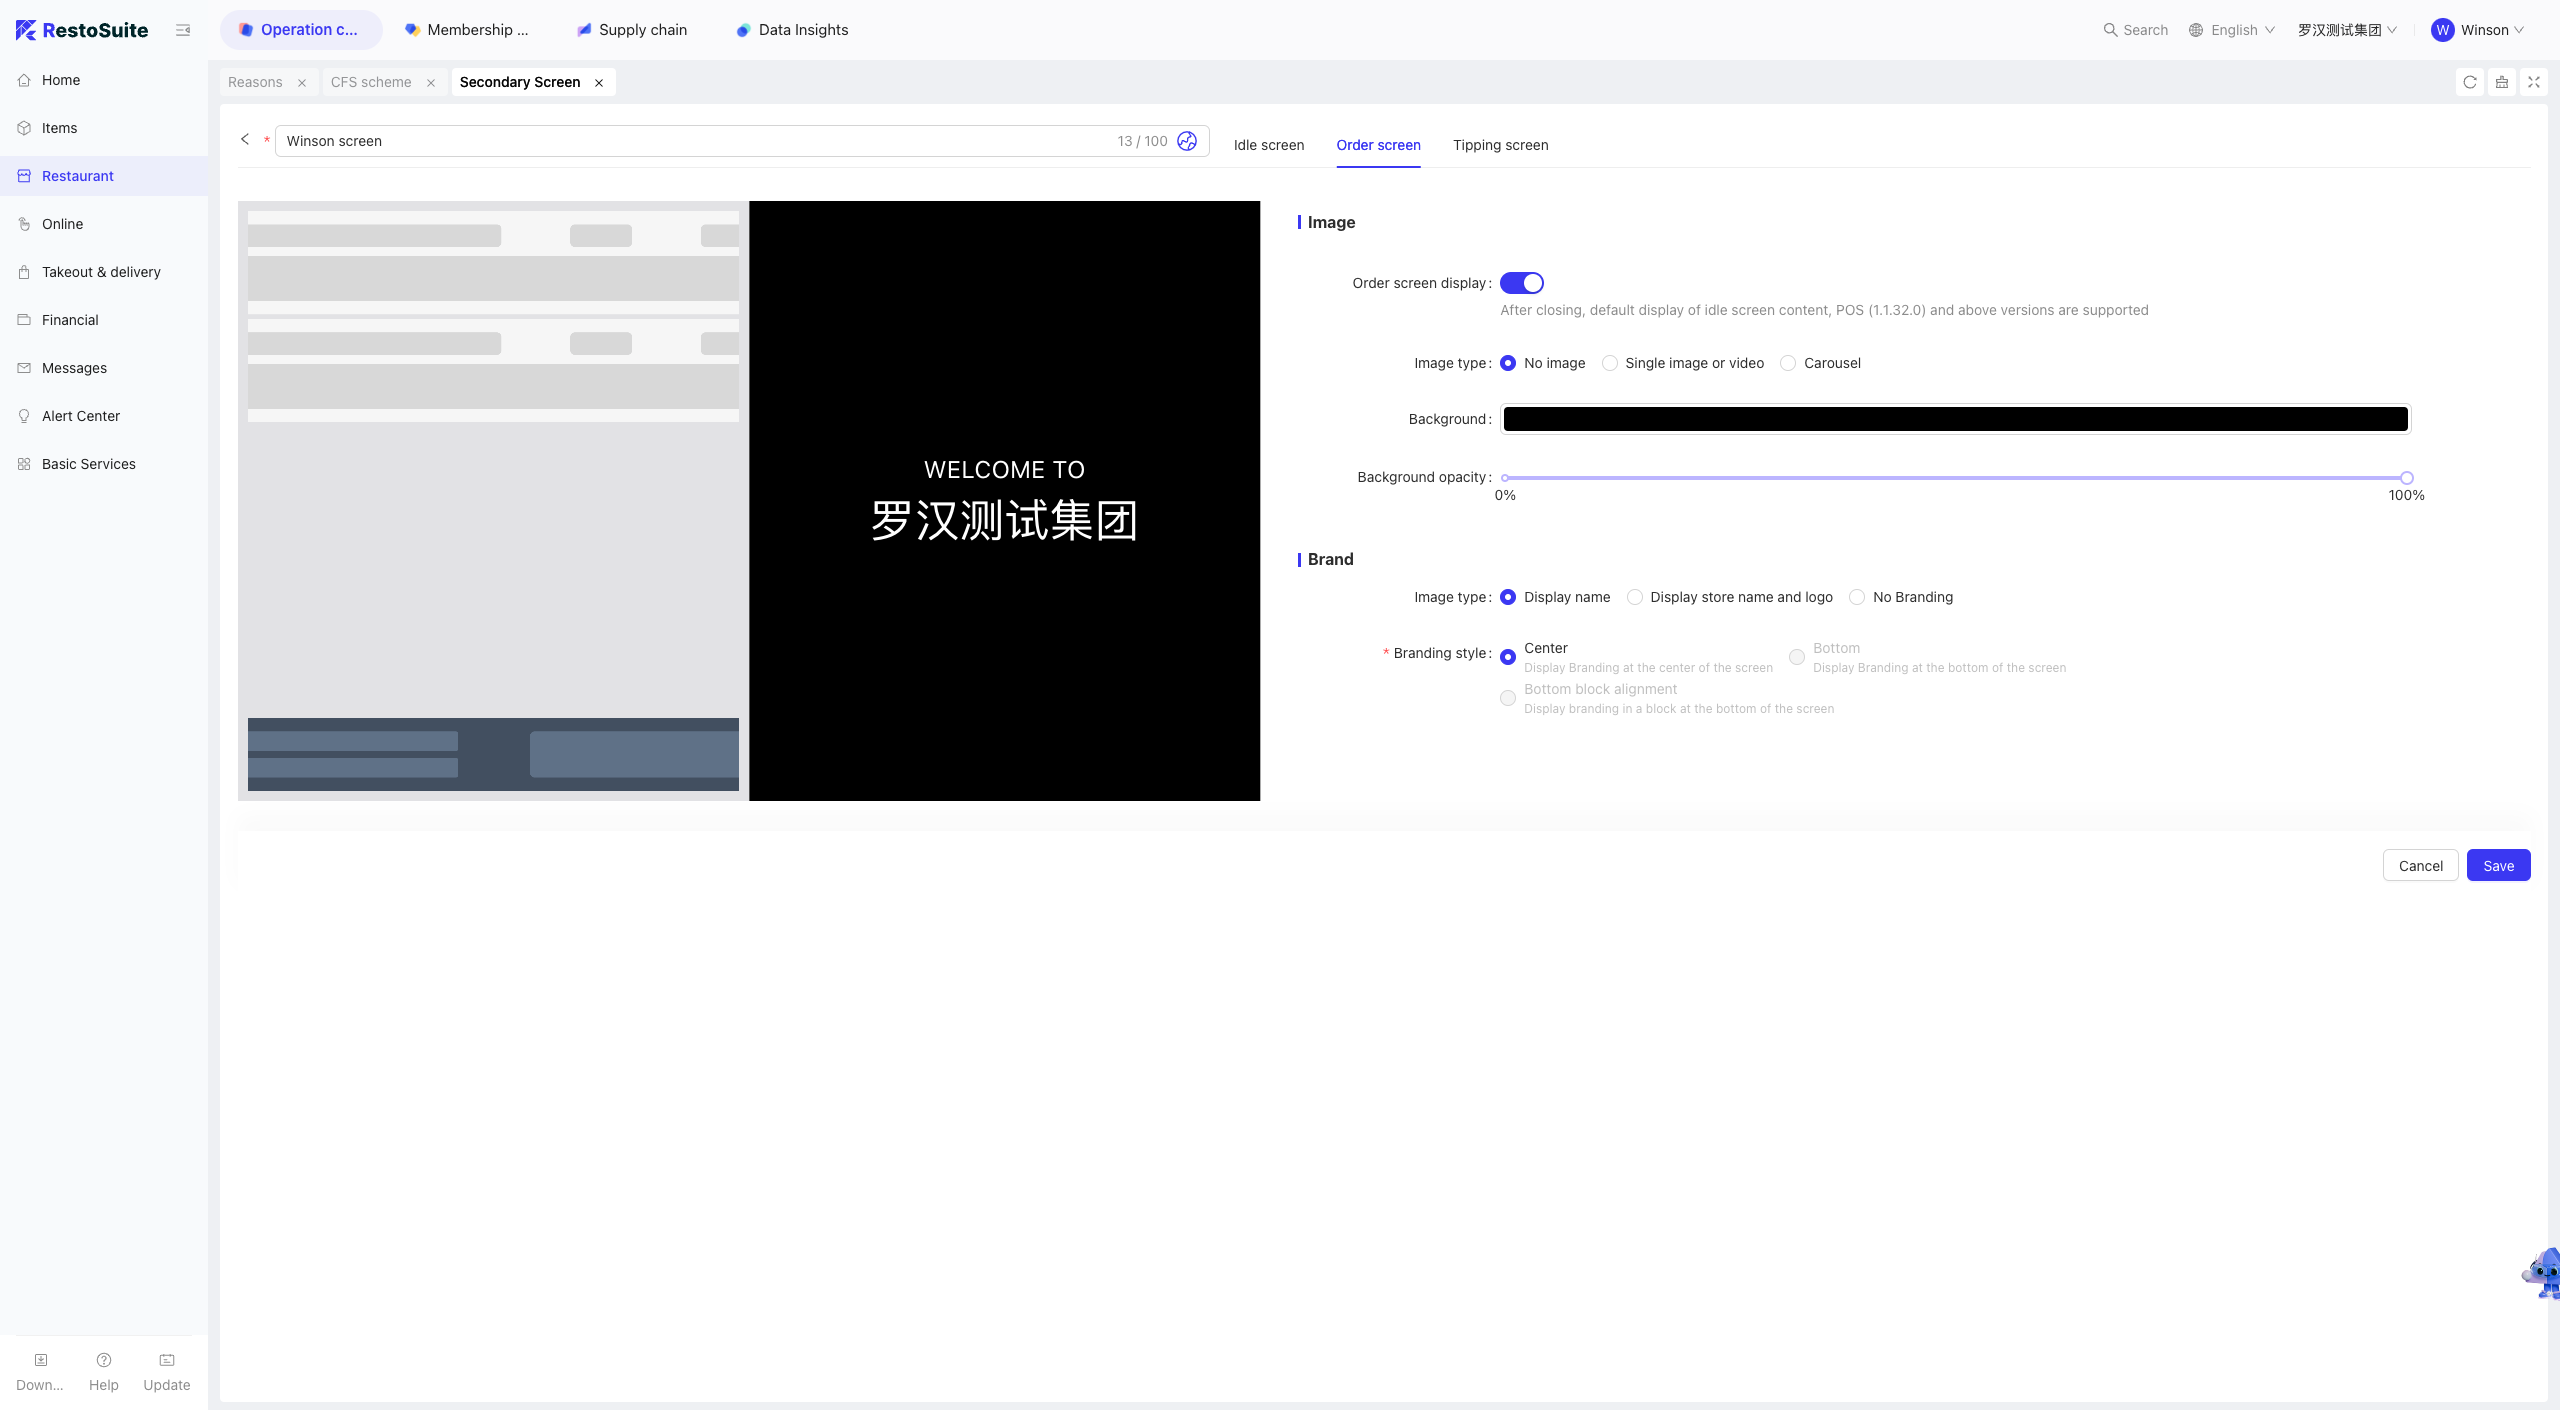
-
Order Screen
- Order Screen Display: When disabled, the Idle Screen content is shown by default (supported in POS version 1.1.32.0 and above)
- Background Image Type: None, Single Image/Video, Carousel
- Background Color
- Background Color Transparency
- Brand Image Type: Show Name, Show Name & Logo, No Brand
- Brand Style: Center-Aligned, Bottom-Aligned, Bottom Block-Aligned
-
Tip Screen
- Show Tip Screen
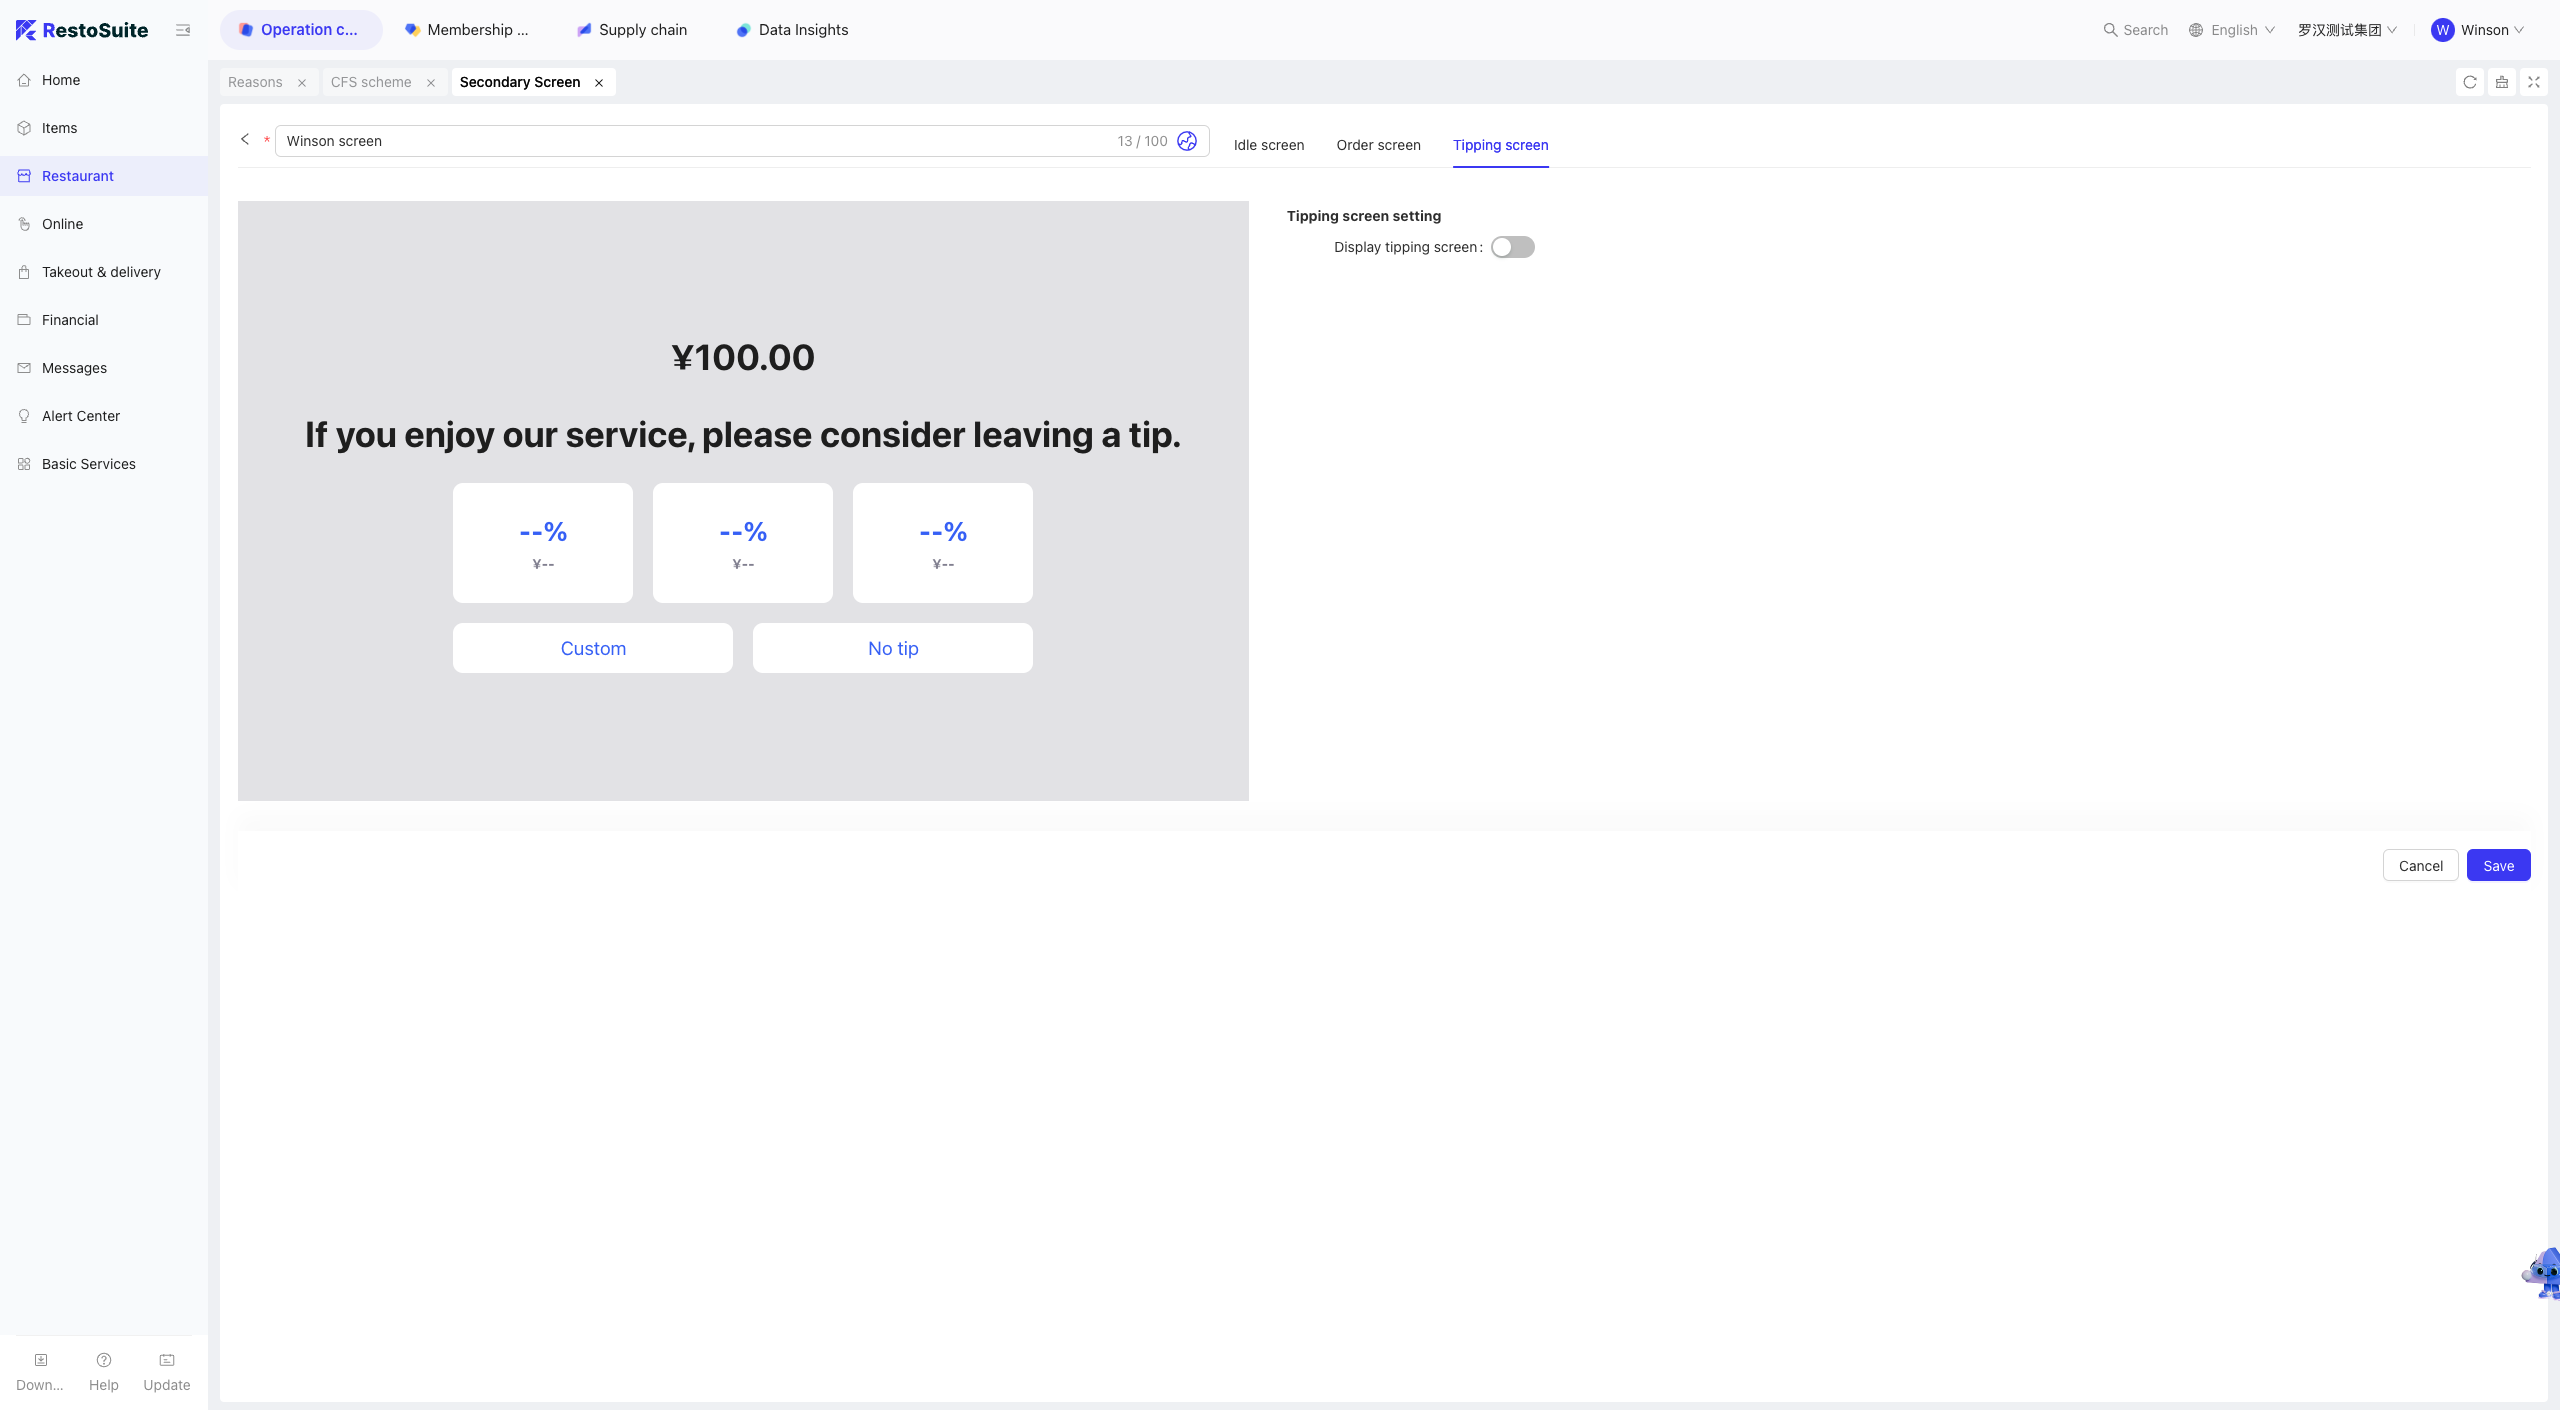
- Show Tip Screen
Step 5: Click [Save] to distribute the configuration to target stores.
3.3 Finding Your Secondary Screen Scheme
Step 1: Switch View: Select the level (Group or Brand) of the Secondary Screen Scheme to search for.
Step 2: Navigate to [Restaurant Management -> CFS Schema] and filter schemes by [Scheme Name] or [Brand].
3.4 Store-Level CFS Style
Step 1: Switch View to the Store level where the Secondary Screen Scheme will be decorated.
Step 2: Navigate to [Restaurant Management -> CFS Schema] to customize Secondary Screen Schemes distributed from the Group or Brand level.
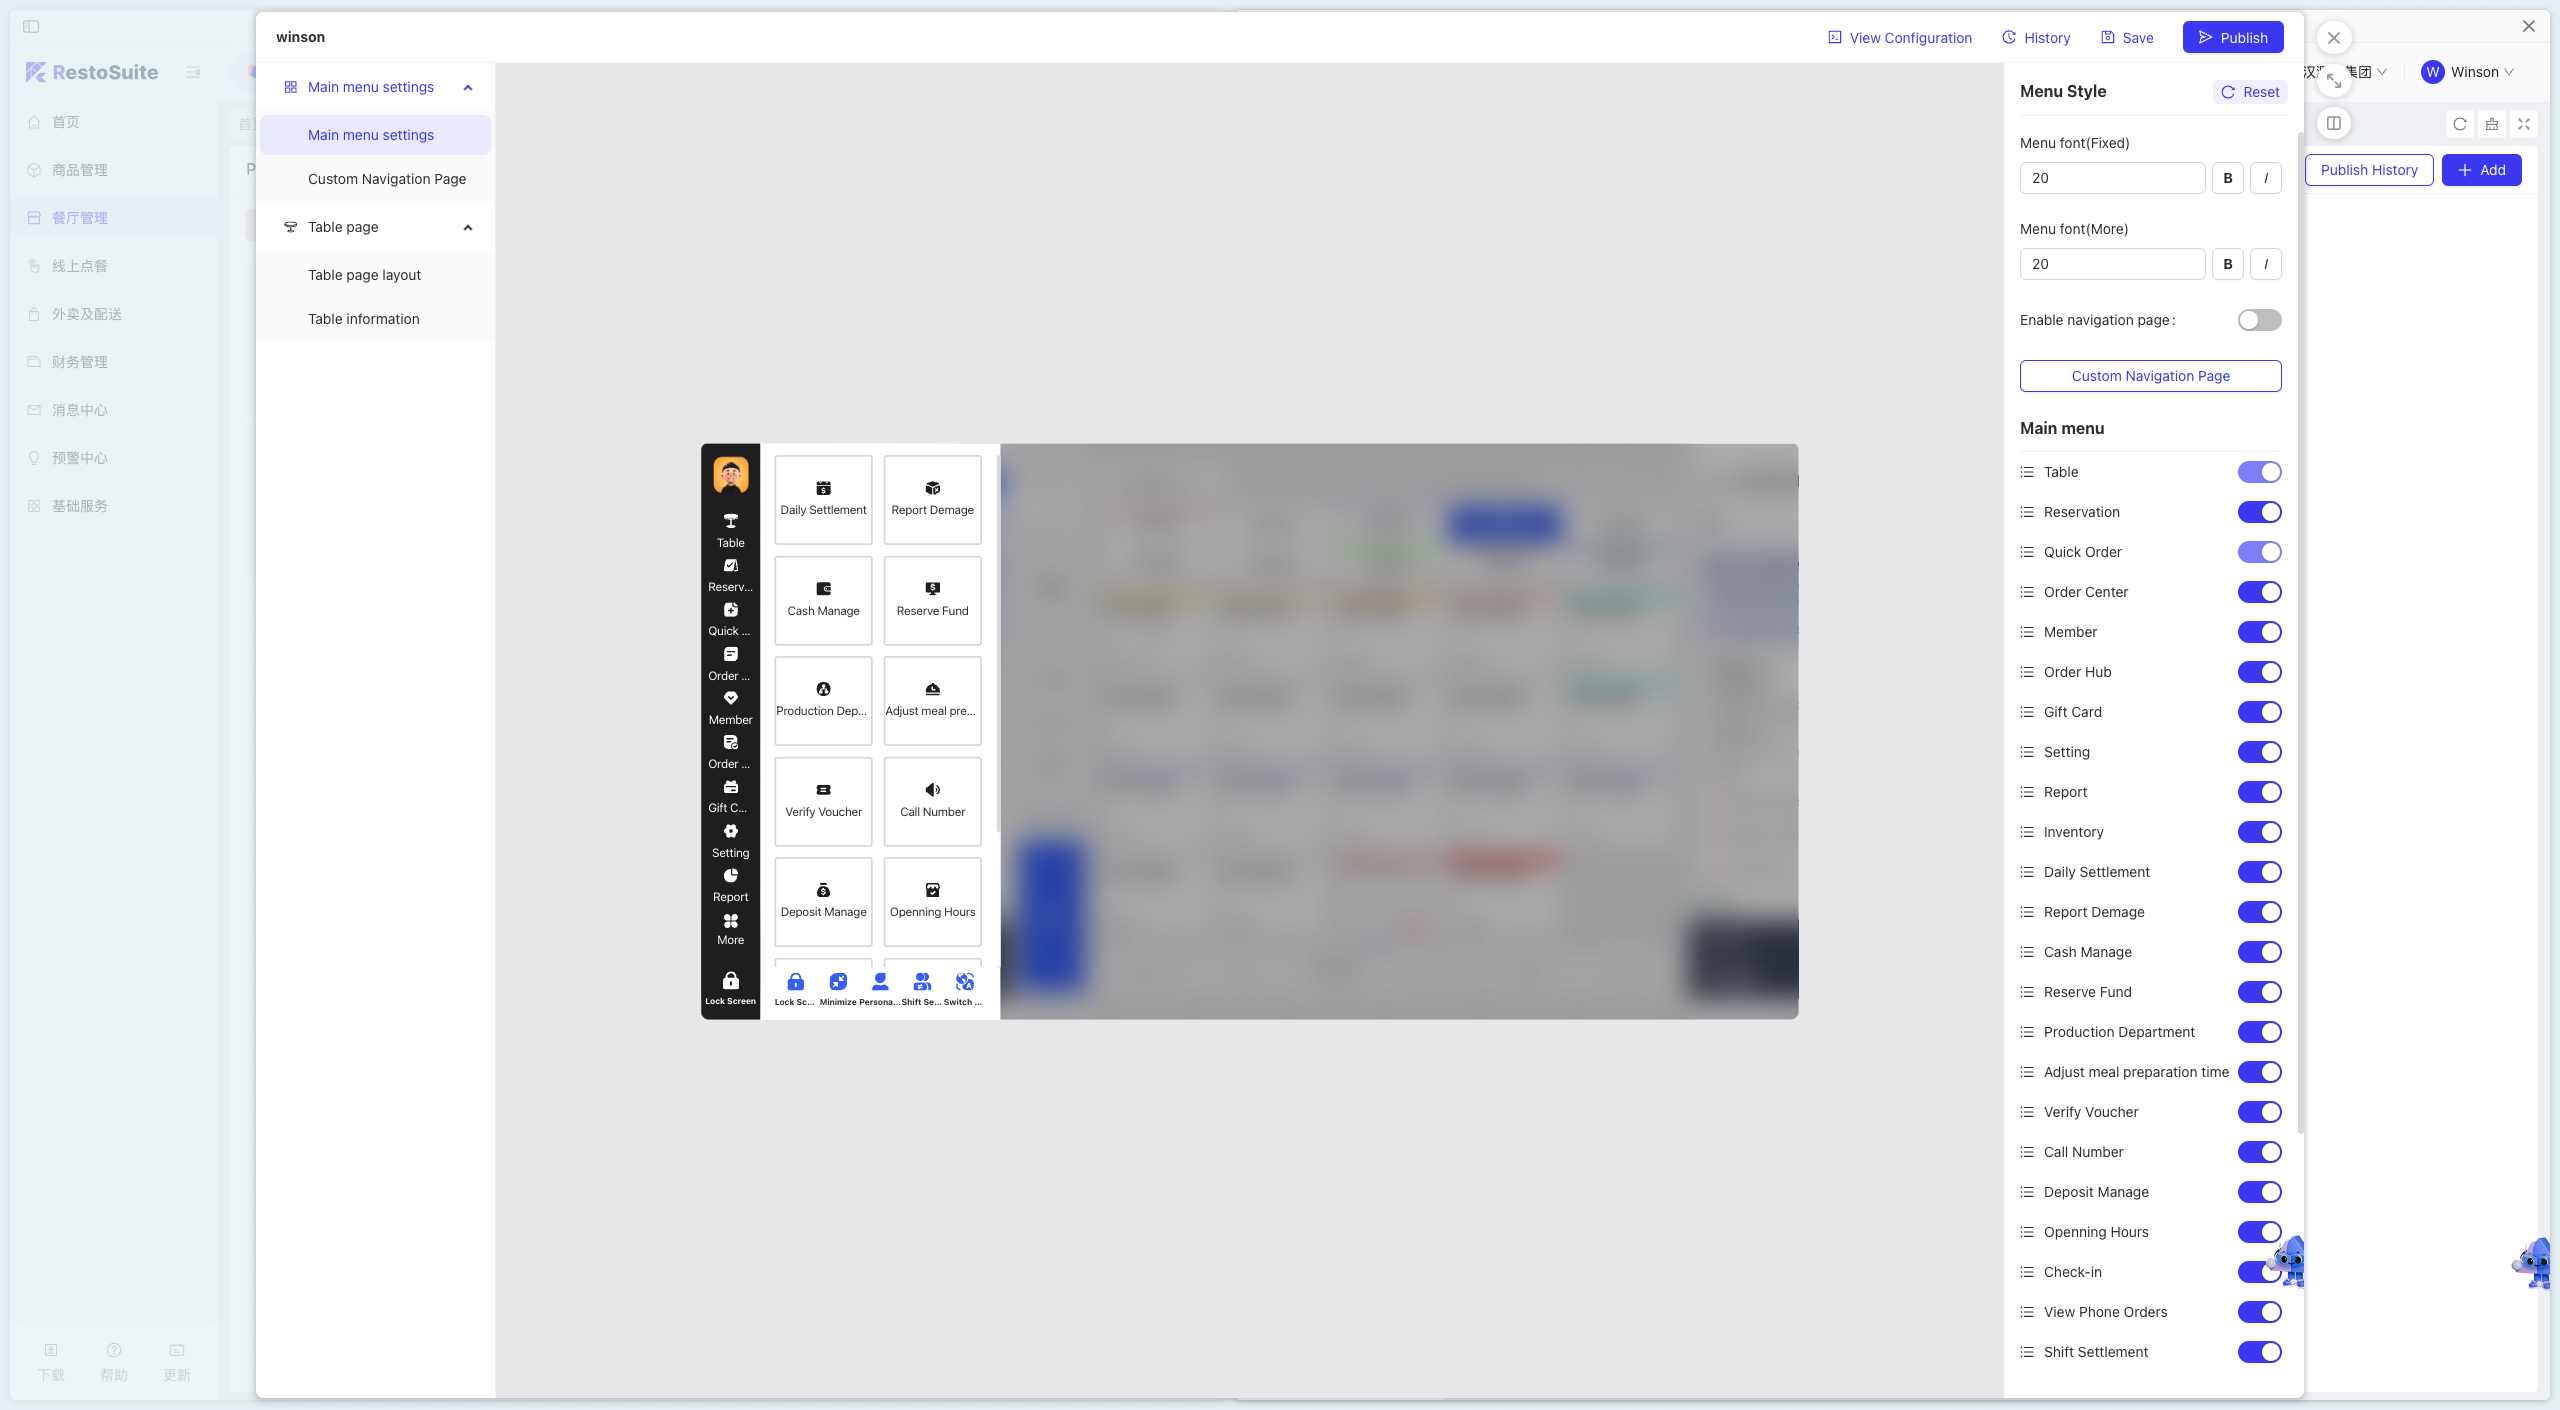
4 POS Decoration Schemes
Users can create, edit, and configure Decoration Schemes for specific brands at the Group level. The decoration configuration page supports personalized modifications to the layout and style of the navigation bar, table page, and ordering page.
4.1 Adding a New POS Decoration Scheme
Step 1: Switch View: Select the level (Group or Brand) where you want to add the POS Decoration Scheme.
Step 2: Navigate to [Restaurant Management -> POS Decoration Scheme] and click to add a new scheme.
Step 3: Enter the [Scheme Name], [Brand], and [Remarks], then click [Confirm].
Step 4: Click [Decorate] to customize the layout and style of the POS navigation bar and table page in the pop-up window.

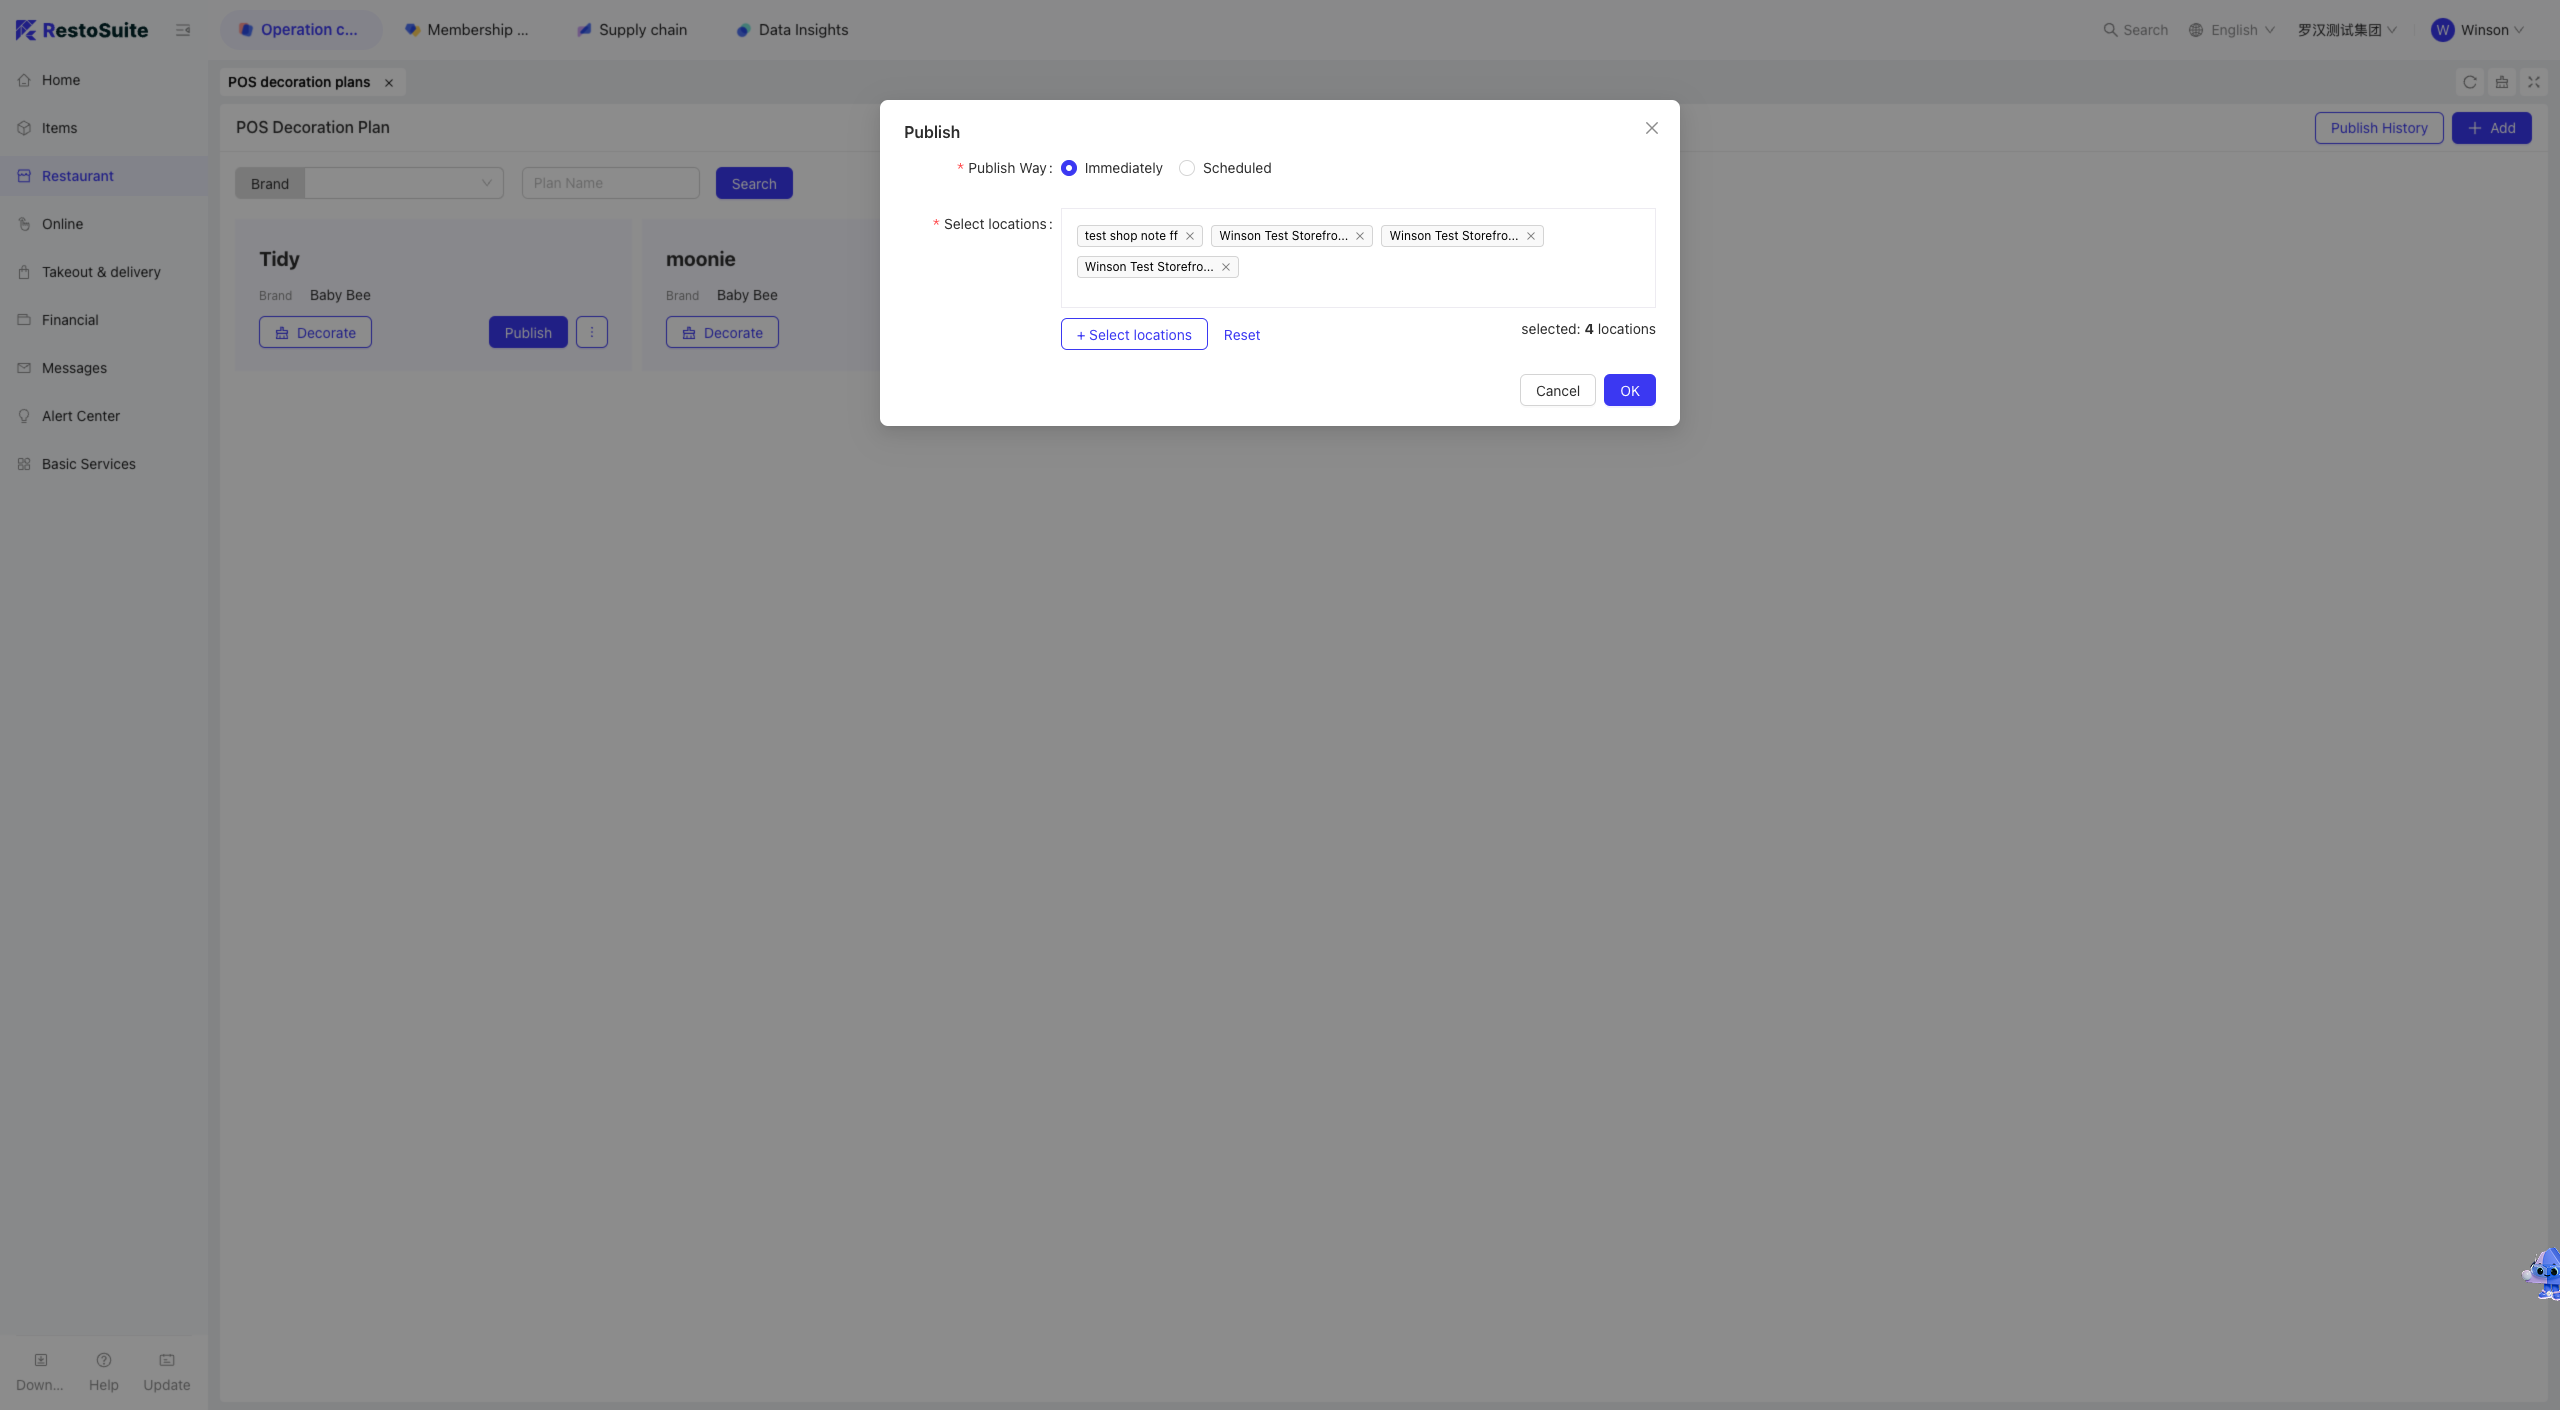
4.2 Publishing a POS Decoration Scheme
Step 1: Switch View to the level where the Decoration Scheme resides.
Step 2: Navigate to [Restaurant Management -> POS Decoration Scheme] and click [Publish] to deploy the scheme to specific stores.
Step 3: Select the [Publishing Time] and target [Stores], then click Confirm to complete the distribution.
4.3 FAQs
Q: No effect on POS after publishing the POS Decoration Scheme. Possible solutions:
- Confirm the scheme is in “Published” status (draft status does not take effect);
- Restart the POS terminal to load the latest configuration;
- Check scheme priority (store-level schemes override group-level templates).
5 Service Area (Store Level)
Stores can add, edit, delete, and configure Service Areas, set corresponding table layouts, and publish configurations to the POS system.
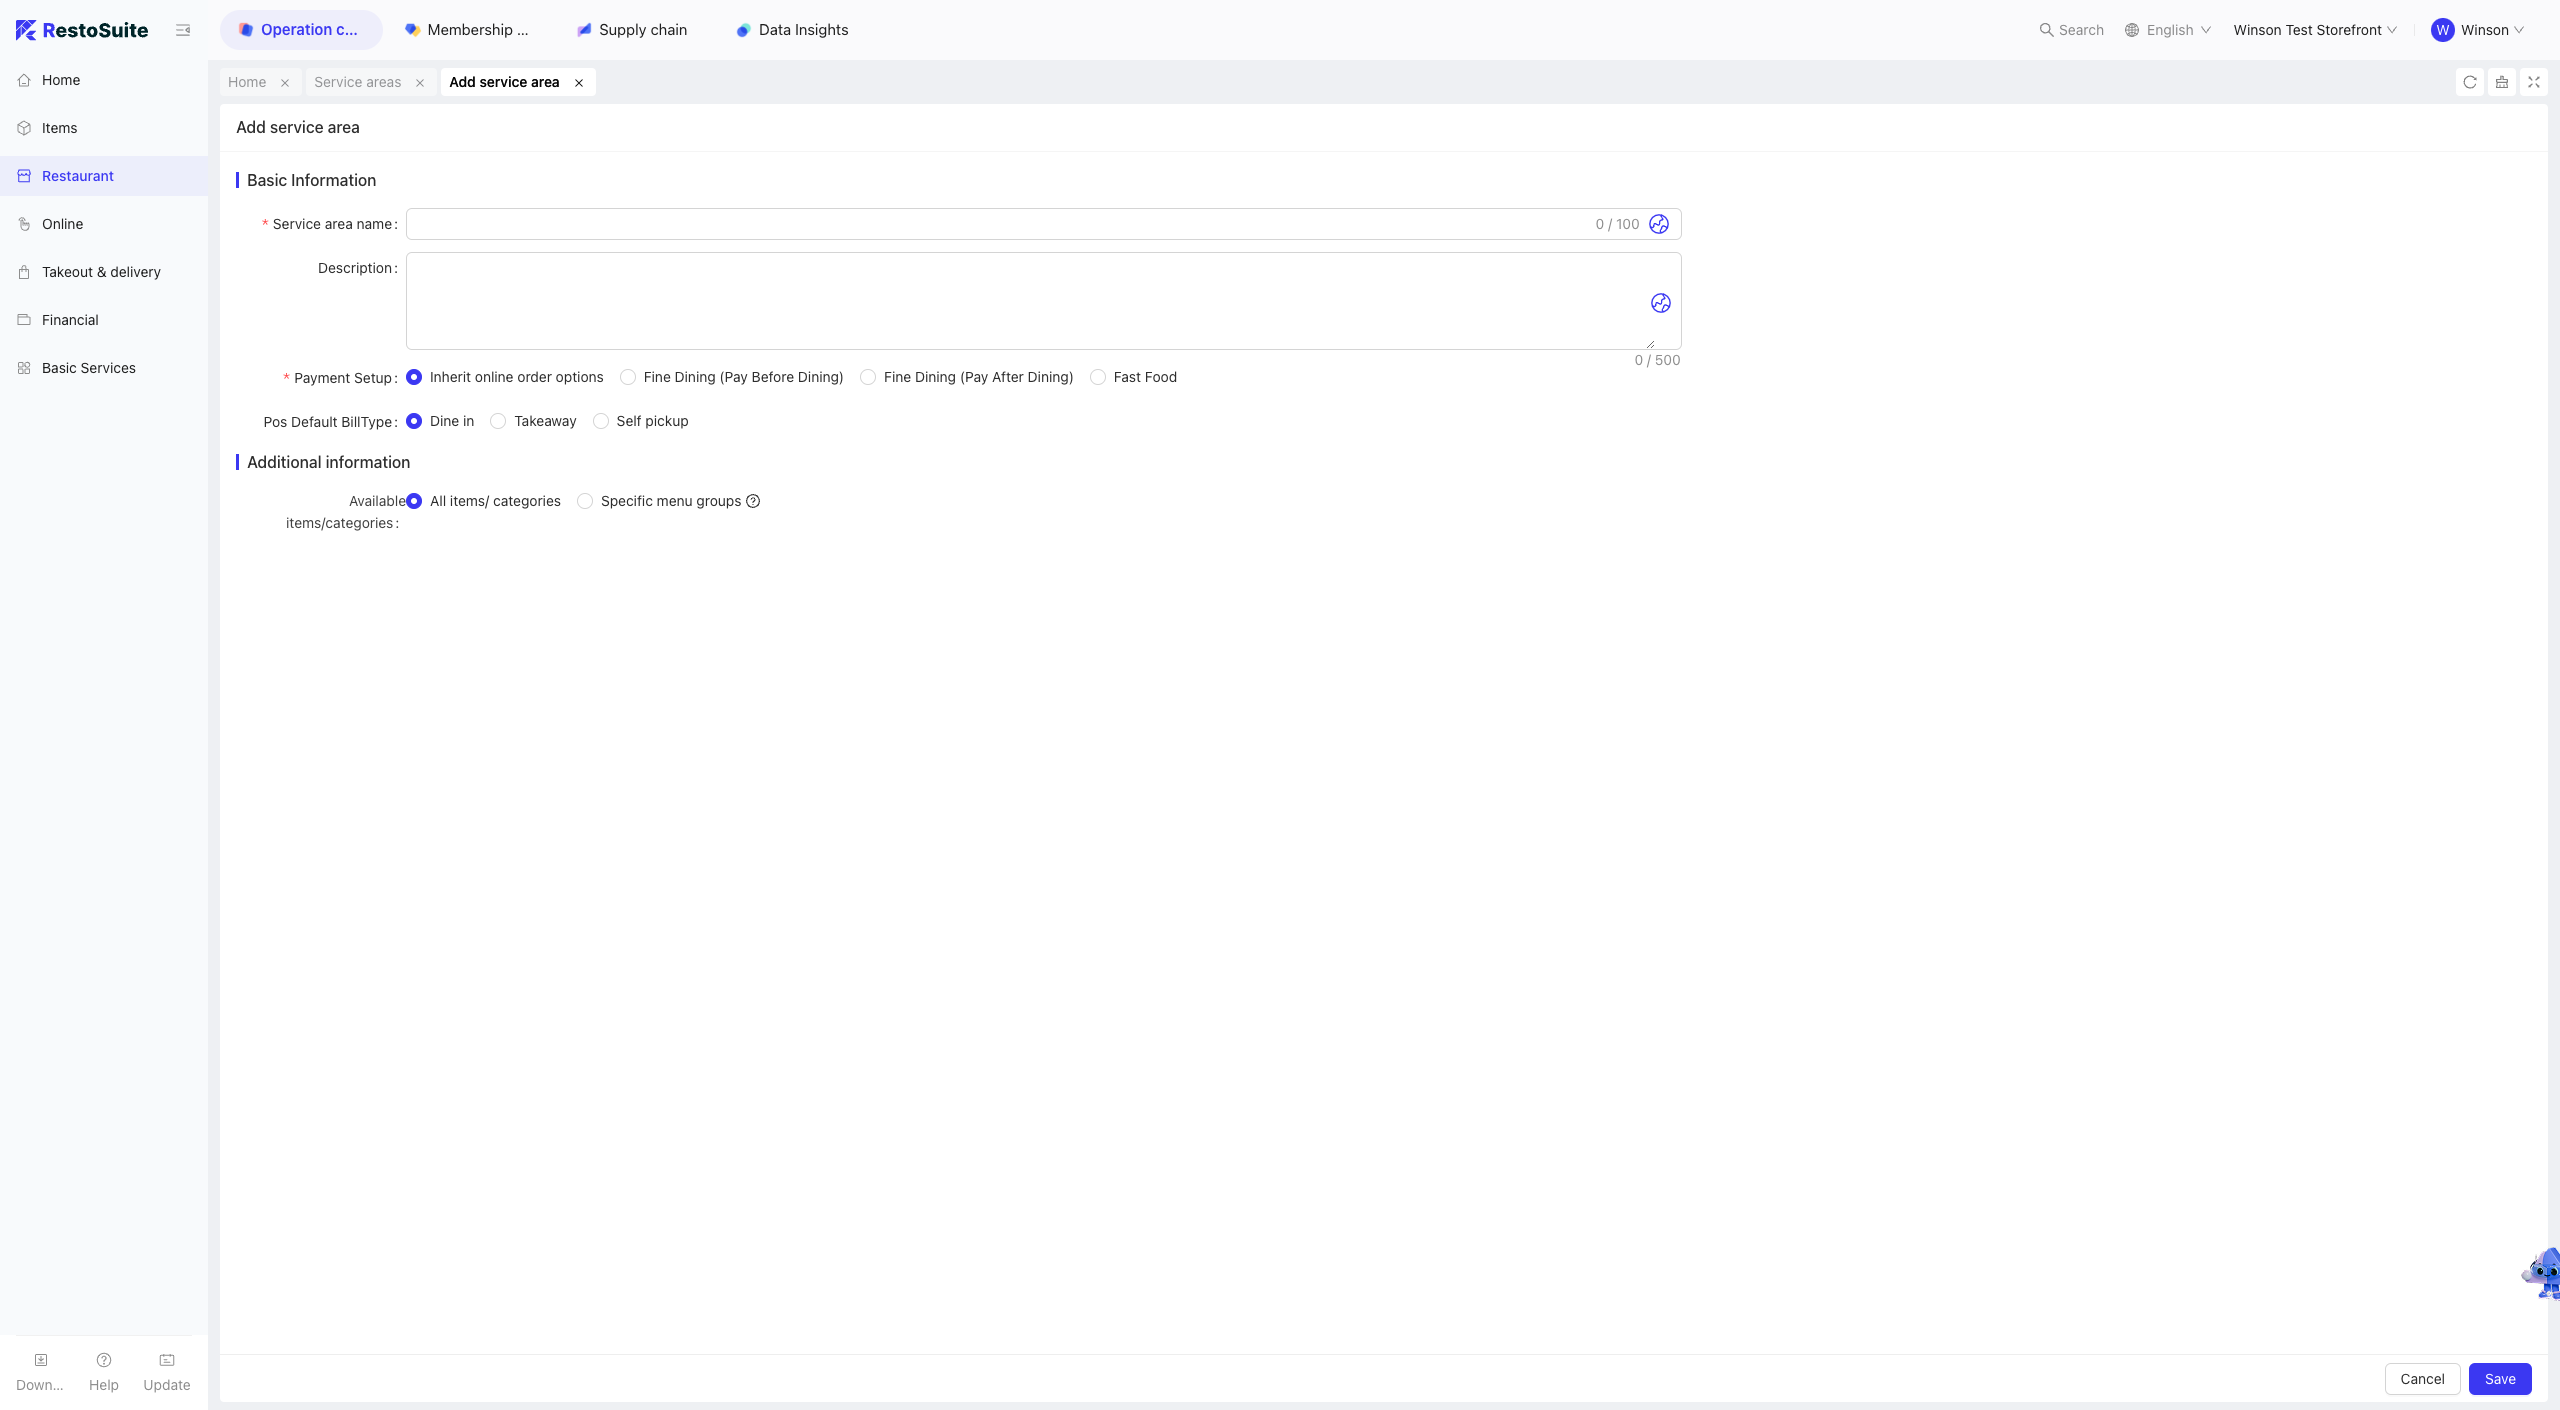
5.1 Adding a POS Service Area
Step 1: Switch View to the target Store.
Step 2: Navigate to [Restaurant Management -> Service Area] and click to add a new Service Area.
Step 3: Fill in the form:
- Service Area: Name of the service area.
- Description: Brief description of the service area.
- Online Dine-In Order Settings: Inherit Online Order Settings, Table Service (Pre-Meal Payment), Table Service (Post-Meal Payment), Fast Food.
- Default POS Table Opening Type: Default business type when opening a table in this area via POS.
- Service Charge: Service charge applicable to this area.
- Product Scope: Products available in this area.
Step 4: Click [Save] after completing the form.
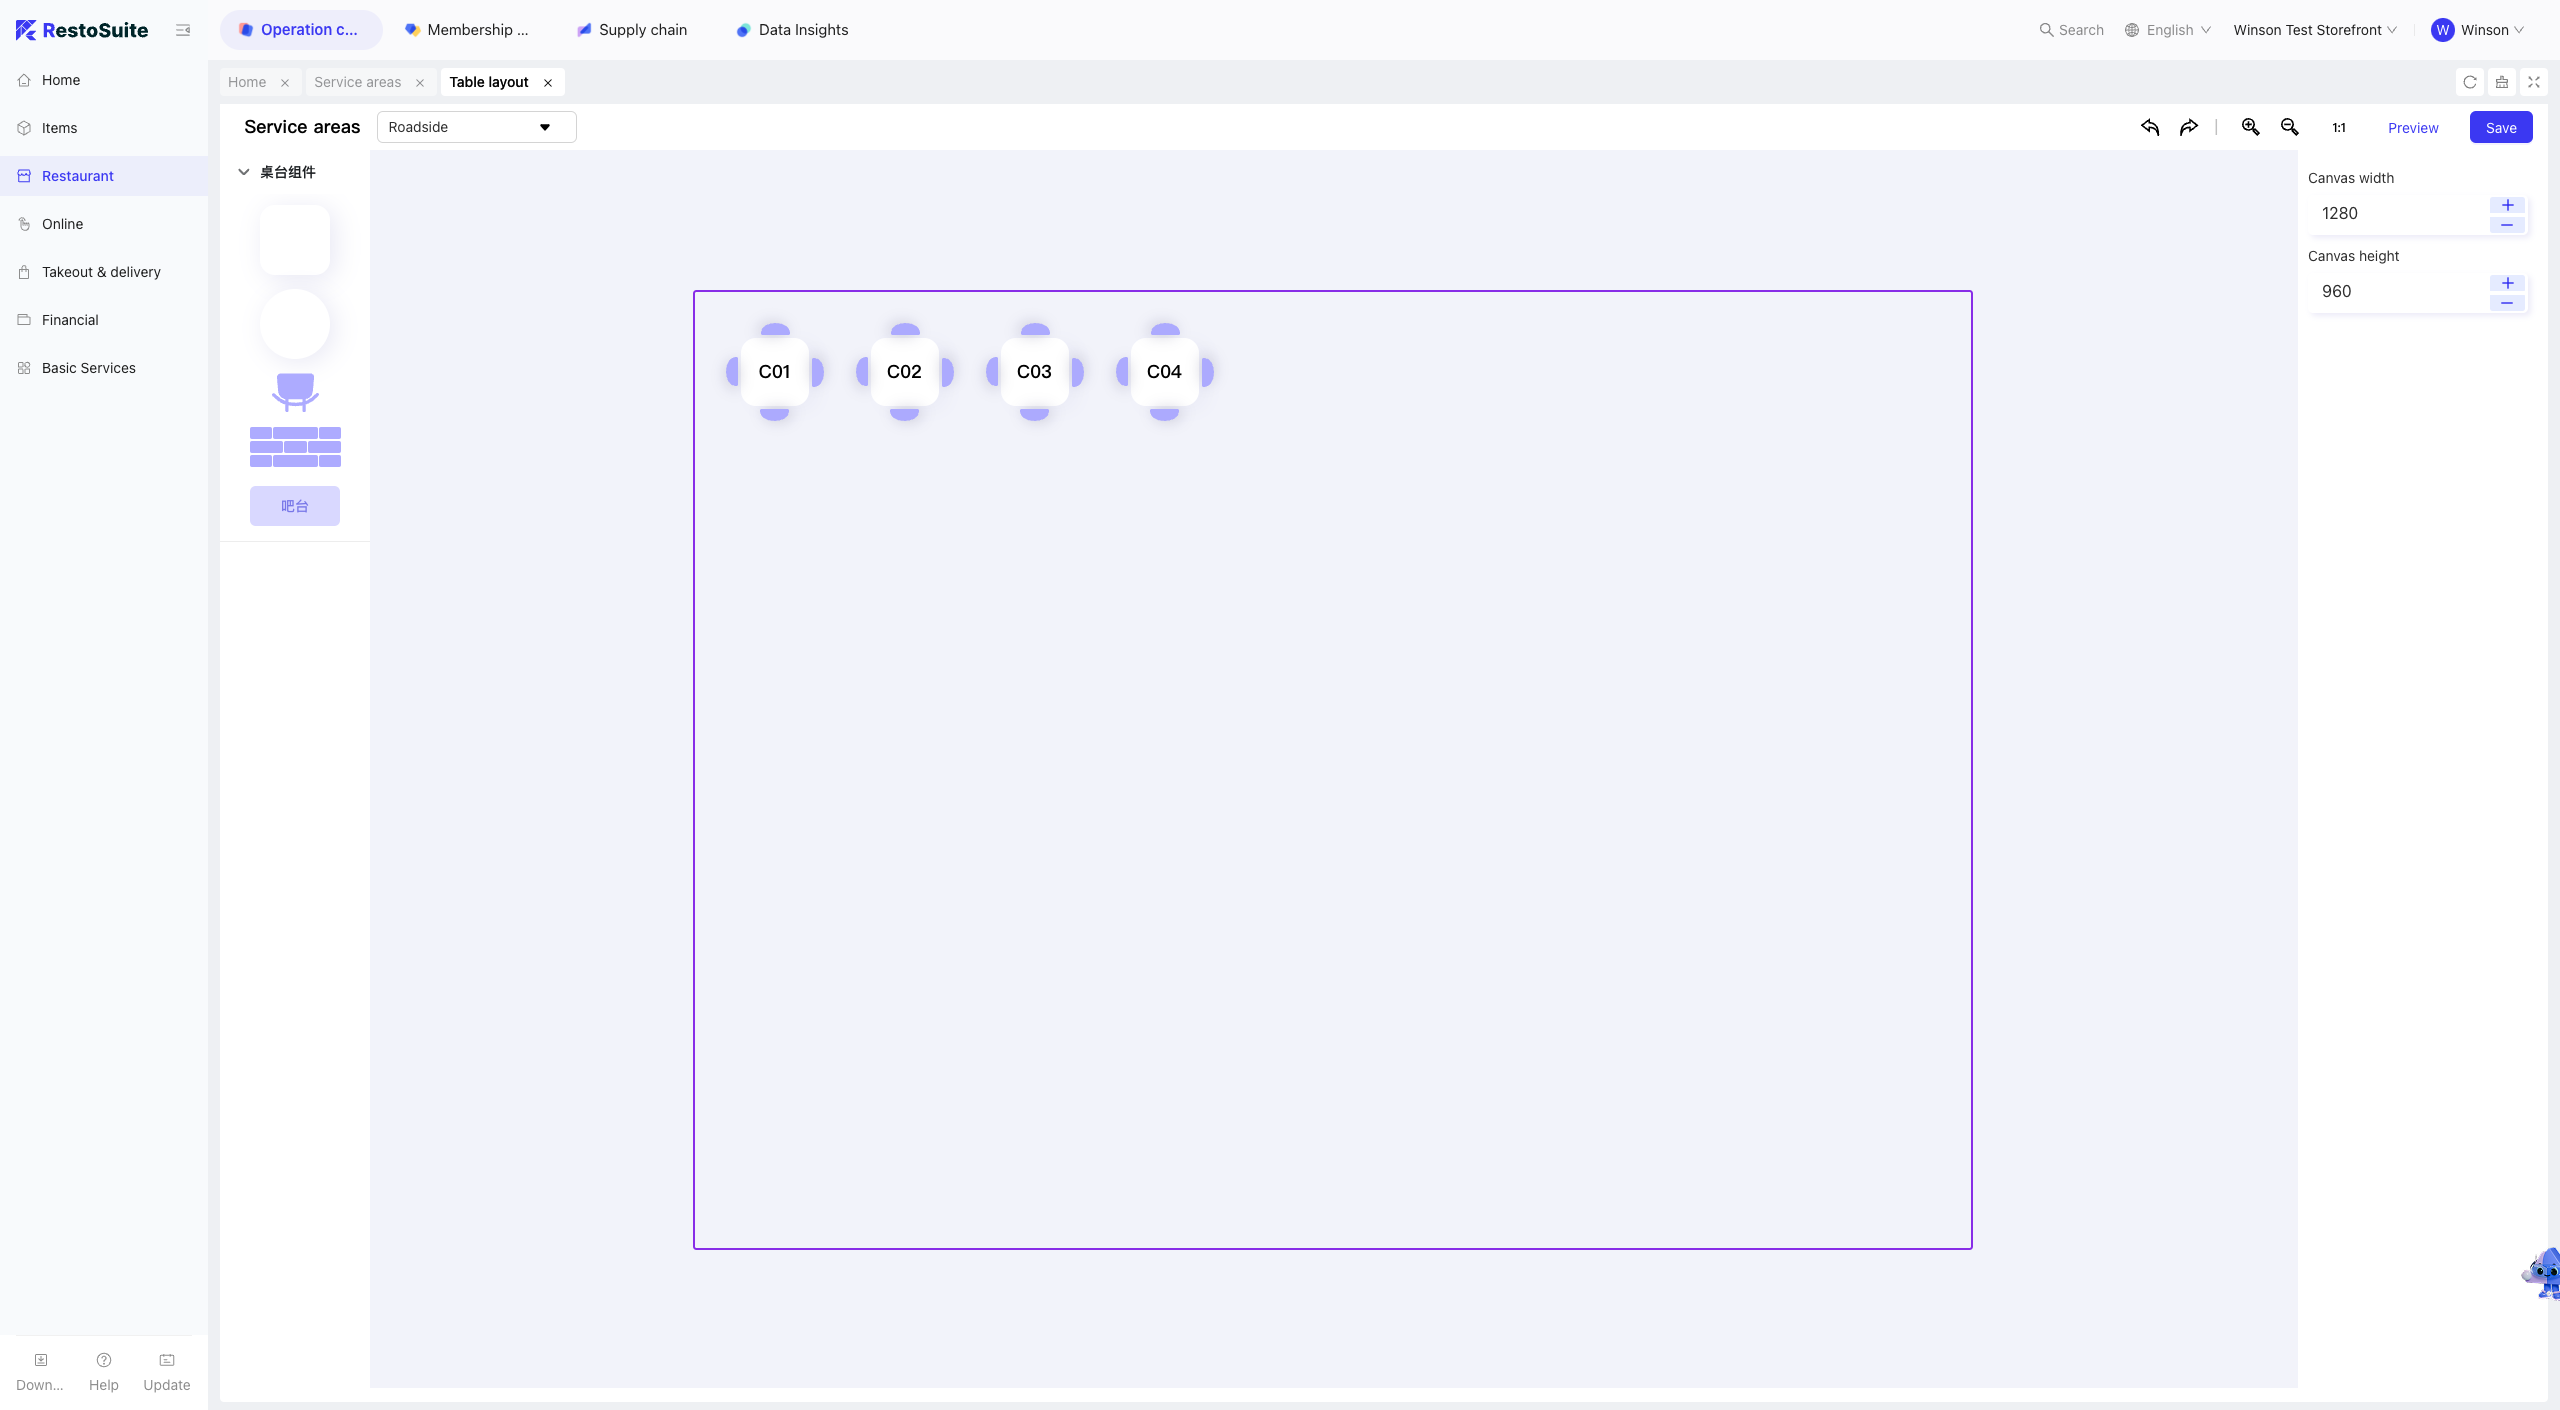
5.2 Service Area Table Layout
Step 1: Select the target Service Area and click [Table Layout] in the operation column.
Step 2: On the [Table Layout] page, drag and drop components such as round tables, square tables, chairs, bars, and walls to configure the service area.
Step 3: Click [Save] after completing the configuration.
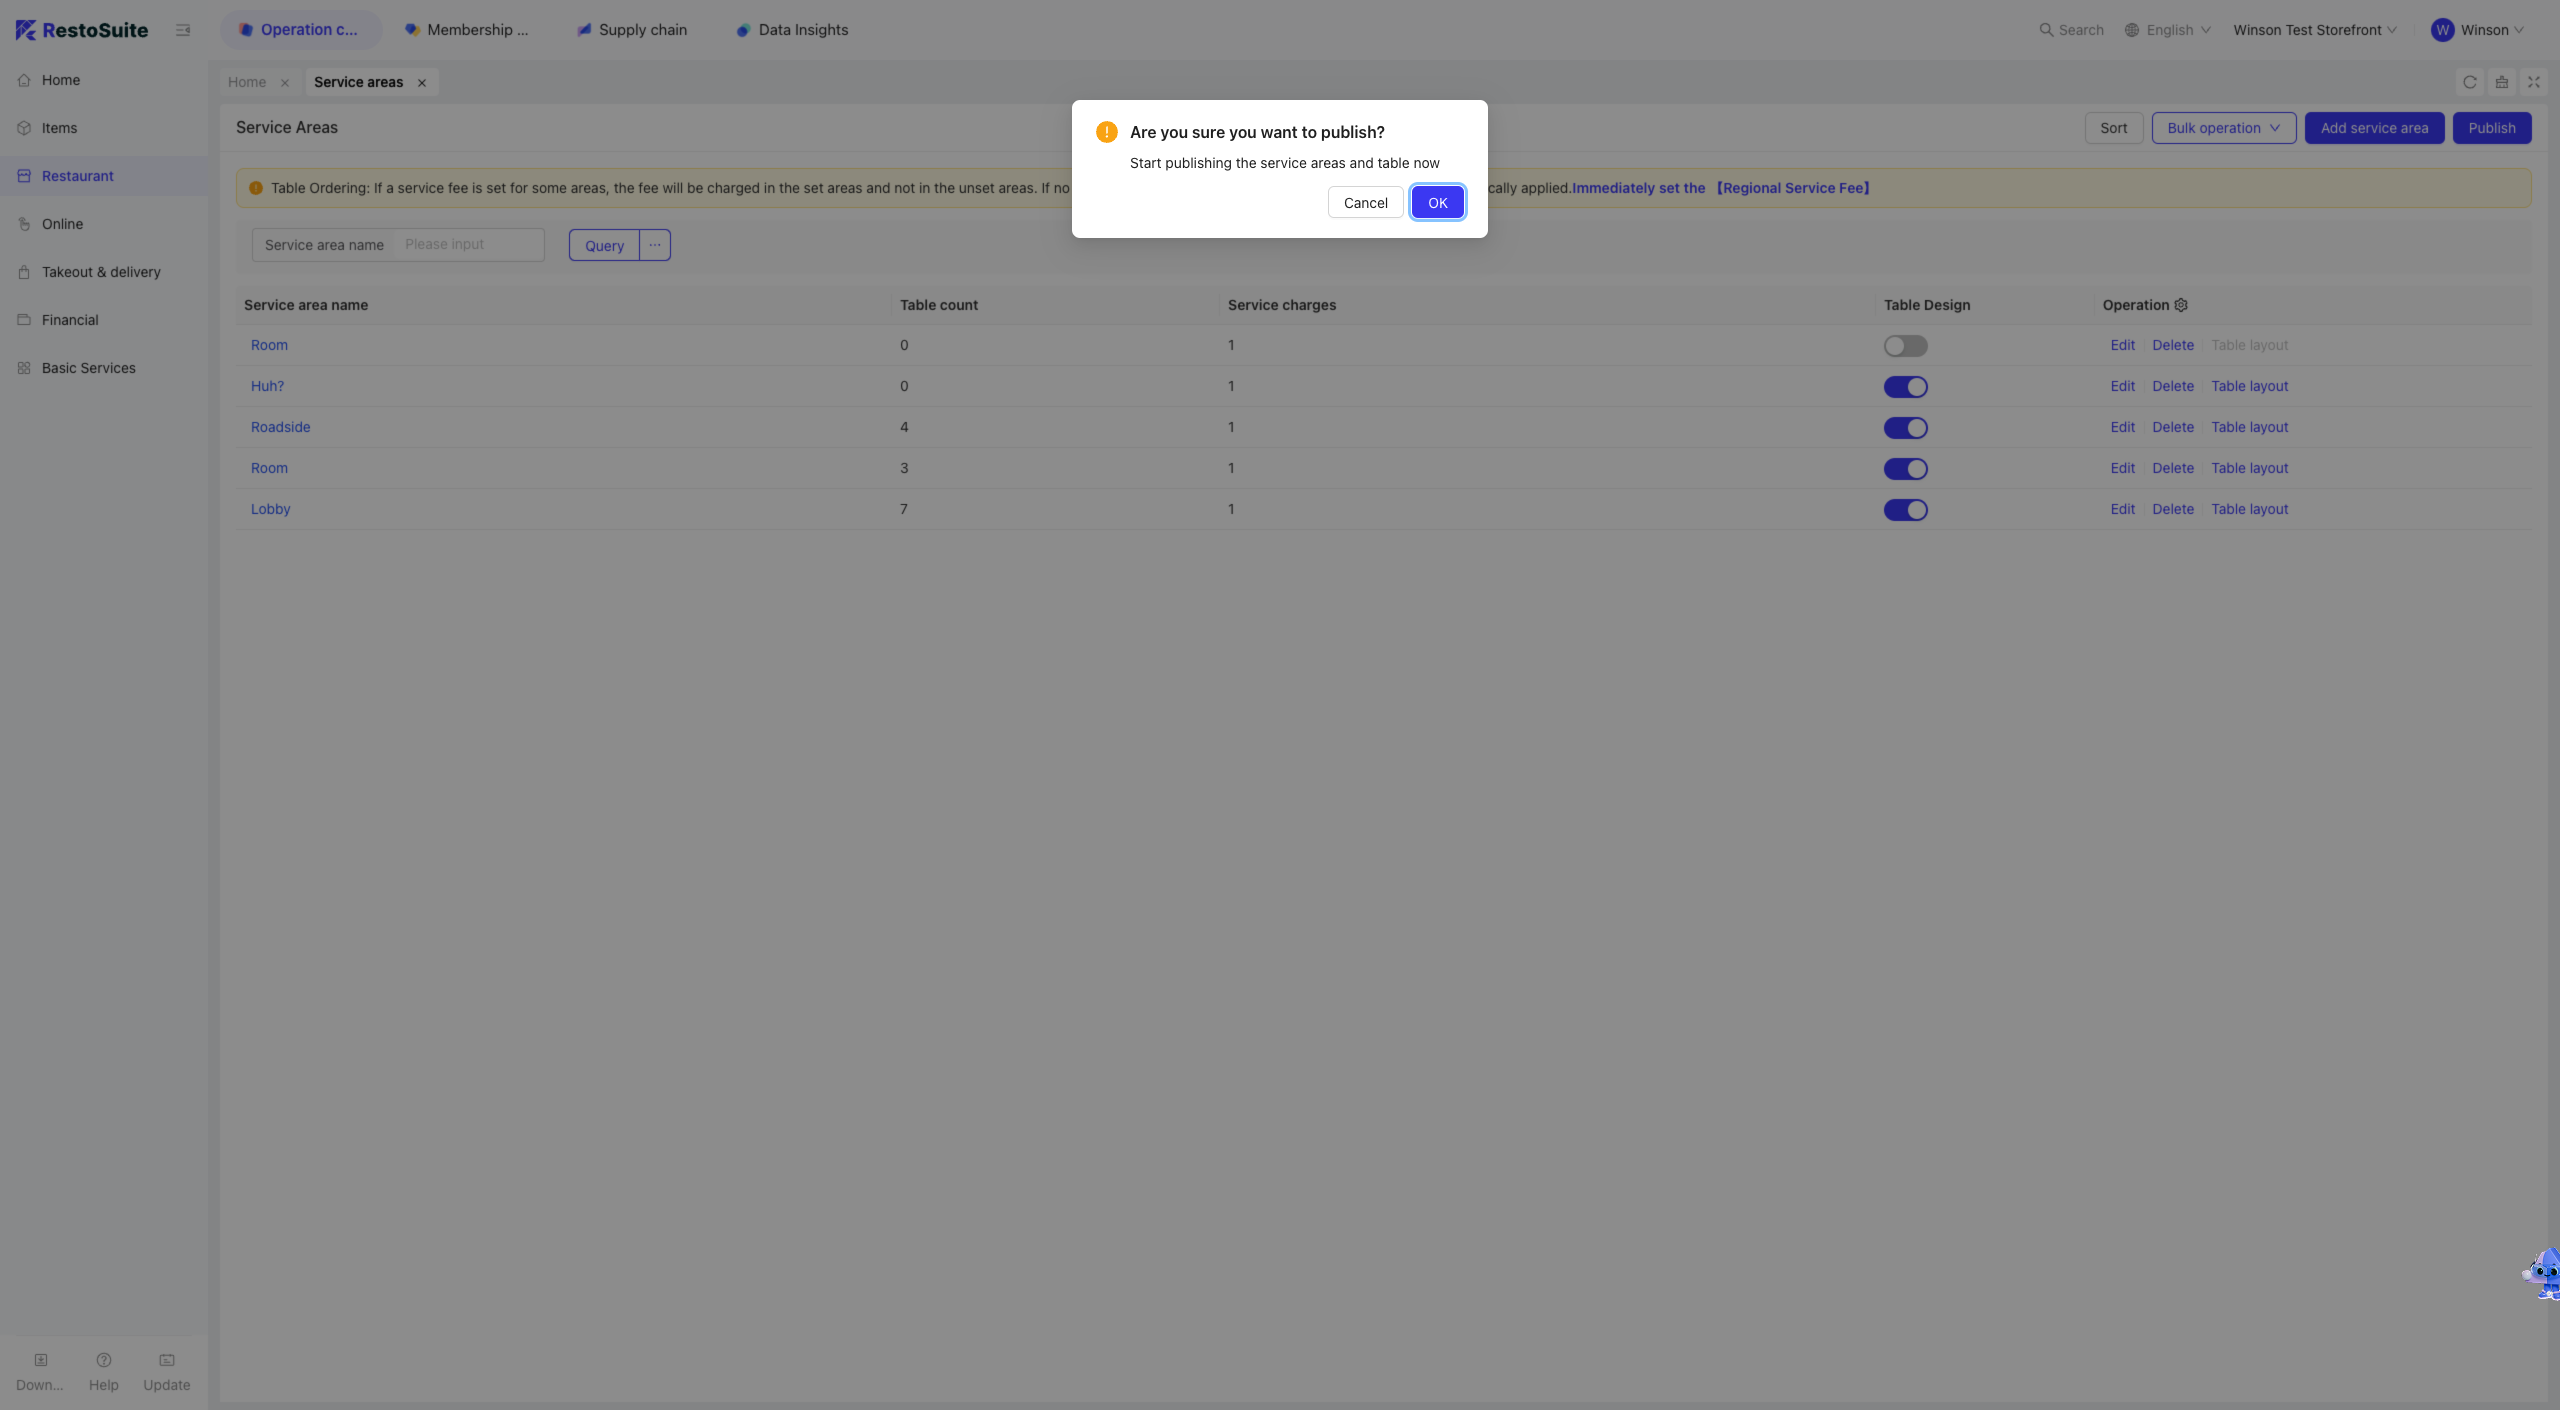
5.3 Publishing the Service Area
Step 1: After configuring the [Service Area] and [Table Layout], click [Publish].
Step 2: Confirm to make the configured Service Area and Table Layout visible on the POS system.
5.4 FAQs
Q: How to configure a Service Area to only display dishes from Menu A?
A:
Step 1: Locate the target Service Area (if existing) and click [Edit].
Step 2: On the [Edit Service Area] page, set [Product Scope] to [By Menu Group], select Menu A, and save.
Step 3: Click [Publish] to apply the configuration to the POS system.
6 Table Management (Store Level)
Stores can add, edit, delete, and perform batch operations on tables, publish configurations to the POS system, and download table QR codes.
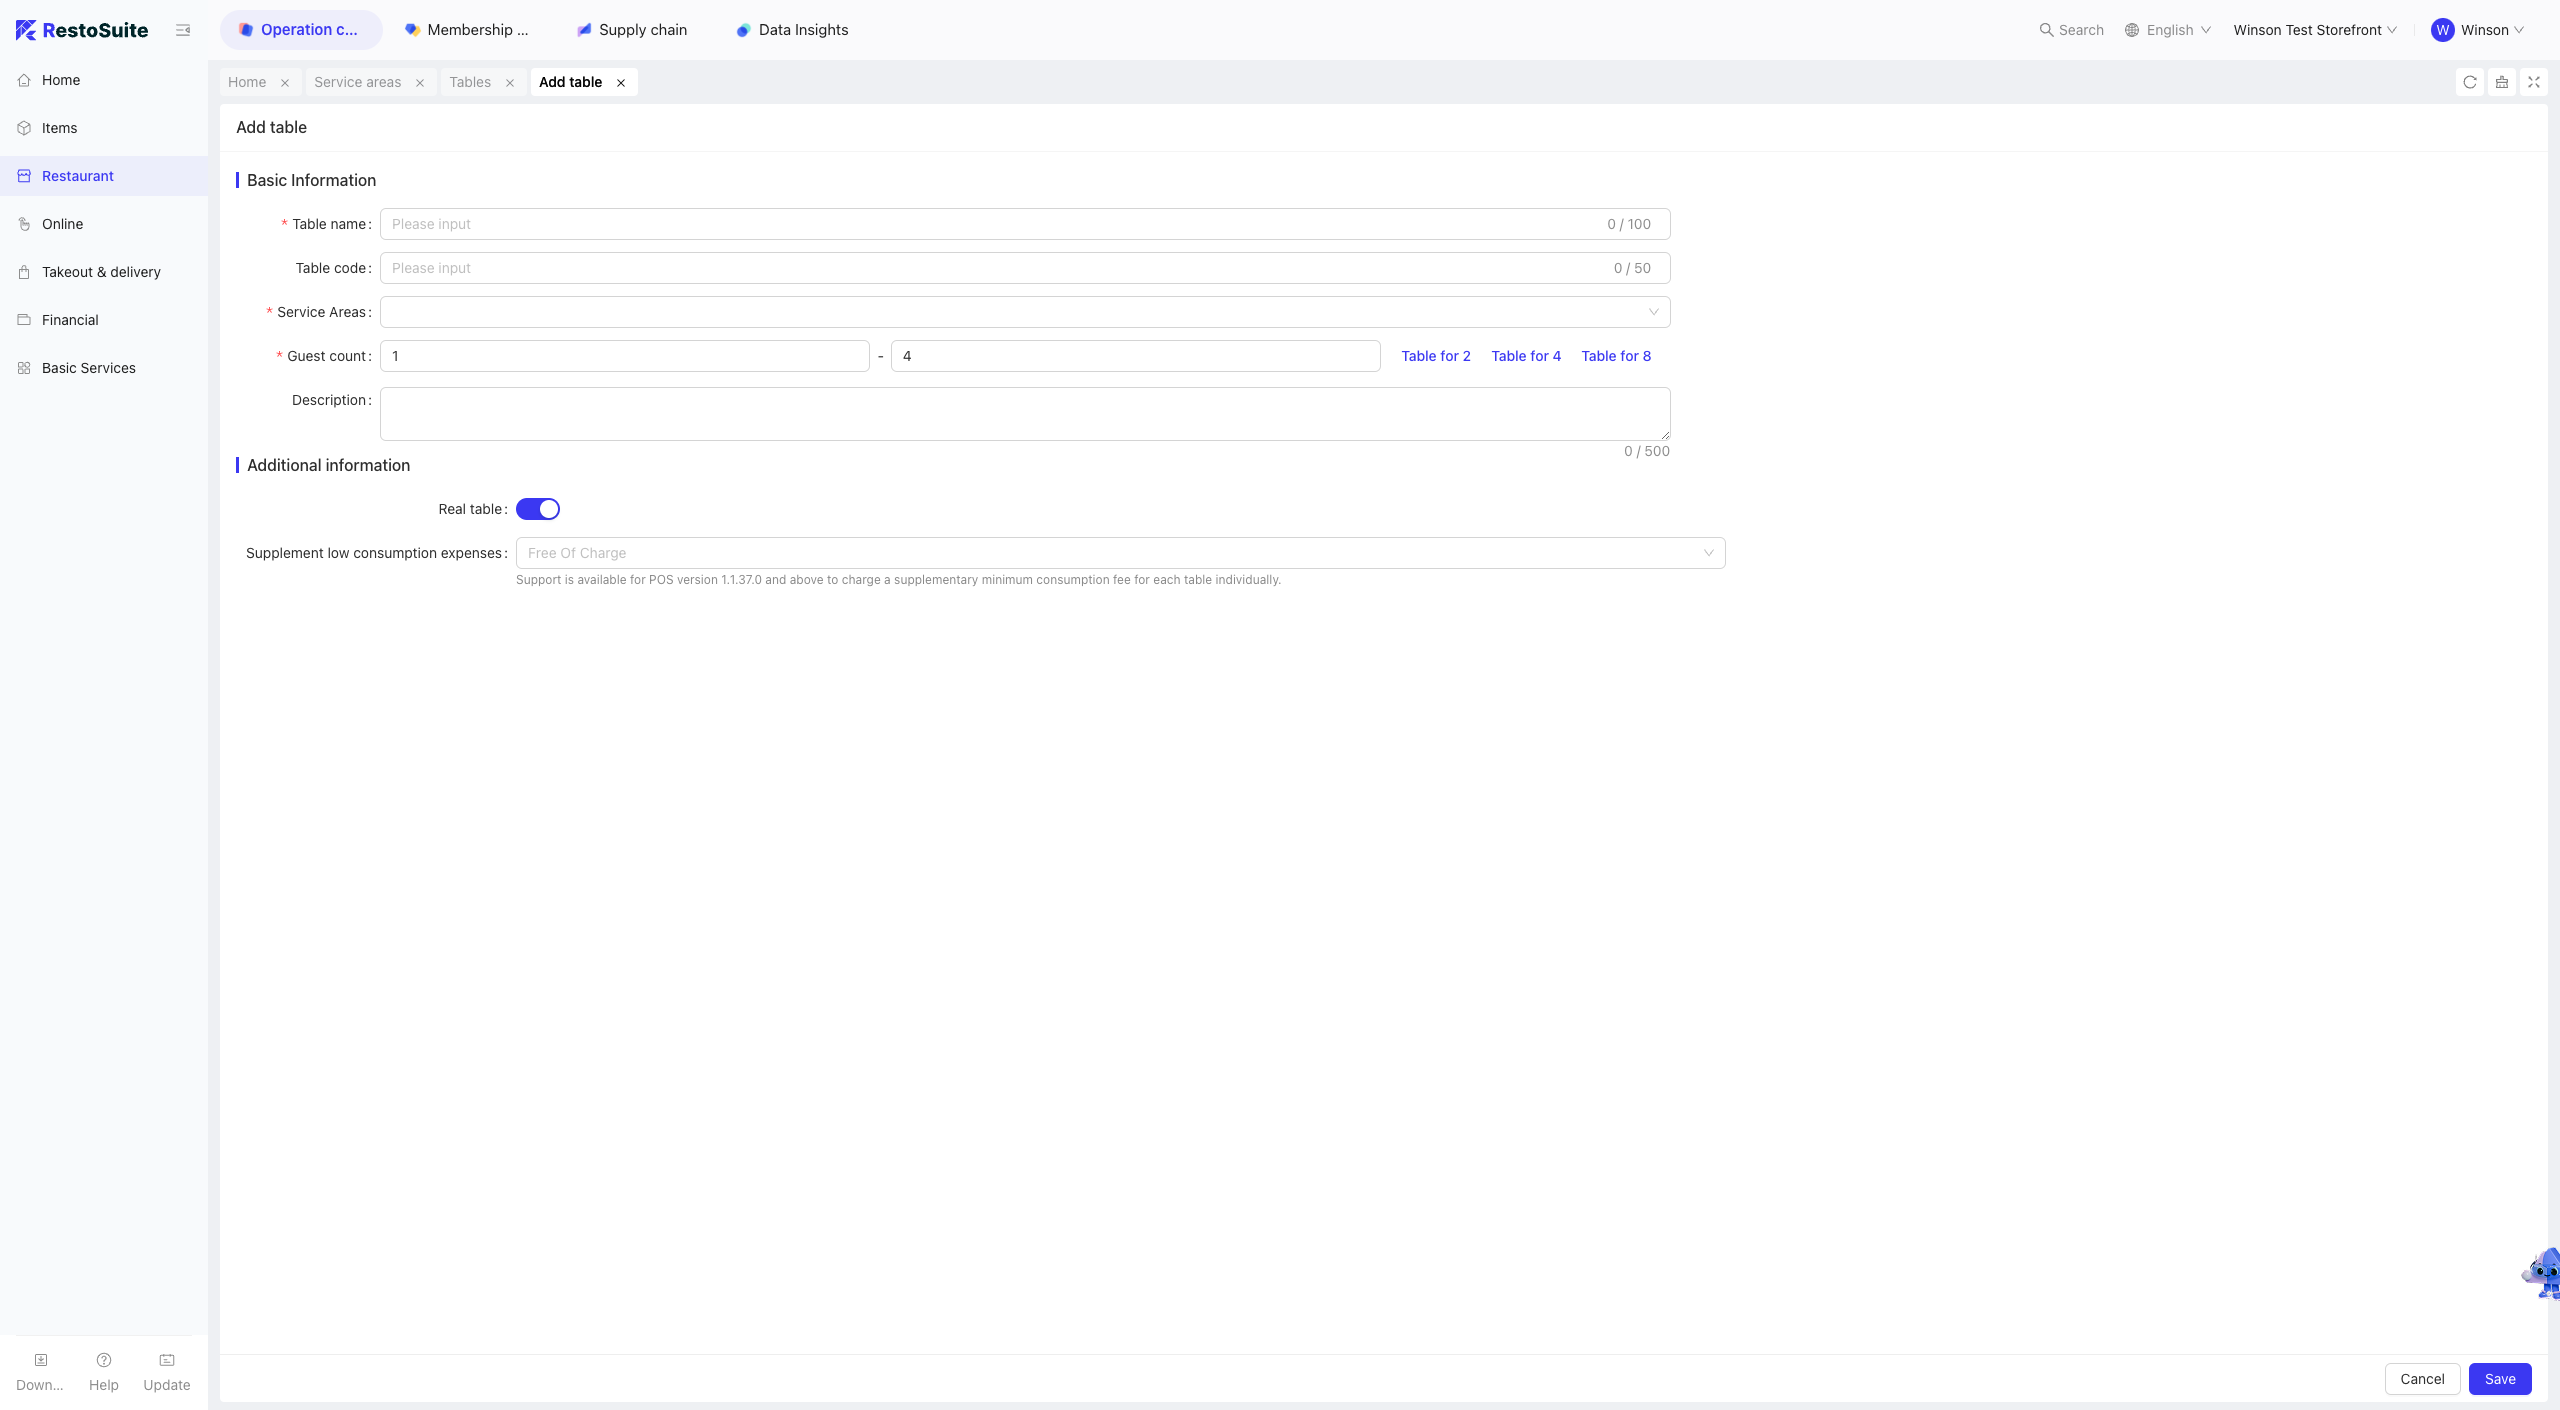
6.1 Adding a New Table
Step 1: Switch View to the target Store.
Step 2: Navigate to [Restaurant Management -> Tables] and click [Add Table] to open the form.
Step 3: Fill in the form:
- Table Name: Name of the table.
- Table Code: Unique identifier for distinguishing tables with the same name.
- Service Area: Service area to which the table belongs.
- Capacity: Maximum number of diners.
- Description: Brief description of the table.
- Physical Table: Mark whether the table is a physical table.
- Minimum Spend: Minimum consumption requirement for the table (supported in POS version 1.1.37.0 and above, enabling separate minimum spend charges per table).
Step 4: Click [Save] after completing the form.
6.2 Batch Operations
Supports batch adding, editing, deleting, importing, exporting tables, and viewing import history.
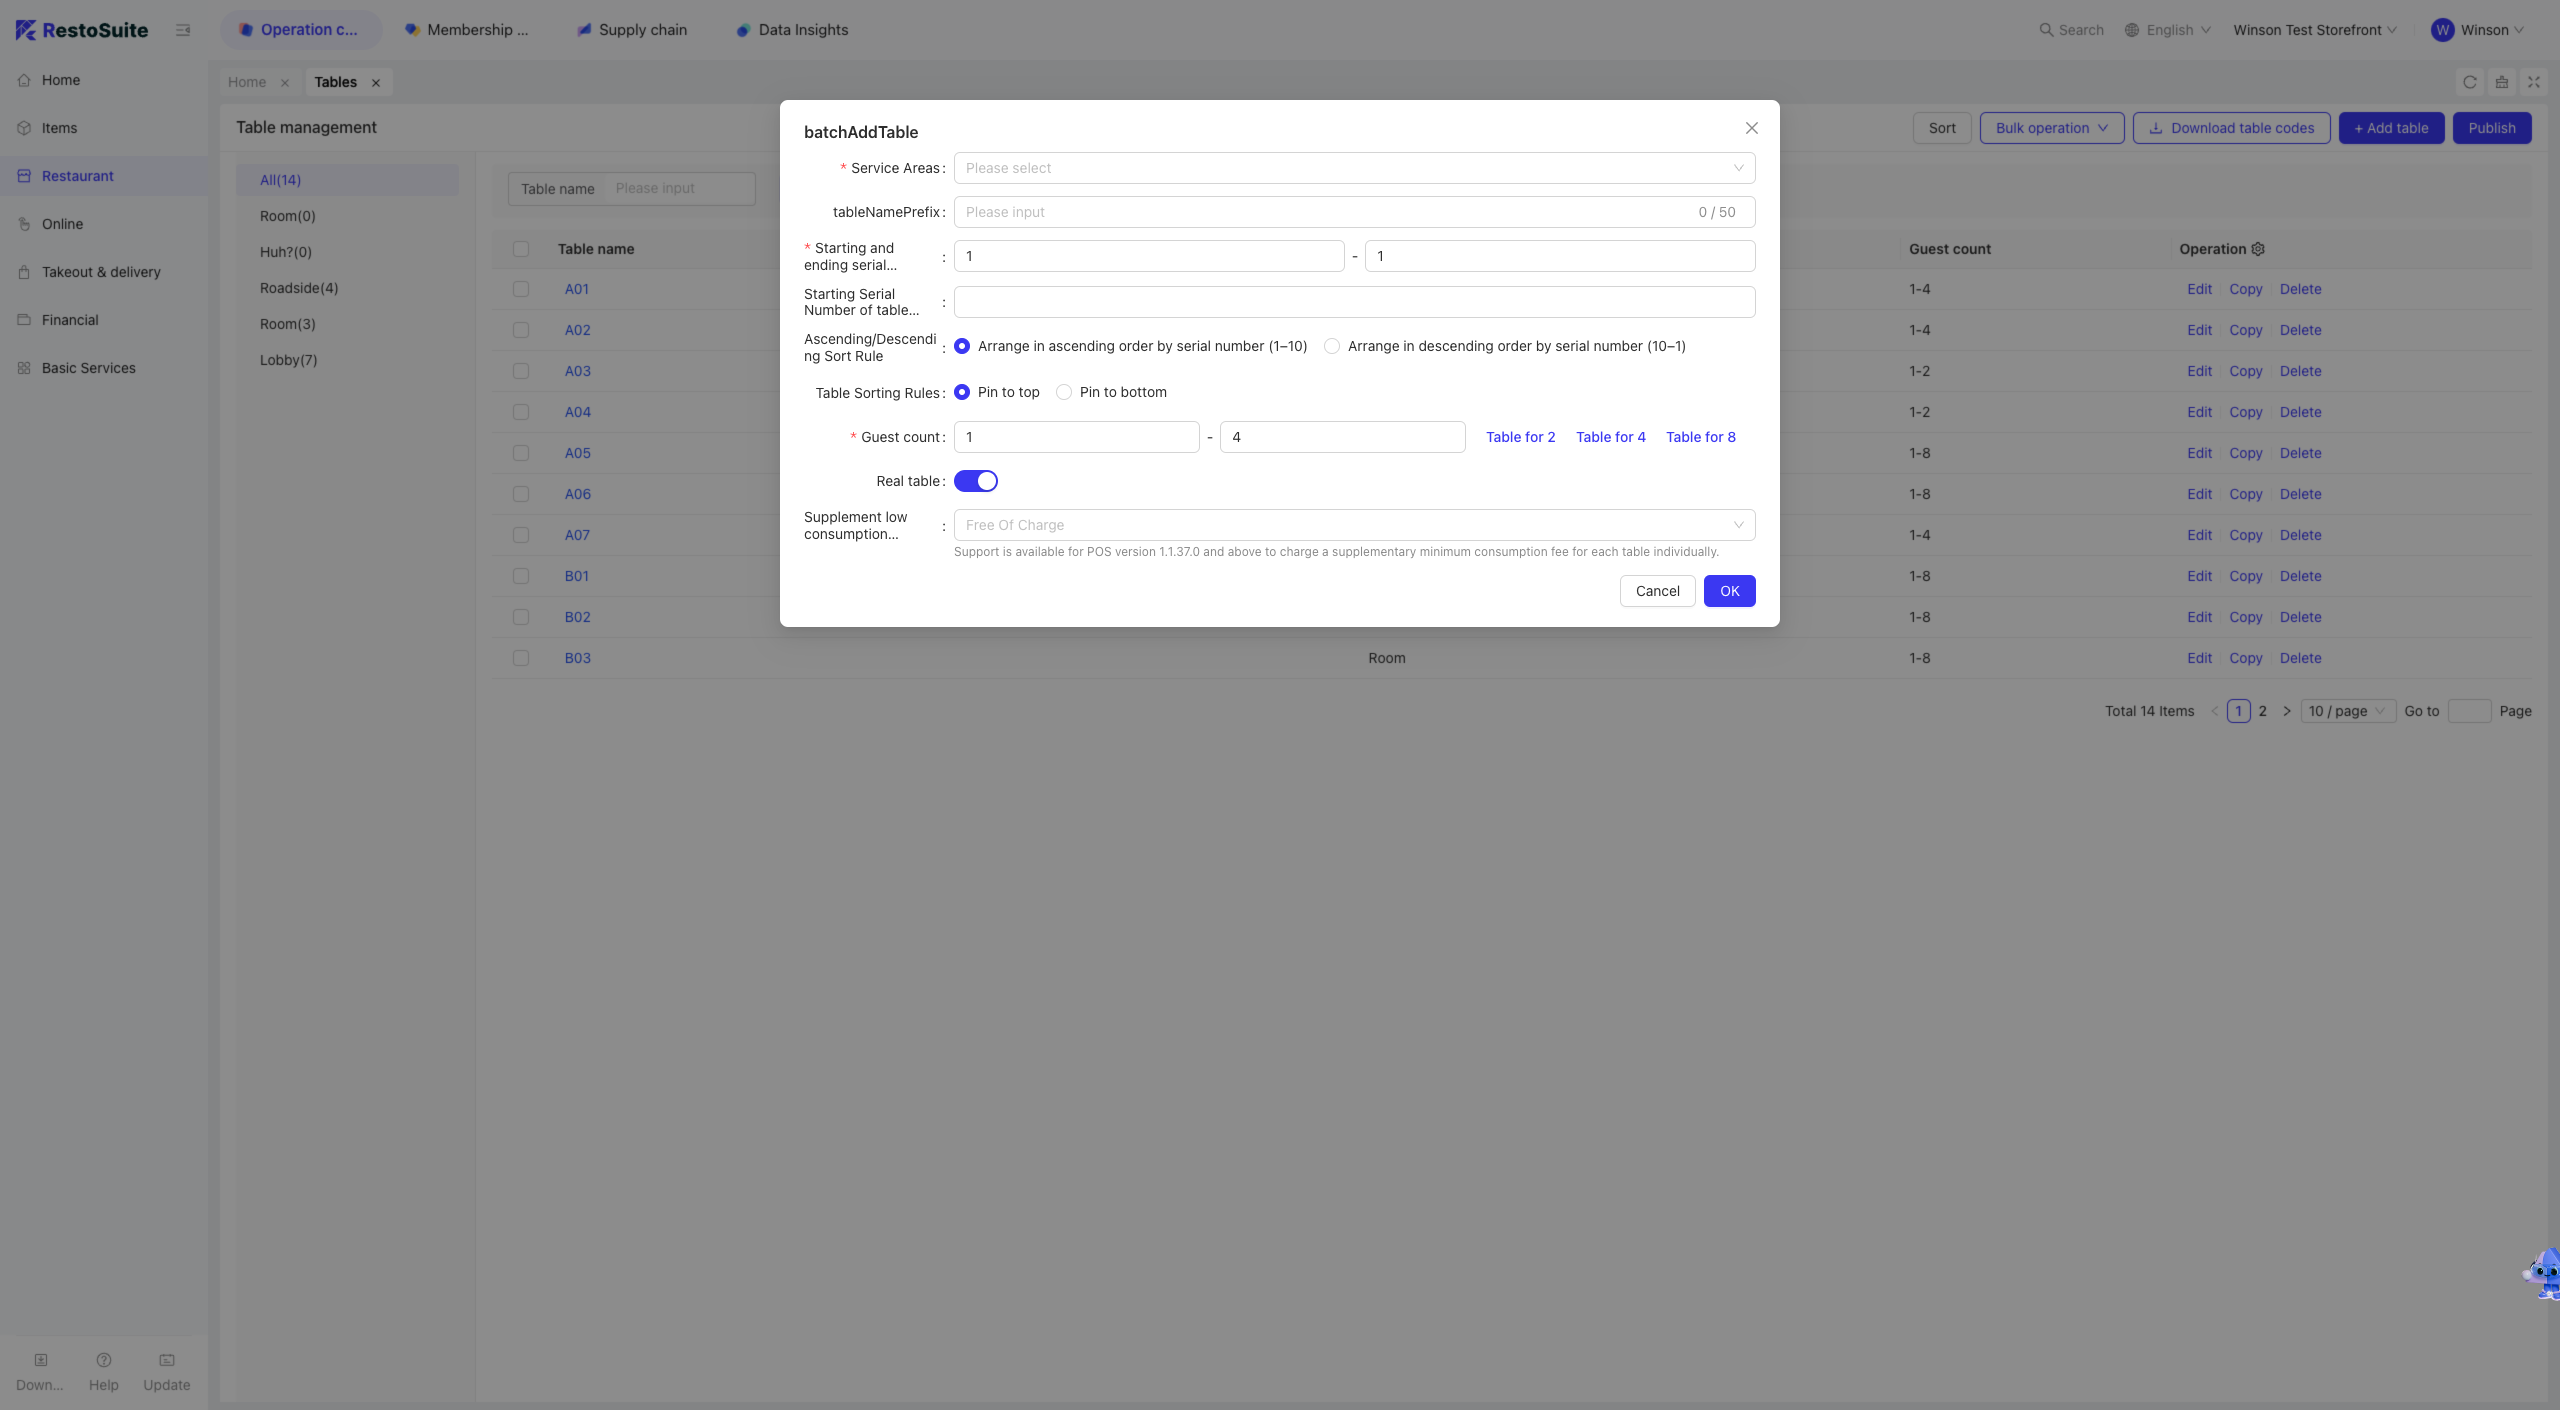
6.2.1 Batch Adding Tables
Step 1: Click [Batch Operations] and select [Batch Add Tables].
Step 2: Fill in the form (fields different from single table addition):
- Table Name Prefix: Fixed prefix for batch-added tables.
- Table Name Sequence Range: Numeric range for table serial numbers (combined with the prefix).
- Starting Table Code: Numeric only.
- Sort Order: Ascending or descending.
- Table List Position: New tables appear at the top or bottom of the list.
Step 3: Click [Confirm] to complete batch addition.
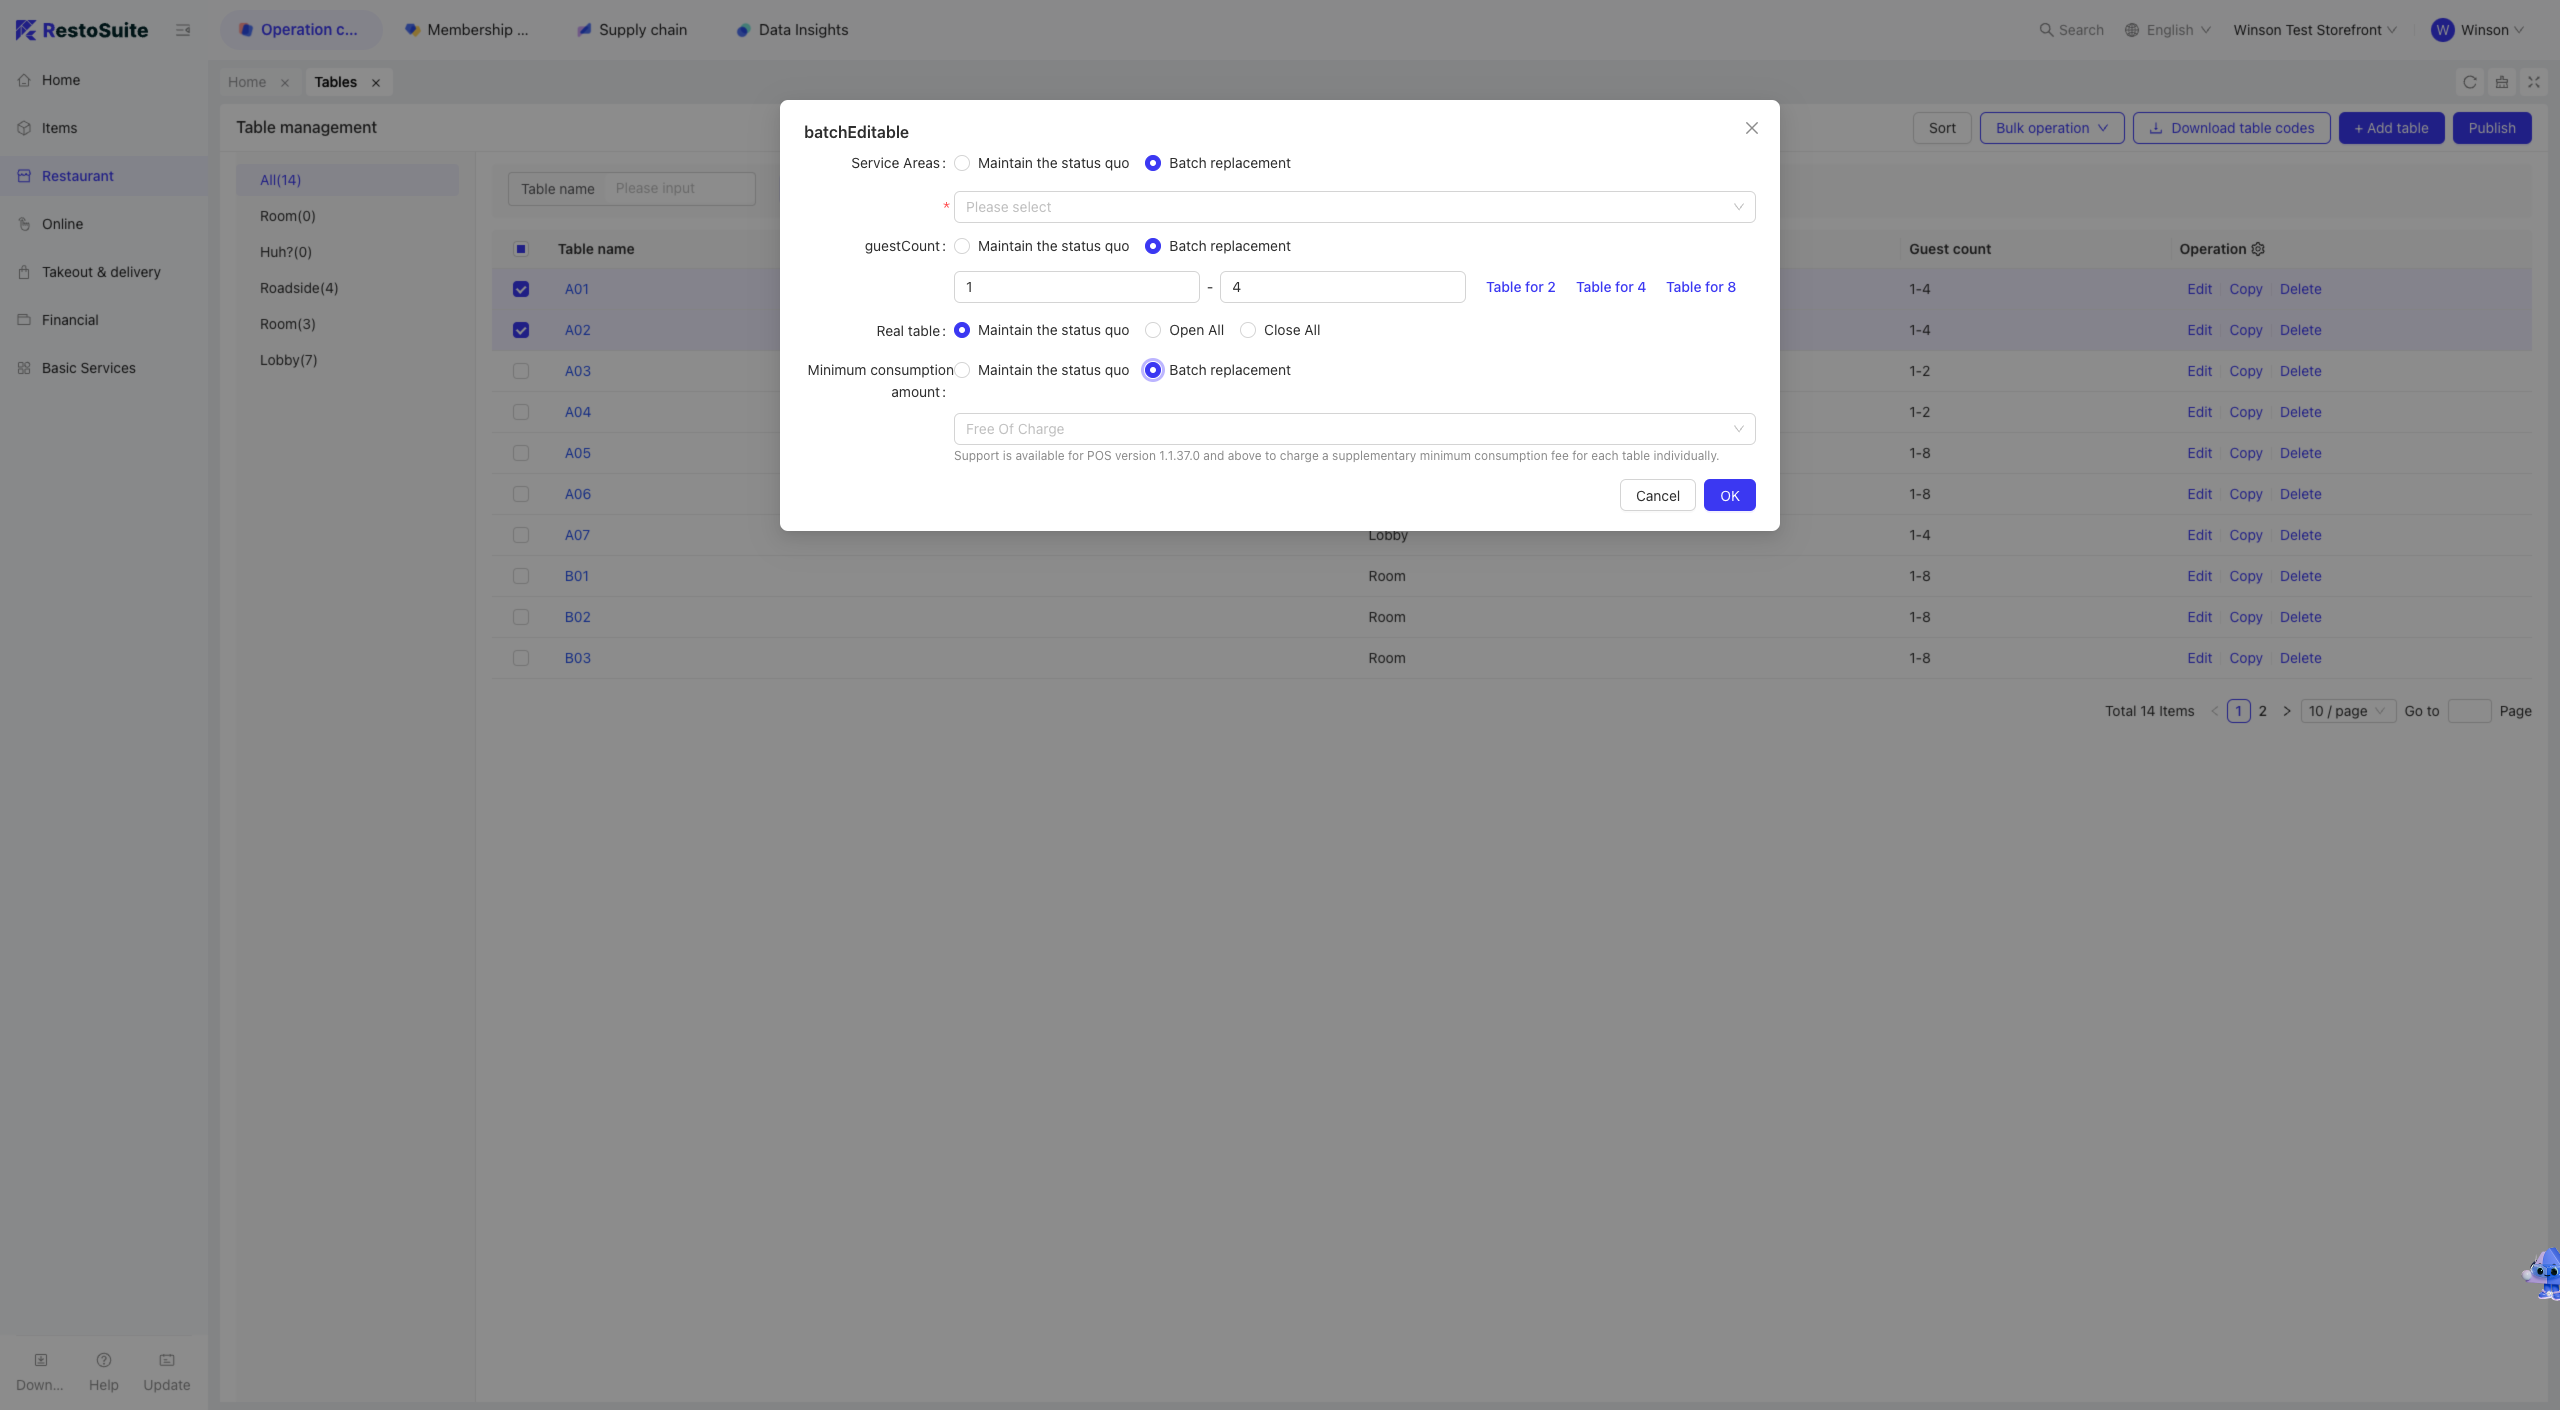
6.2.2 Batch Editing Tables
Step 1: Select the tables to edit in batch.
Step 2: Supported fields for modification:
- Service Area
- Capacity
- Physical Table
- Minimum Spend
Step 3: Click [Confirm] to apply changes to selected tables.
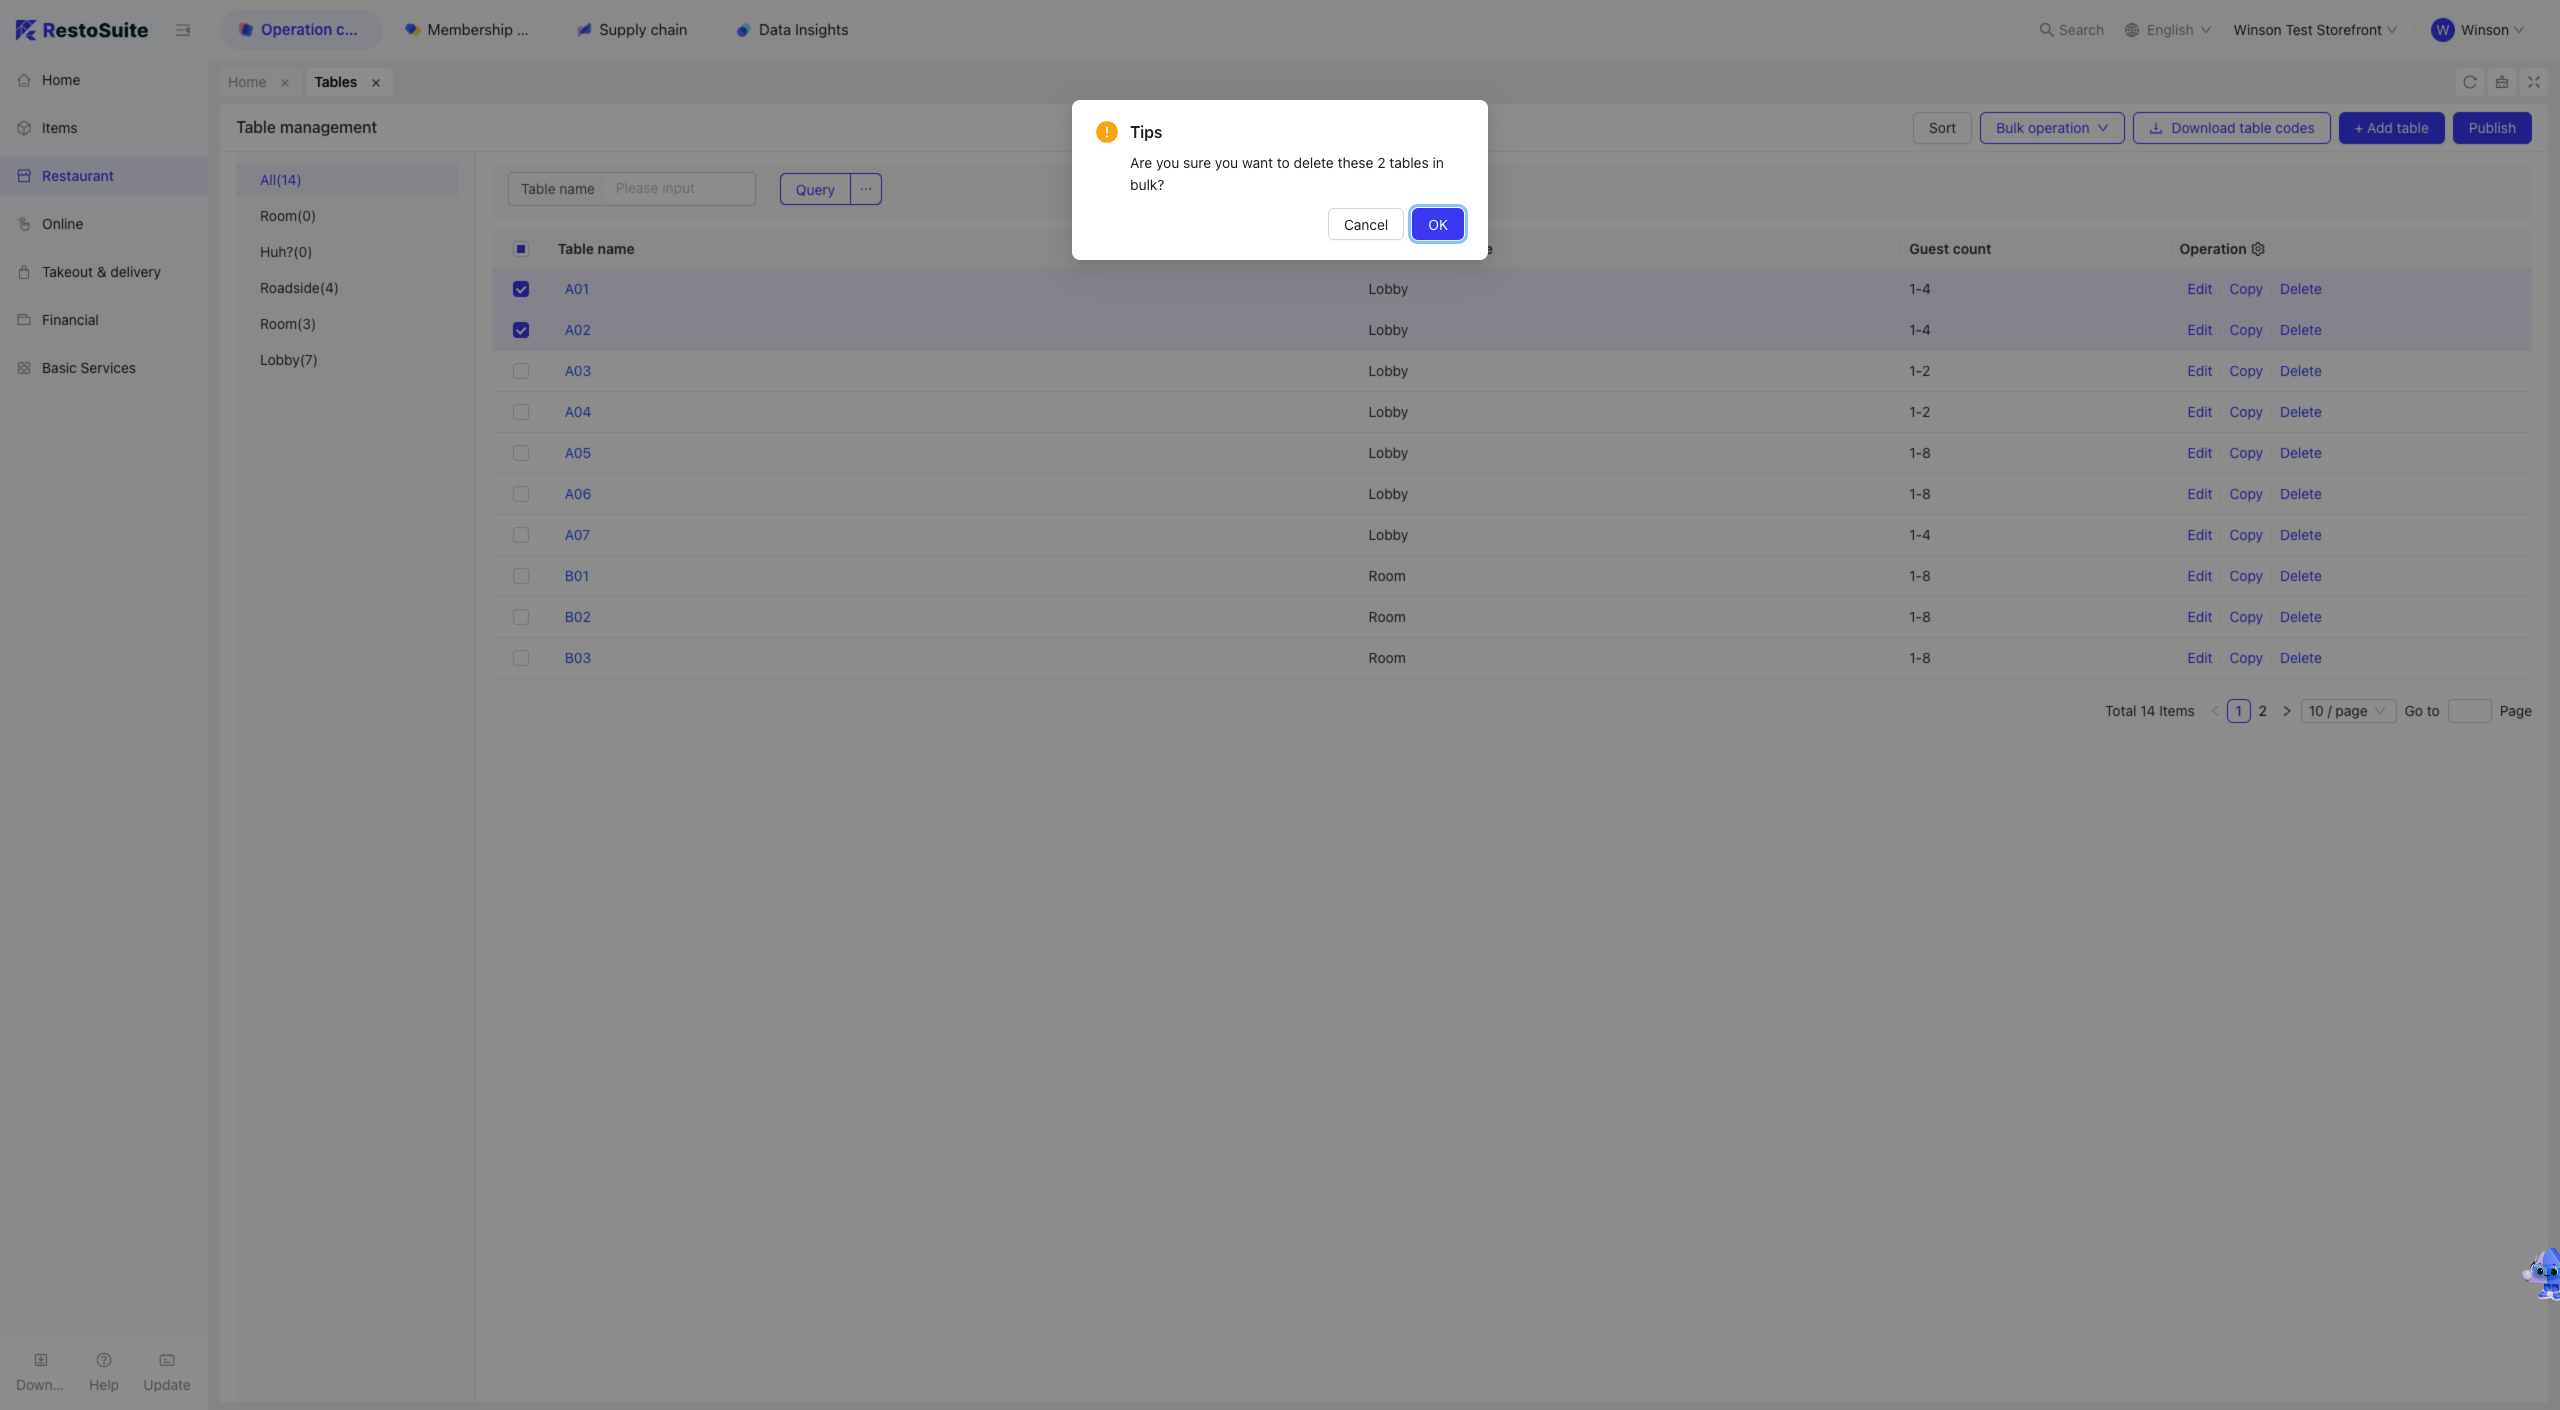
6.2.3 Batch Deleting Tables
Step 1: Select the tables to delete in batch.
Step 2: Click [Confirm] to delete selected tables.
6.2.4 Batch Importing Area Tables
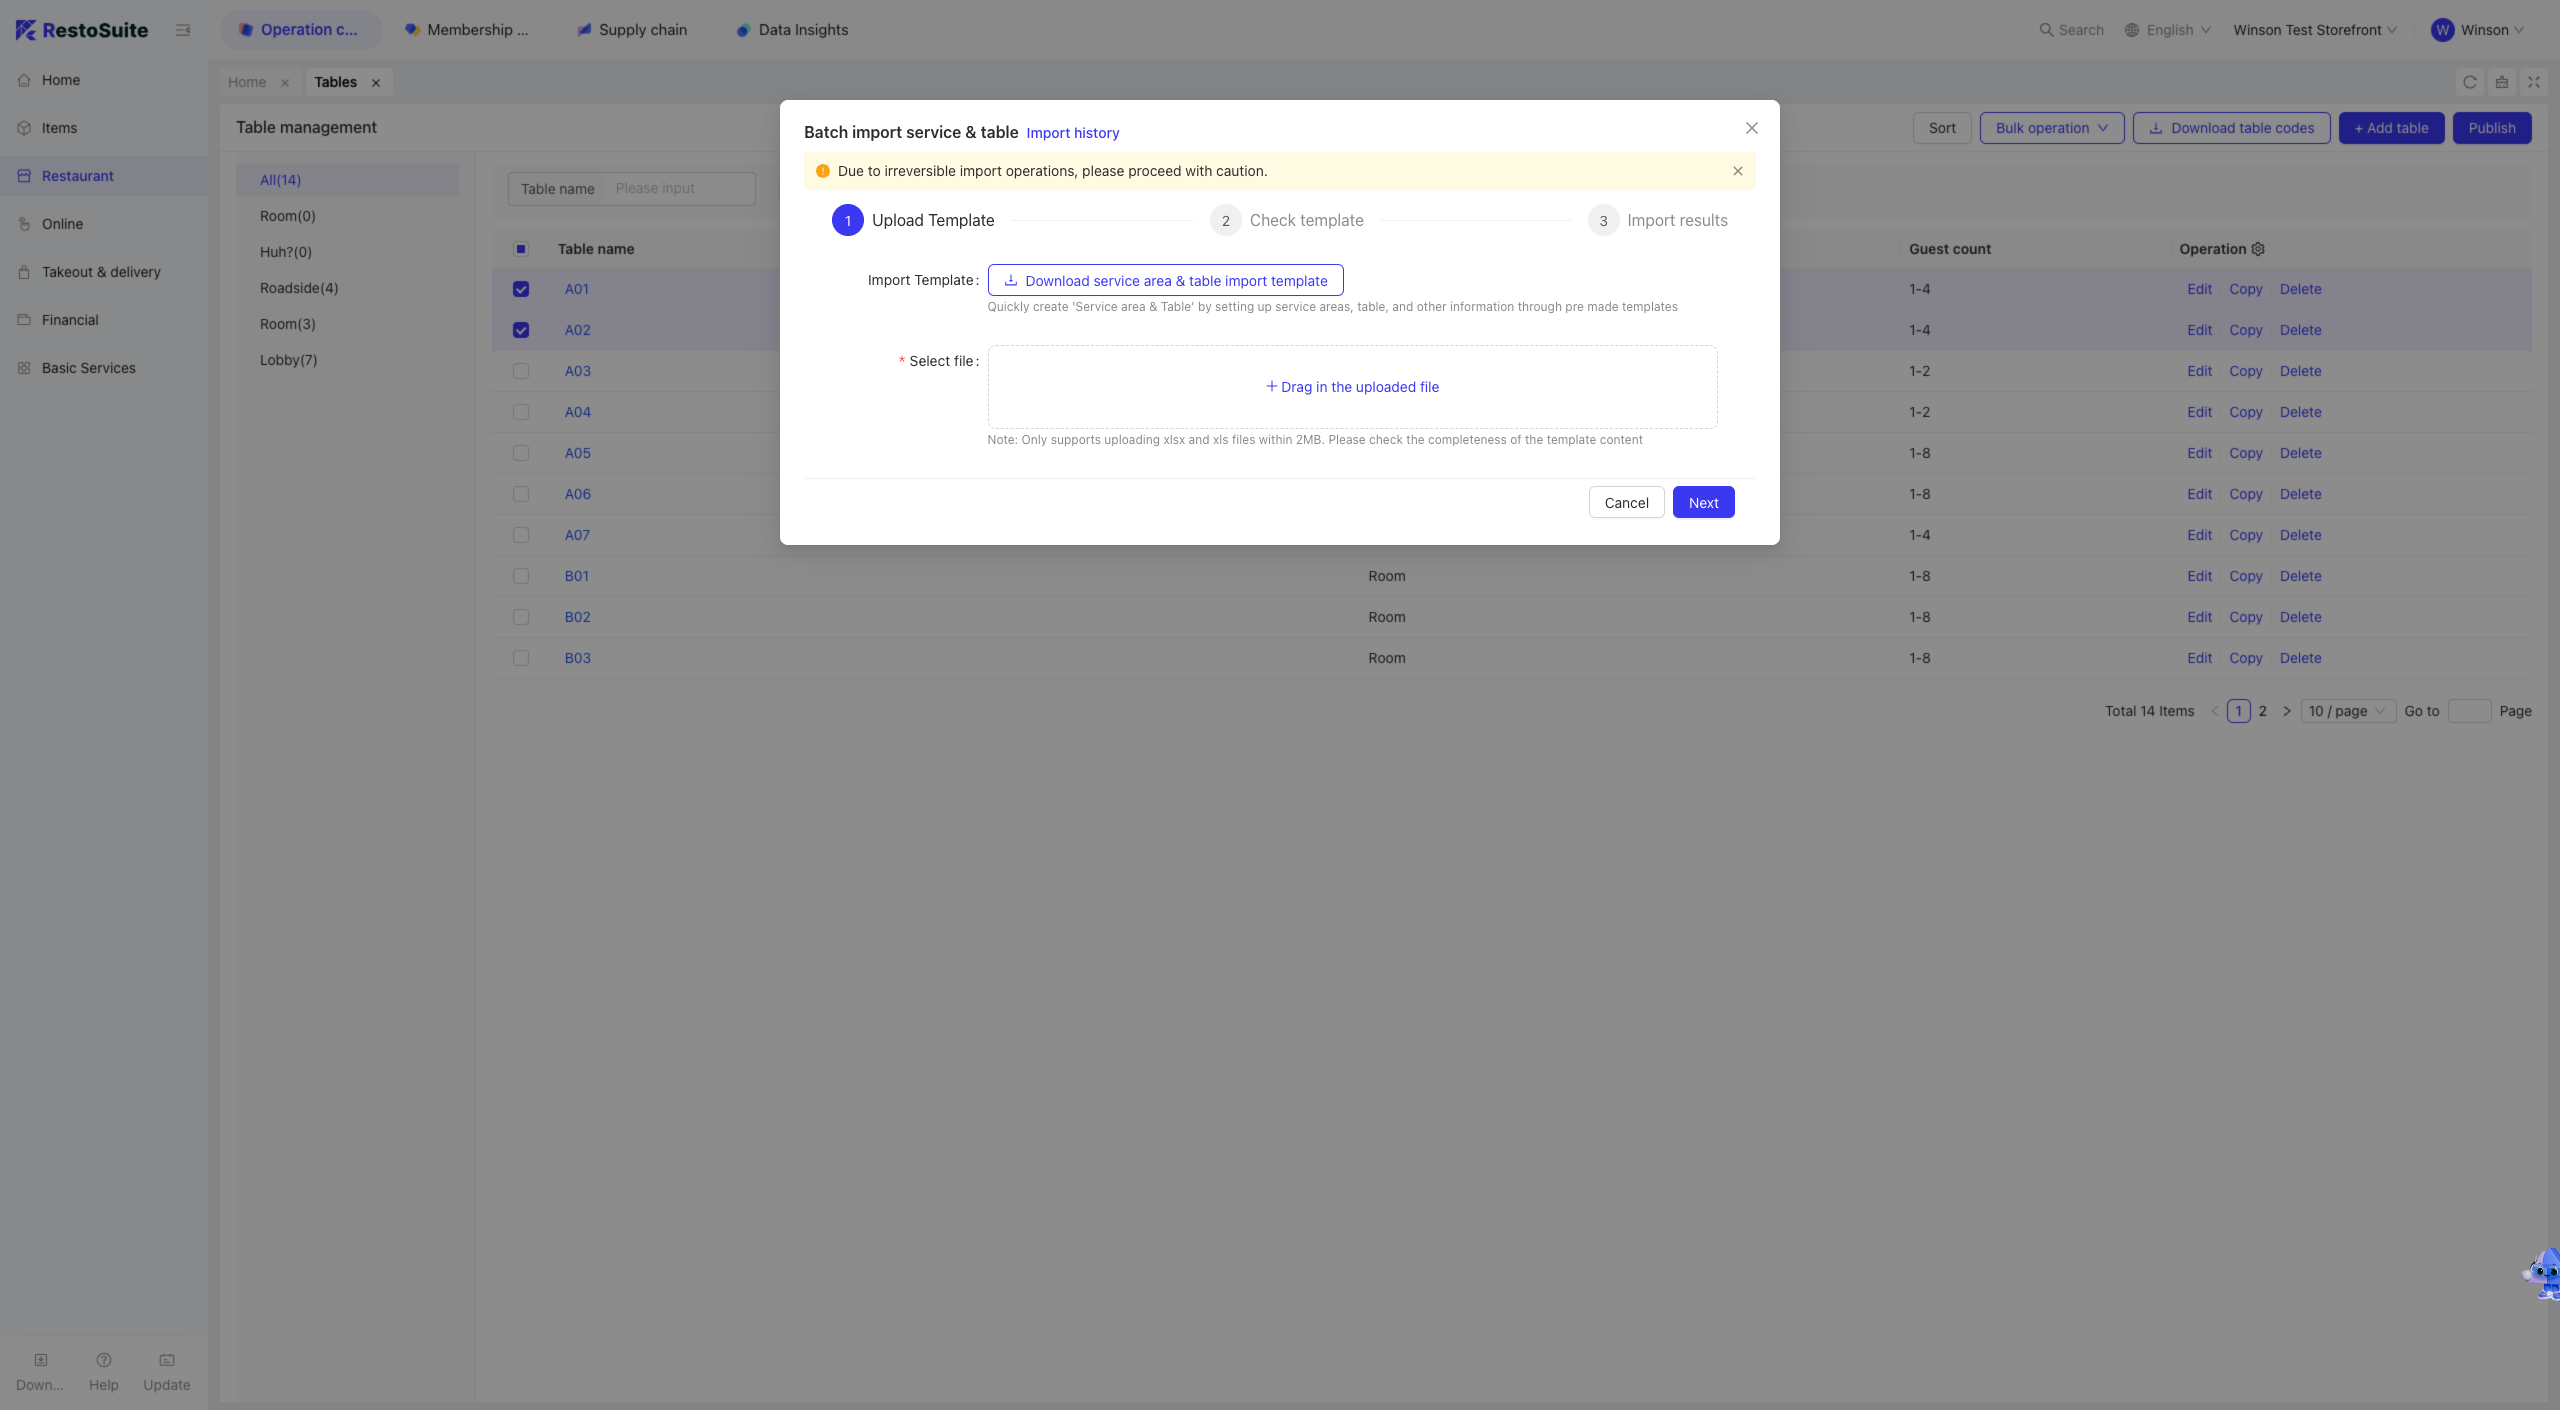
Step 1: Click [Batch Operations] and select [Batch Import Area Tables].
Step 2: Download the [Area Table Import Template] on the import page.
Step 3: Fill in the Excel template, upload the file to the system, and click [Next].
Step 4: Verify the template and click [Start Import] to view imported tables in the list.
6.2.5 Batch Exporting Area Tables
Step 1: Click [Batch Operations] and select [Batch Export Area Tables].
Step 2: Navigate to [Basic Services -> Download Management] to view the exported file.
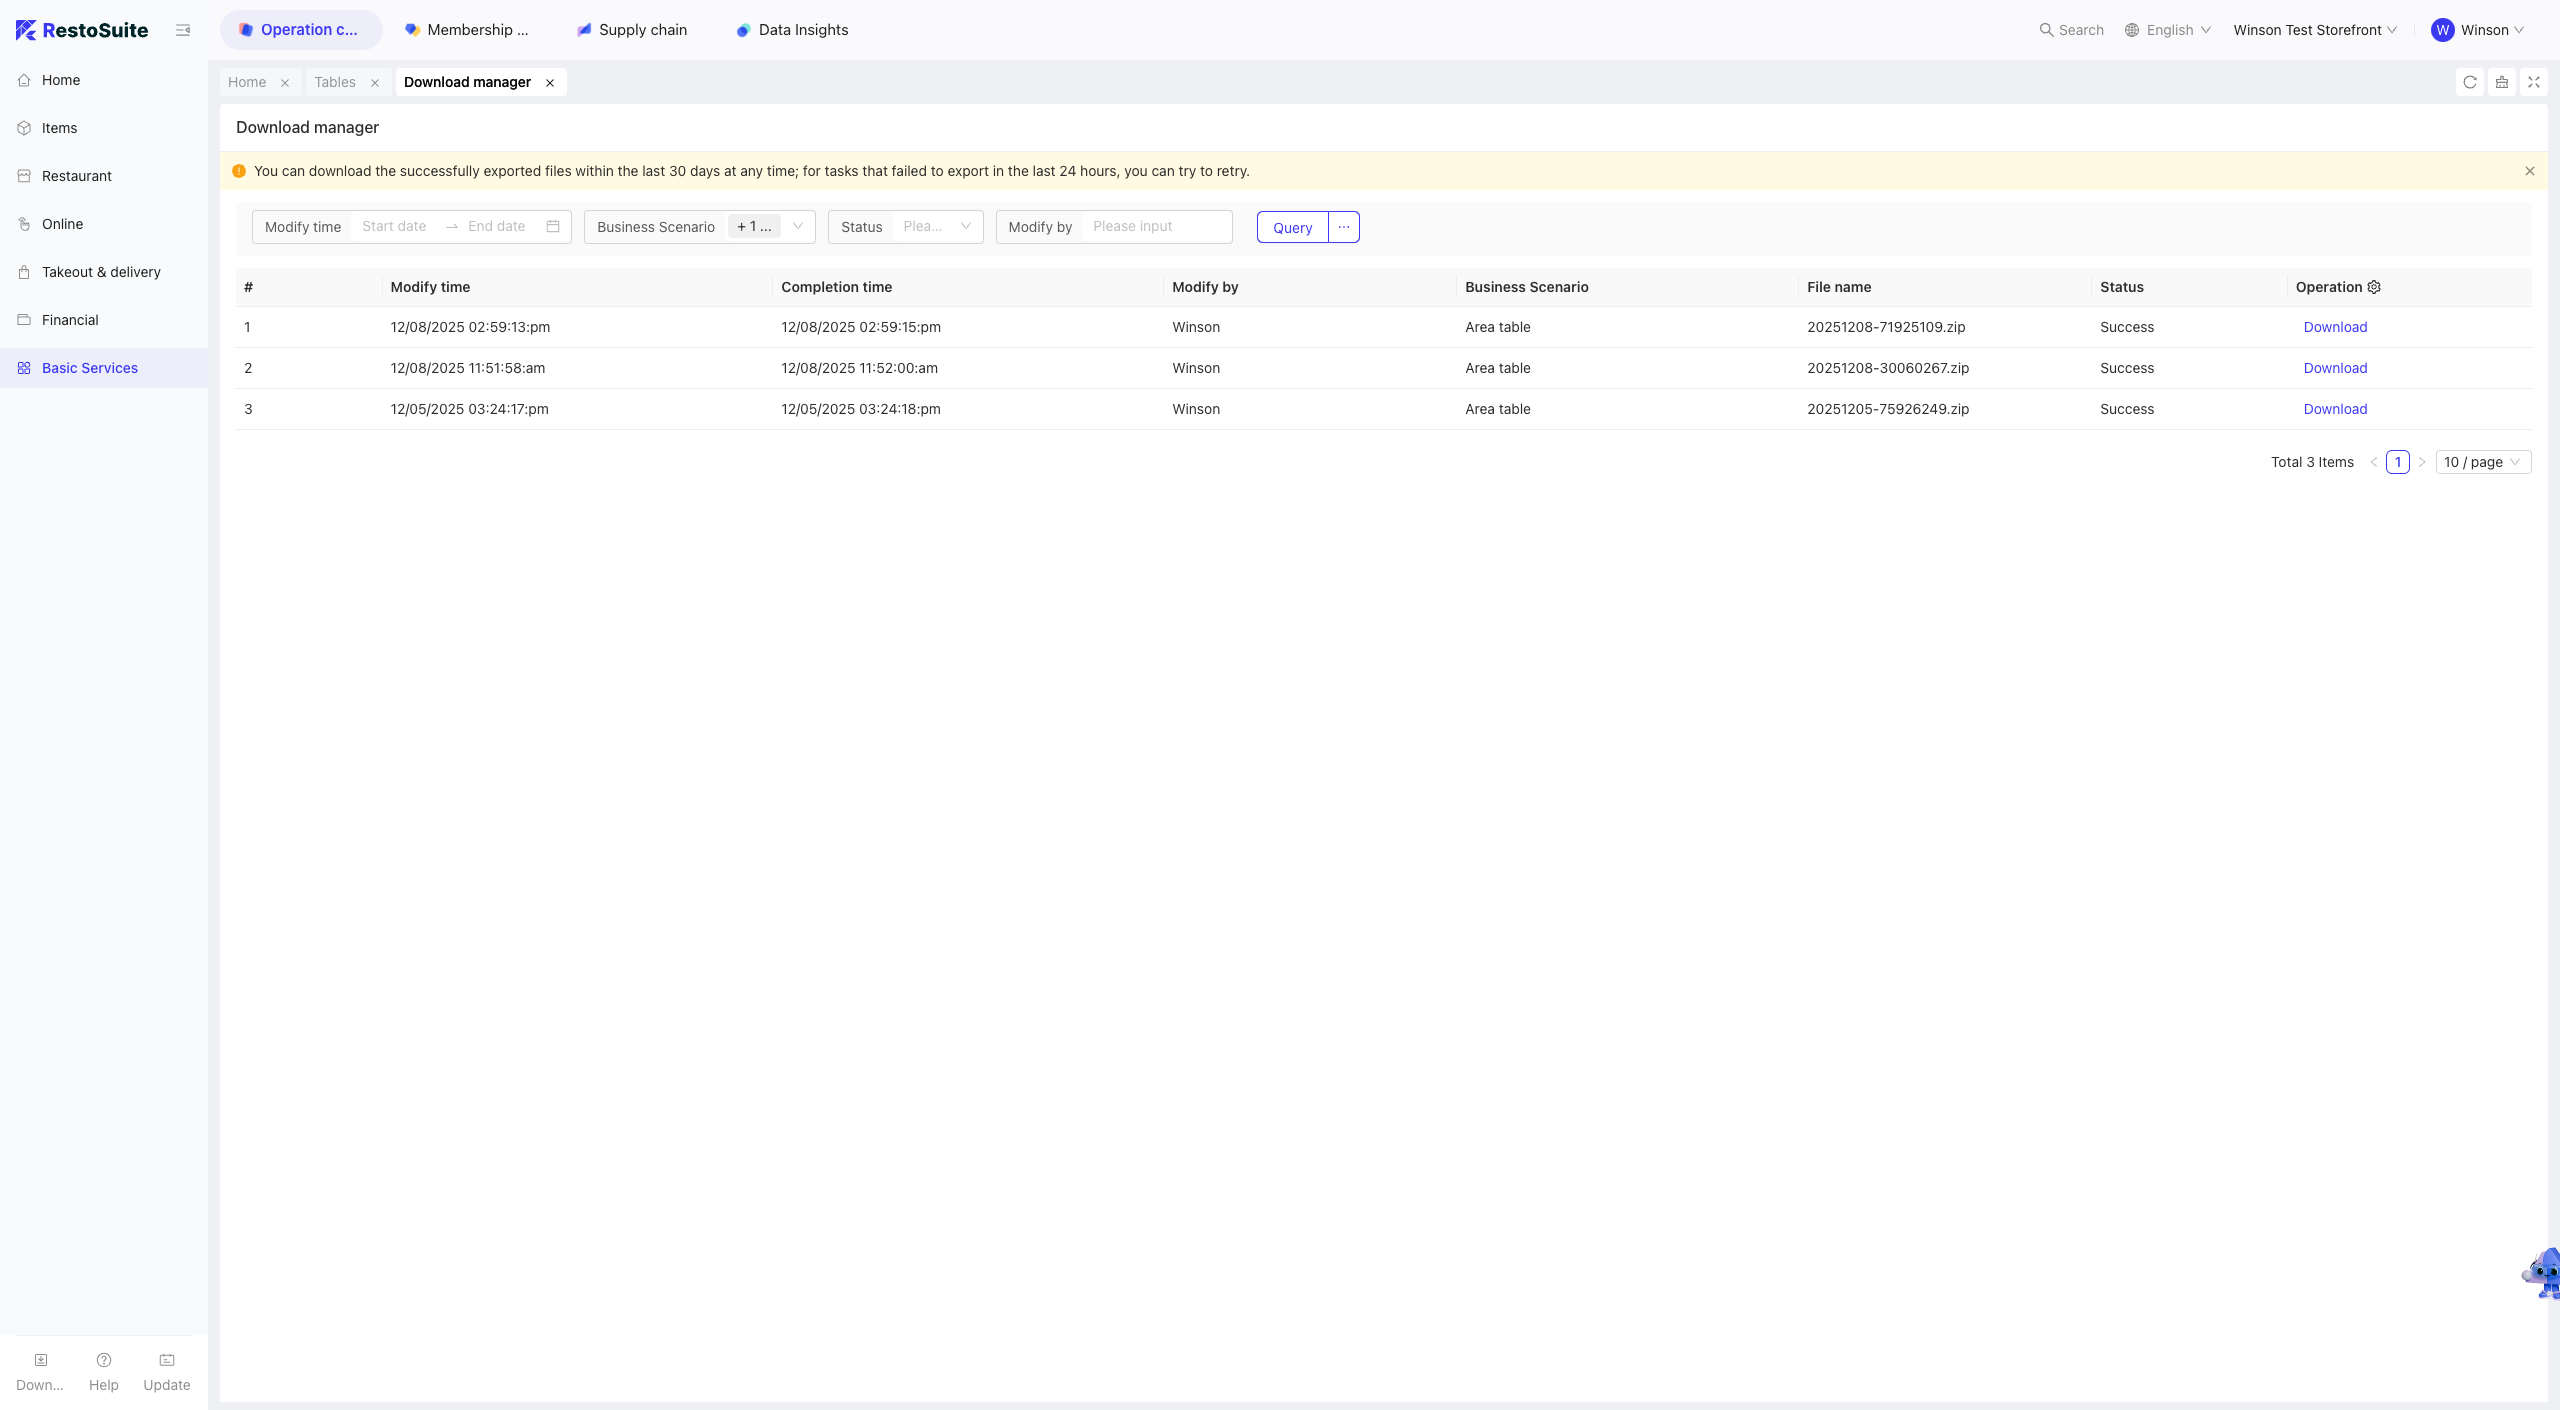
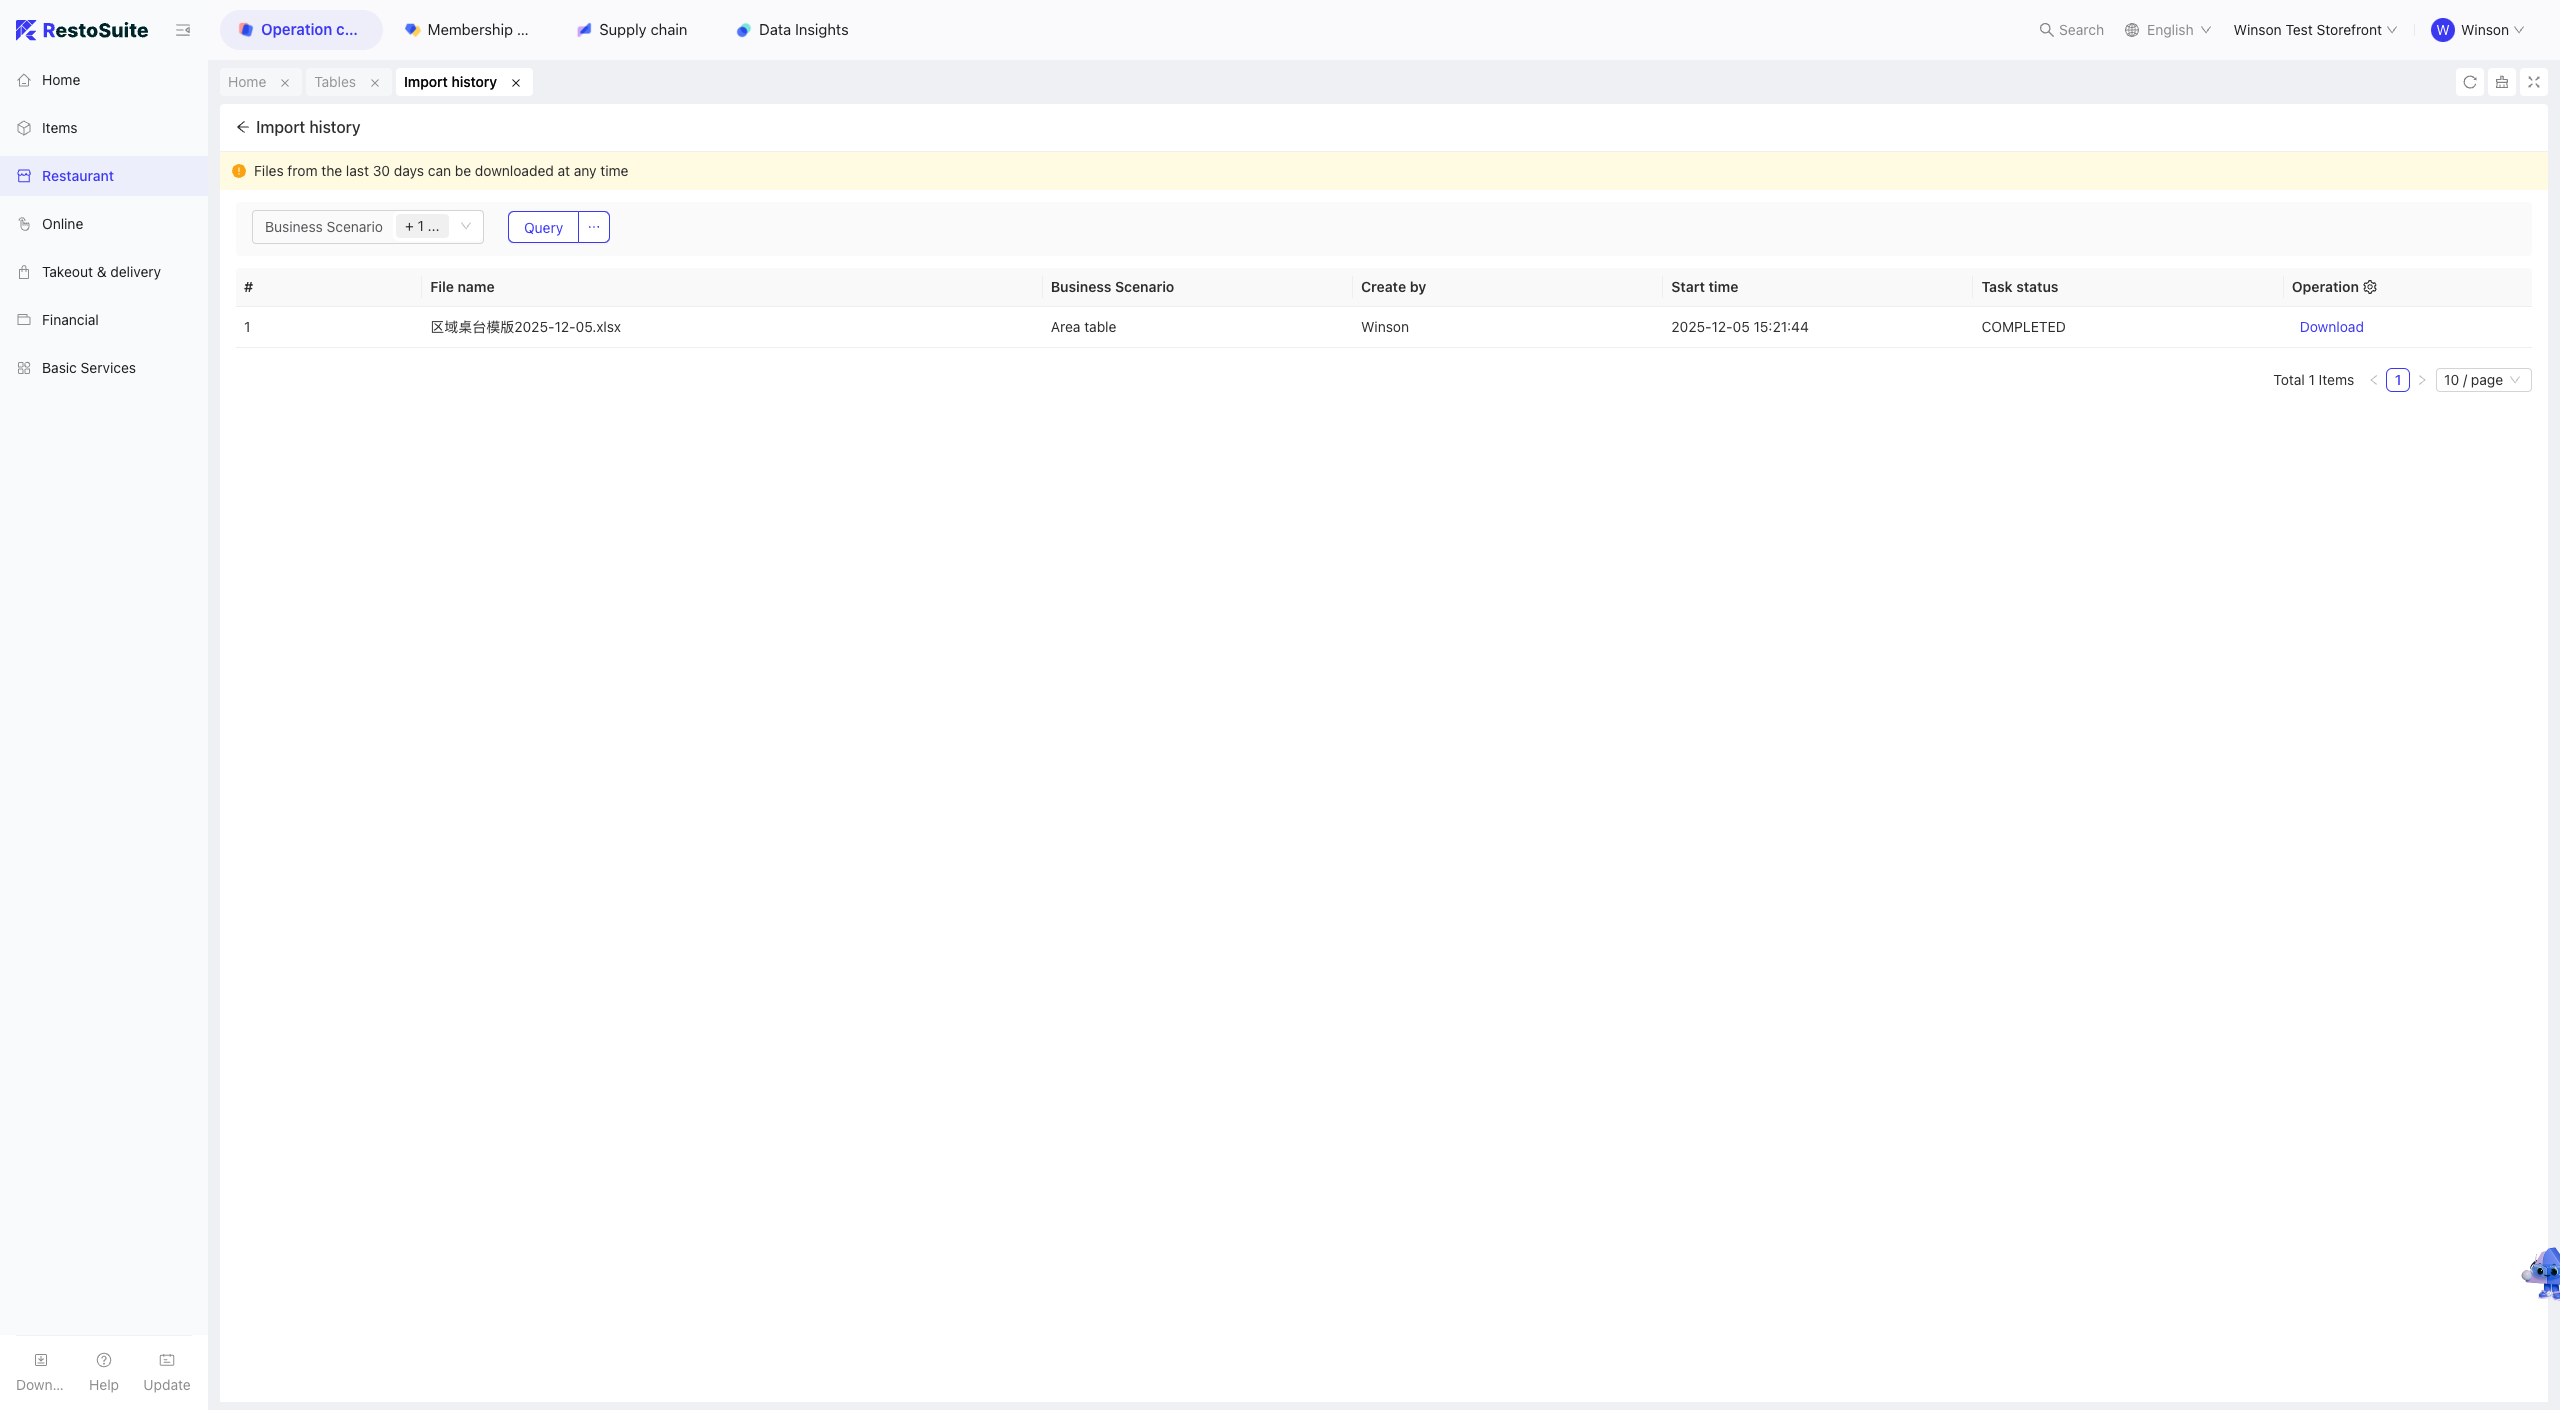
6.2.6 Import History
Step 1: Click [Batch Operations] and select [Import History].
Step 2: View and download import history files from the past 30 days.
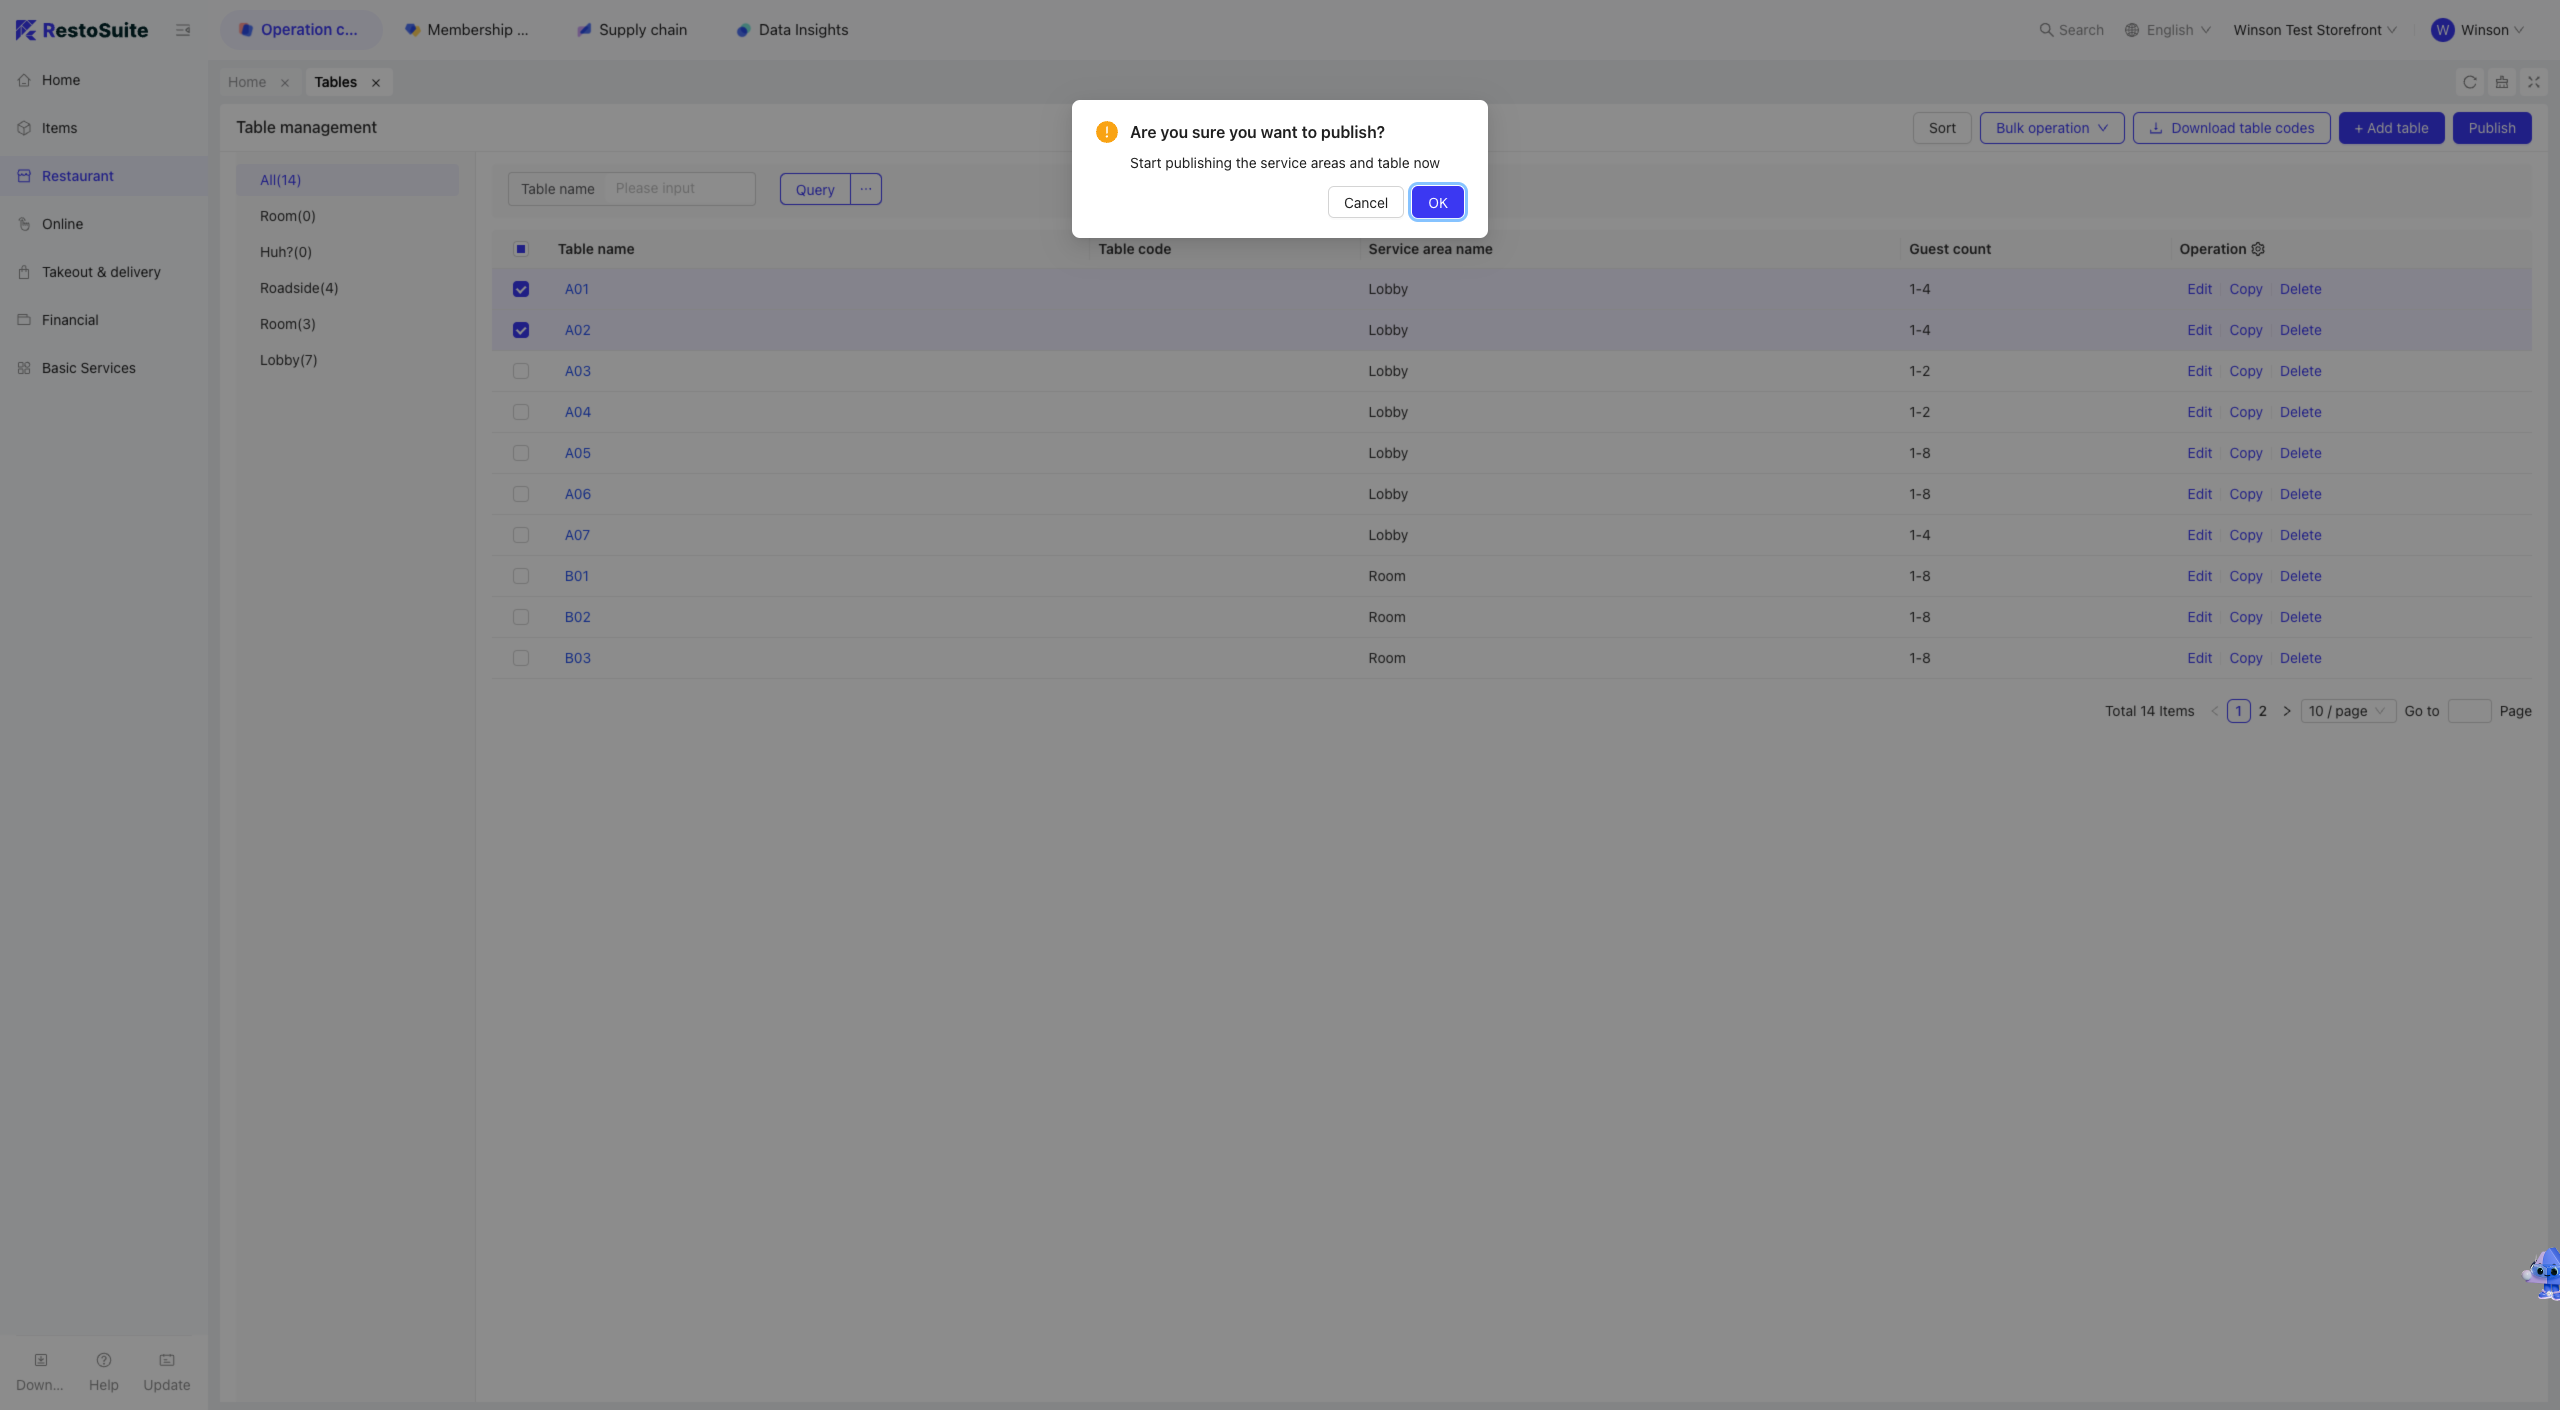
6.3 Publishing Tables
Publish table configurations to the POS system.
Note: After modifying tables, you must publish the changes for them to take effect.
6.4 Downloading Table QR Codes
The [Download Table QR Codes] function allows downloading QR codes for store tables. Print and paste them on tables to enable customers to scan and order.
Step 1: Click [Download Table QR Codes].
Step 2: Select the target tables, application, and template, then click [Download].

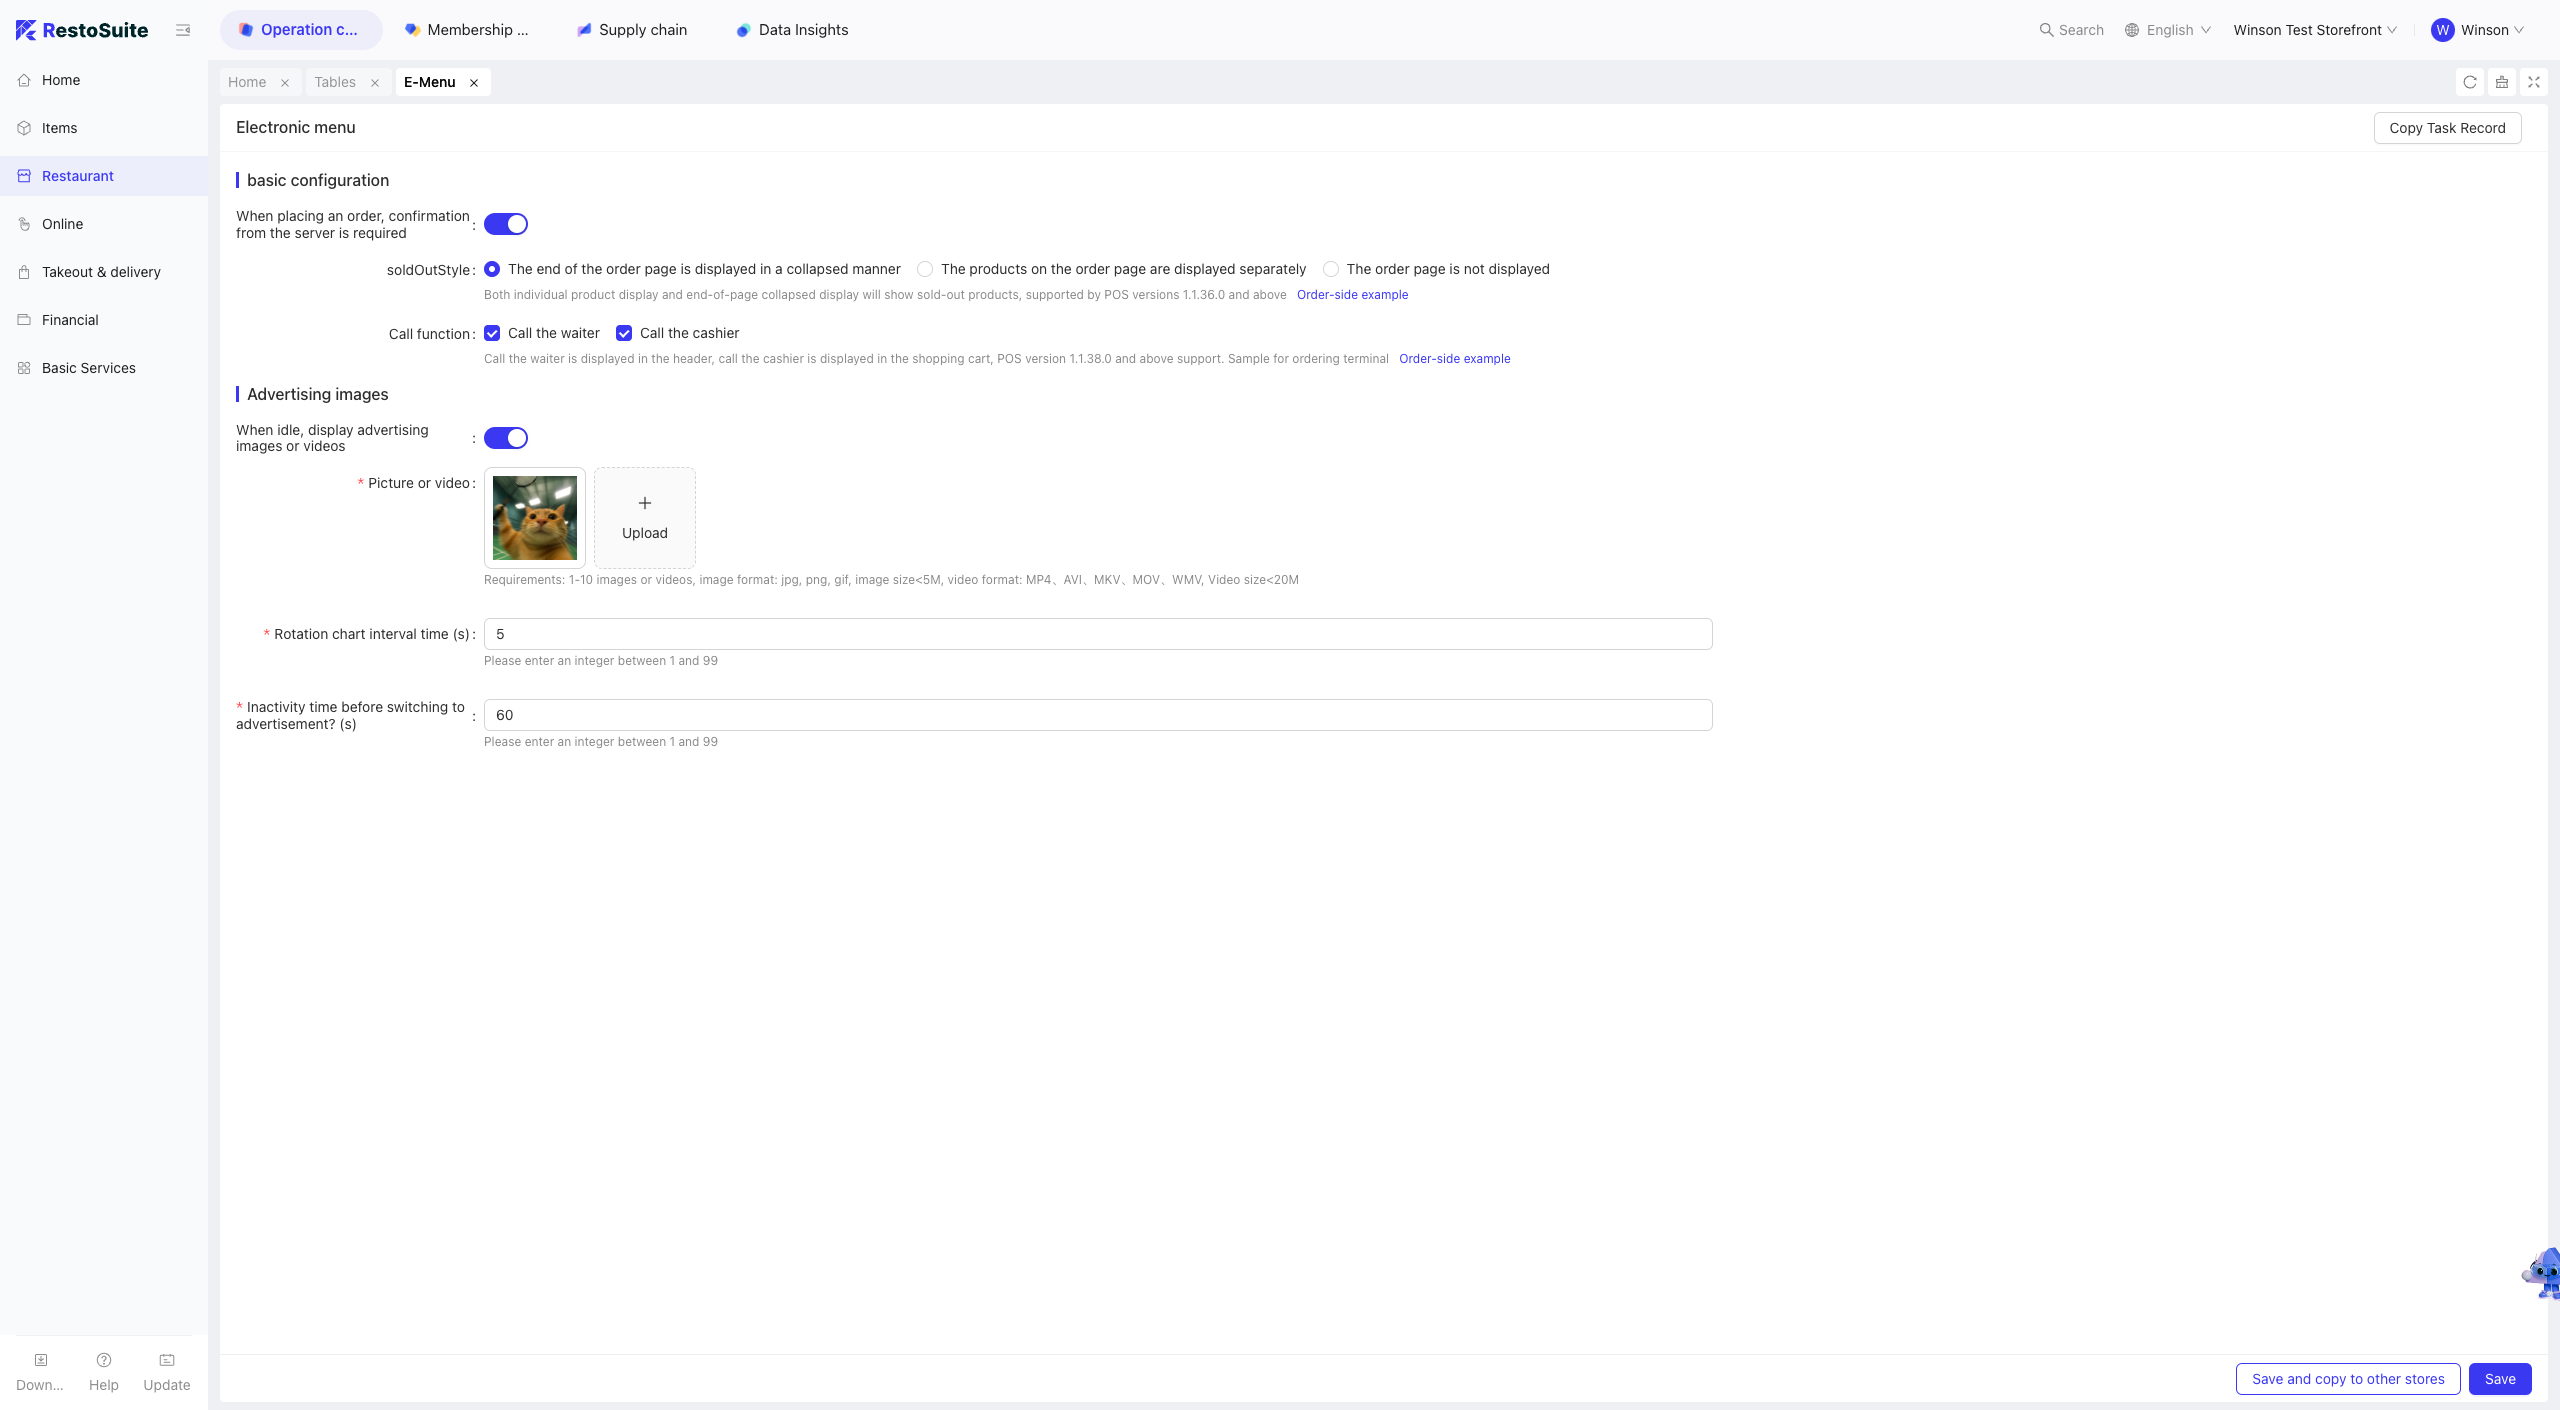
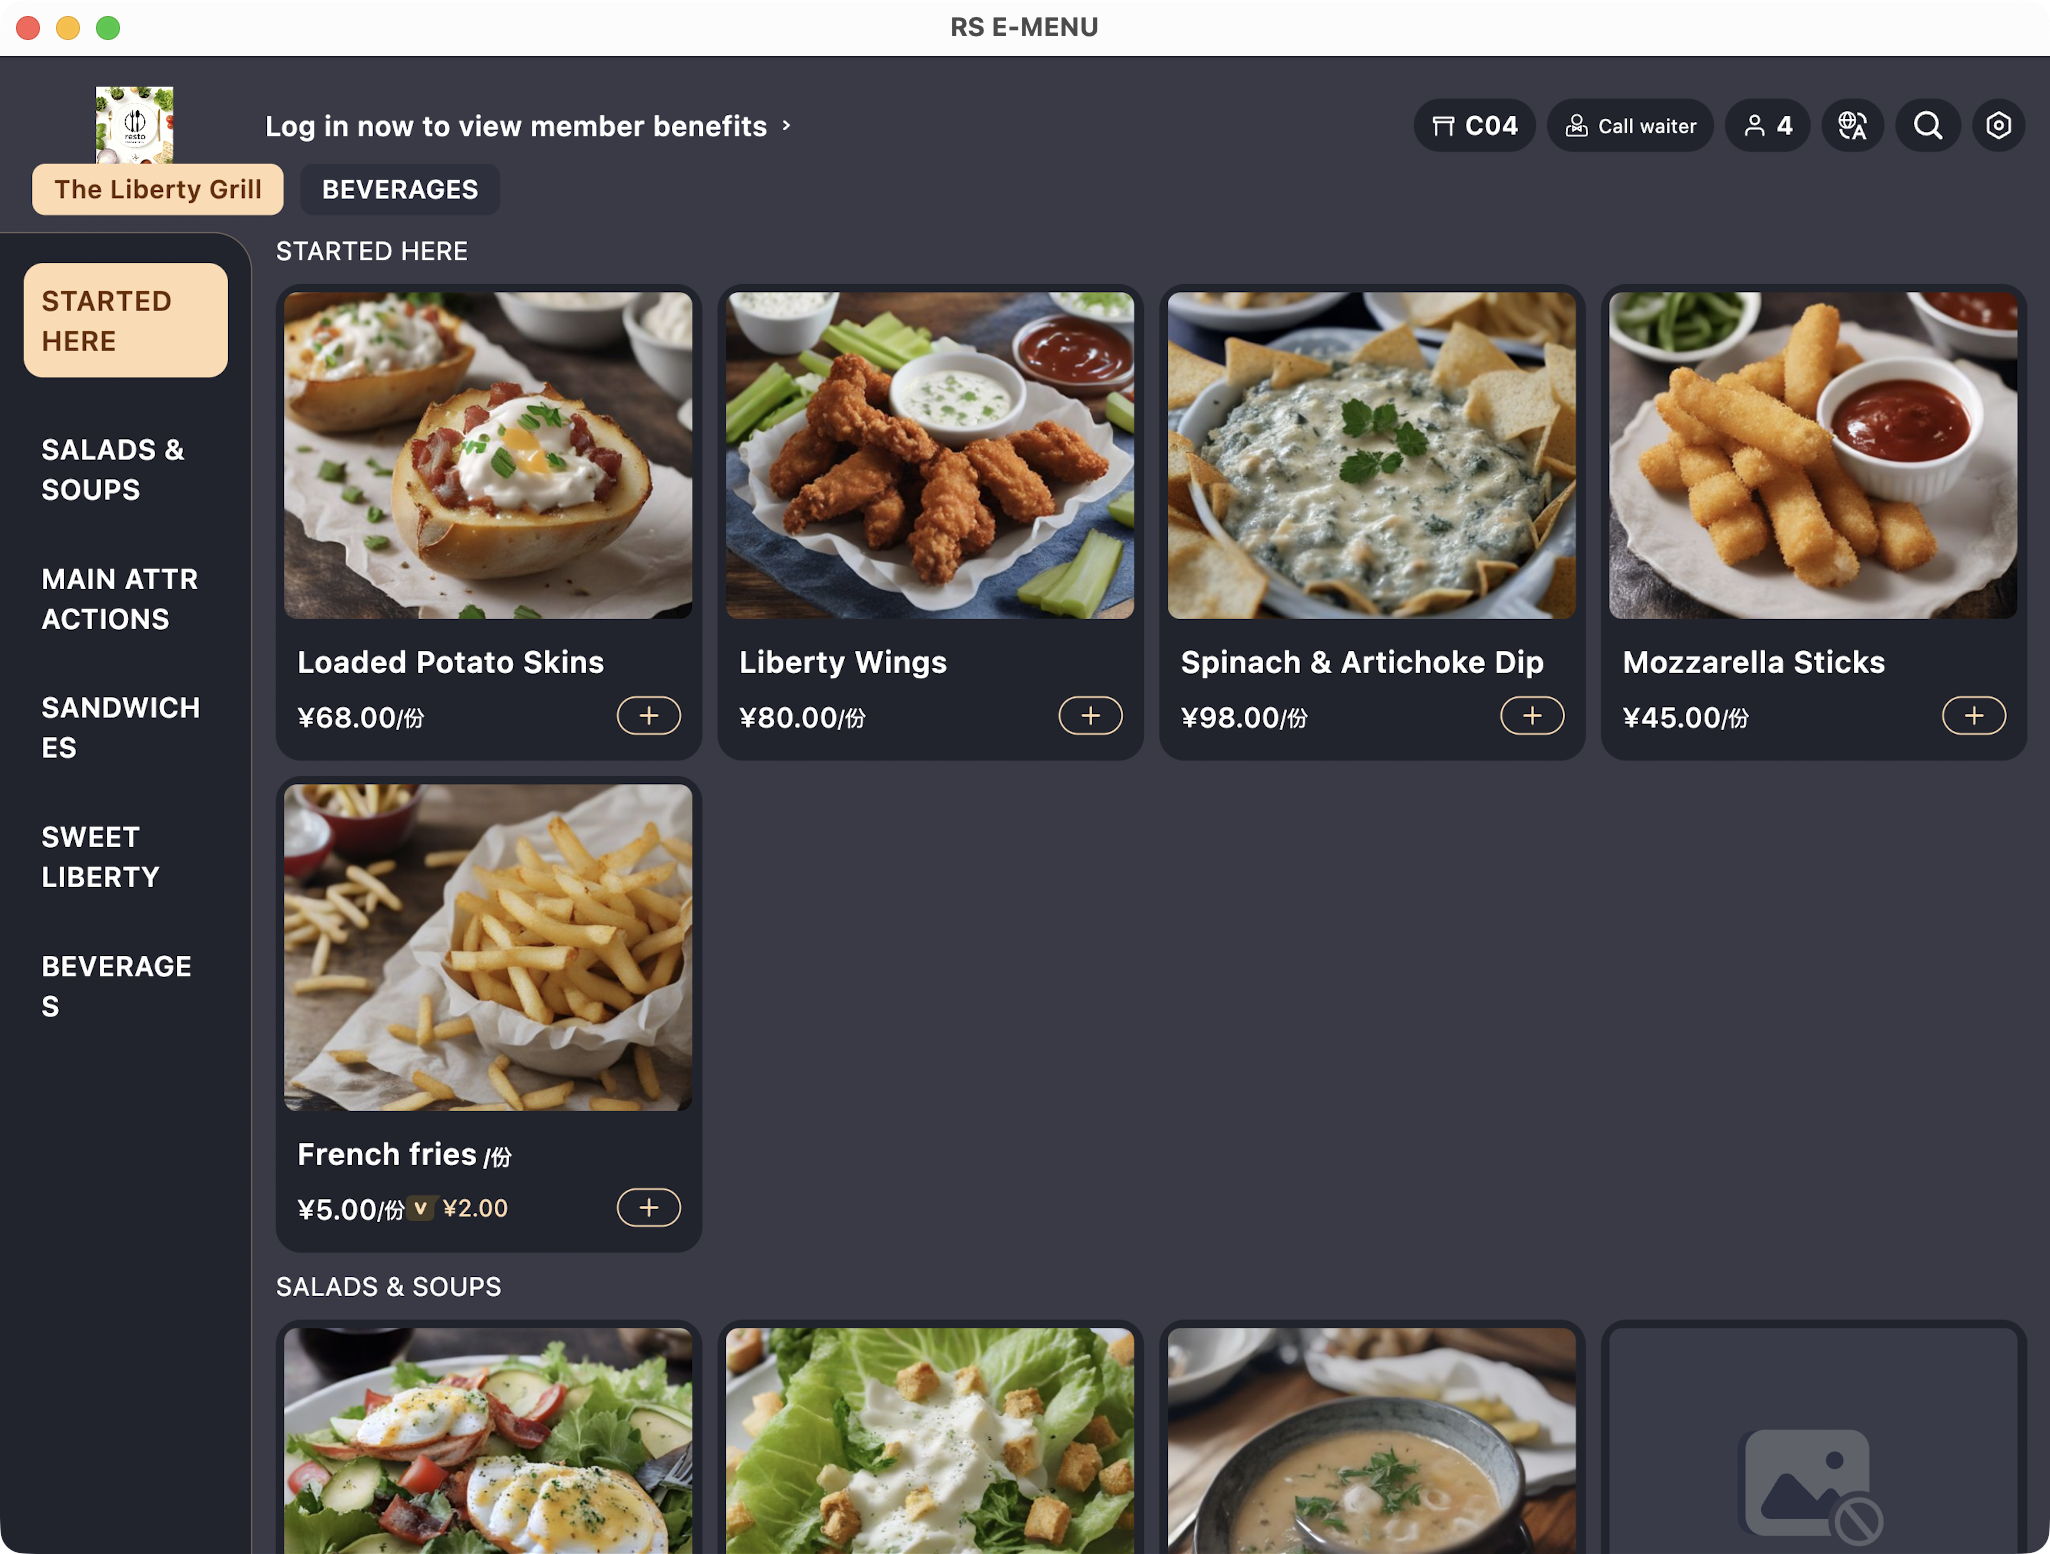
7 E-menu (Store Level)
Configure E-menu settings including out-of-stock item display styles, call functions, and advertisement display to control the E-menu terminal interface.
- Call Function: “Call Server” is displayed in the header; “Call Cashier” is displayed in the shopping cart.
- Advertisement Function: Upload images or videos and set the idle time before advertisements start playing.
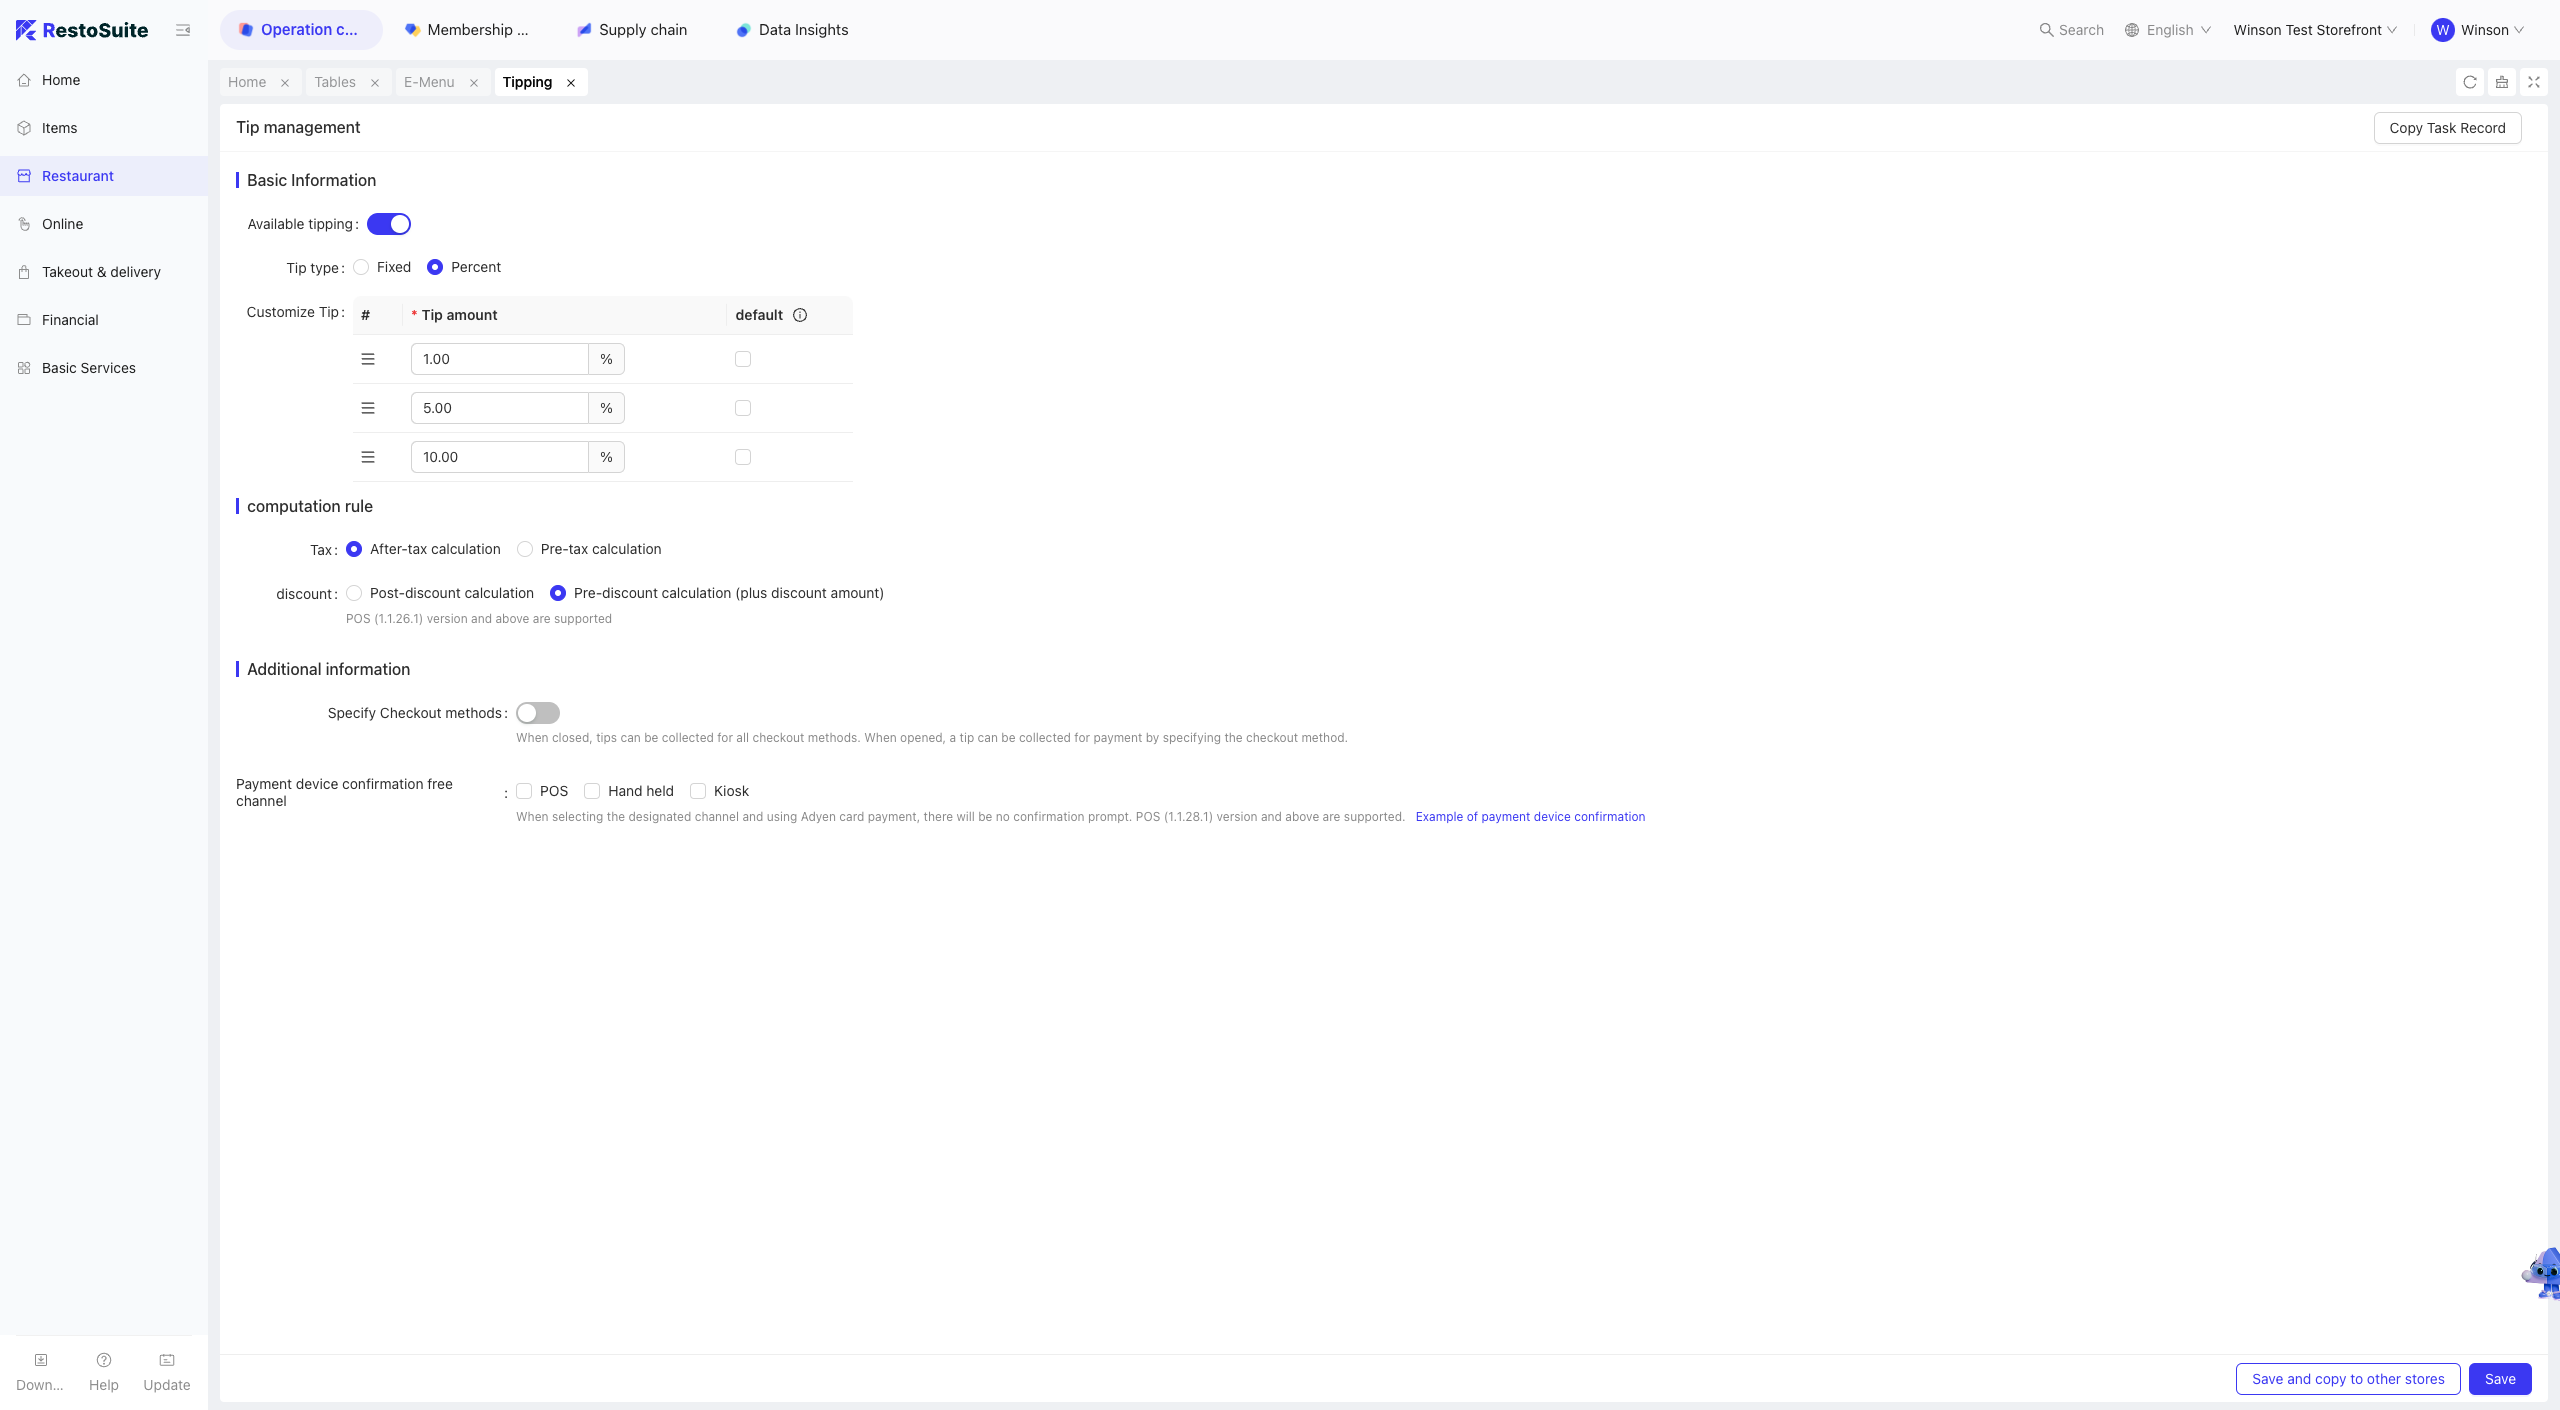
8 Tip Management (Store Level)
Configure basic tip information and calculation rules.
8.1 Setting Up Tips
Step 1: Click [Tip Management].
Step 2: Fill in the form:
- Enable Tips: Required to configure subsequent settings.
- Tip Type: Fixed Amount, Percentage.
- Custom Tips: Customize default tip amounts or percentages.
- Tax Calculation: After Tax, Before Tax.
- Discount Calculation: After Discount, Before Discount (including promotion amounts).
- Specify Payment Methods: Enable to select payment methods that support tips.
- Payment Device Confirmation Exemption: For POS, Order Pad, and Self-Service Kiosks, skip secondary confirmation when using Adyen card payments (supported in POS version 1.1.28.1 and above).
Step 3: Click [Save] to apply the settings.
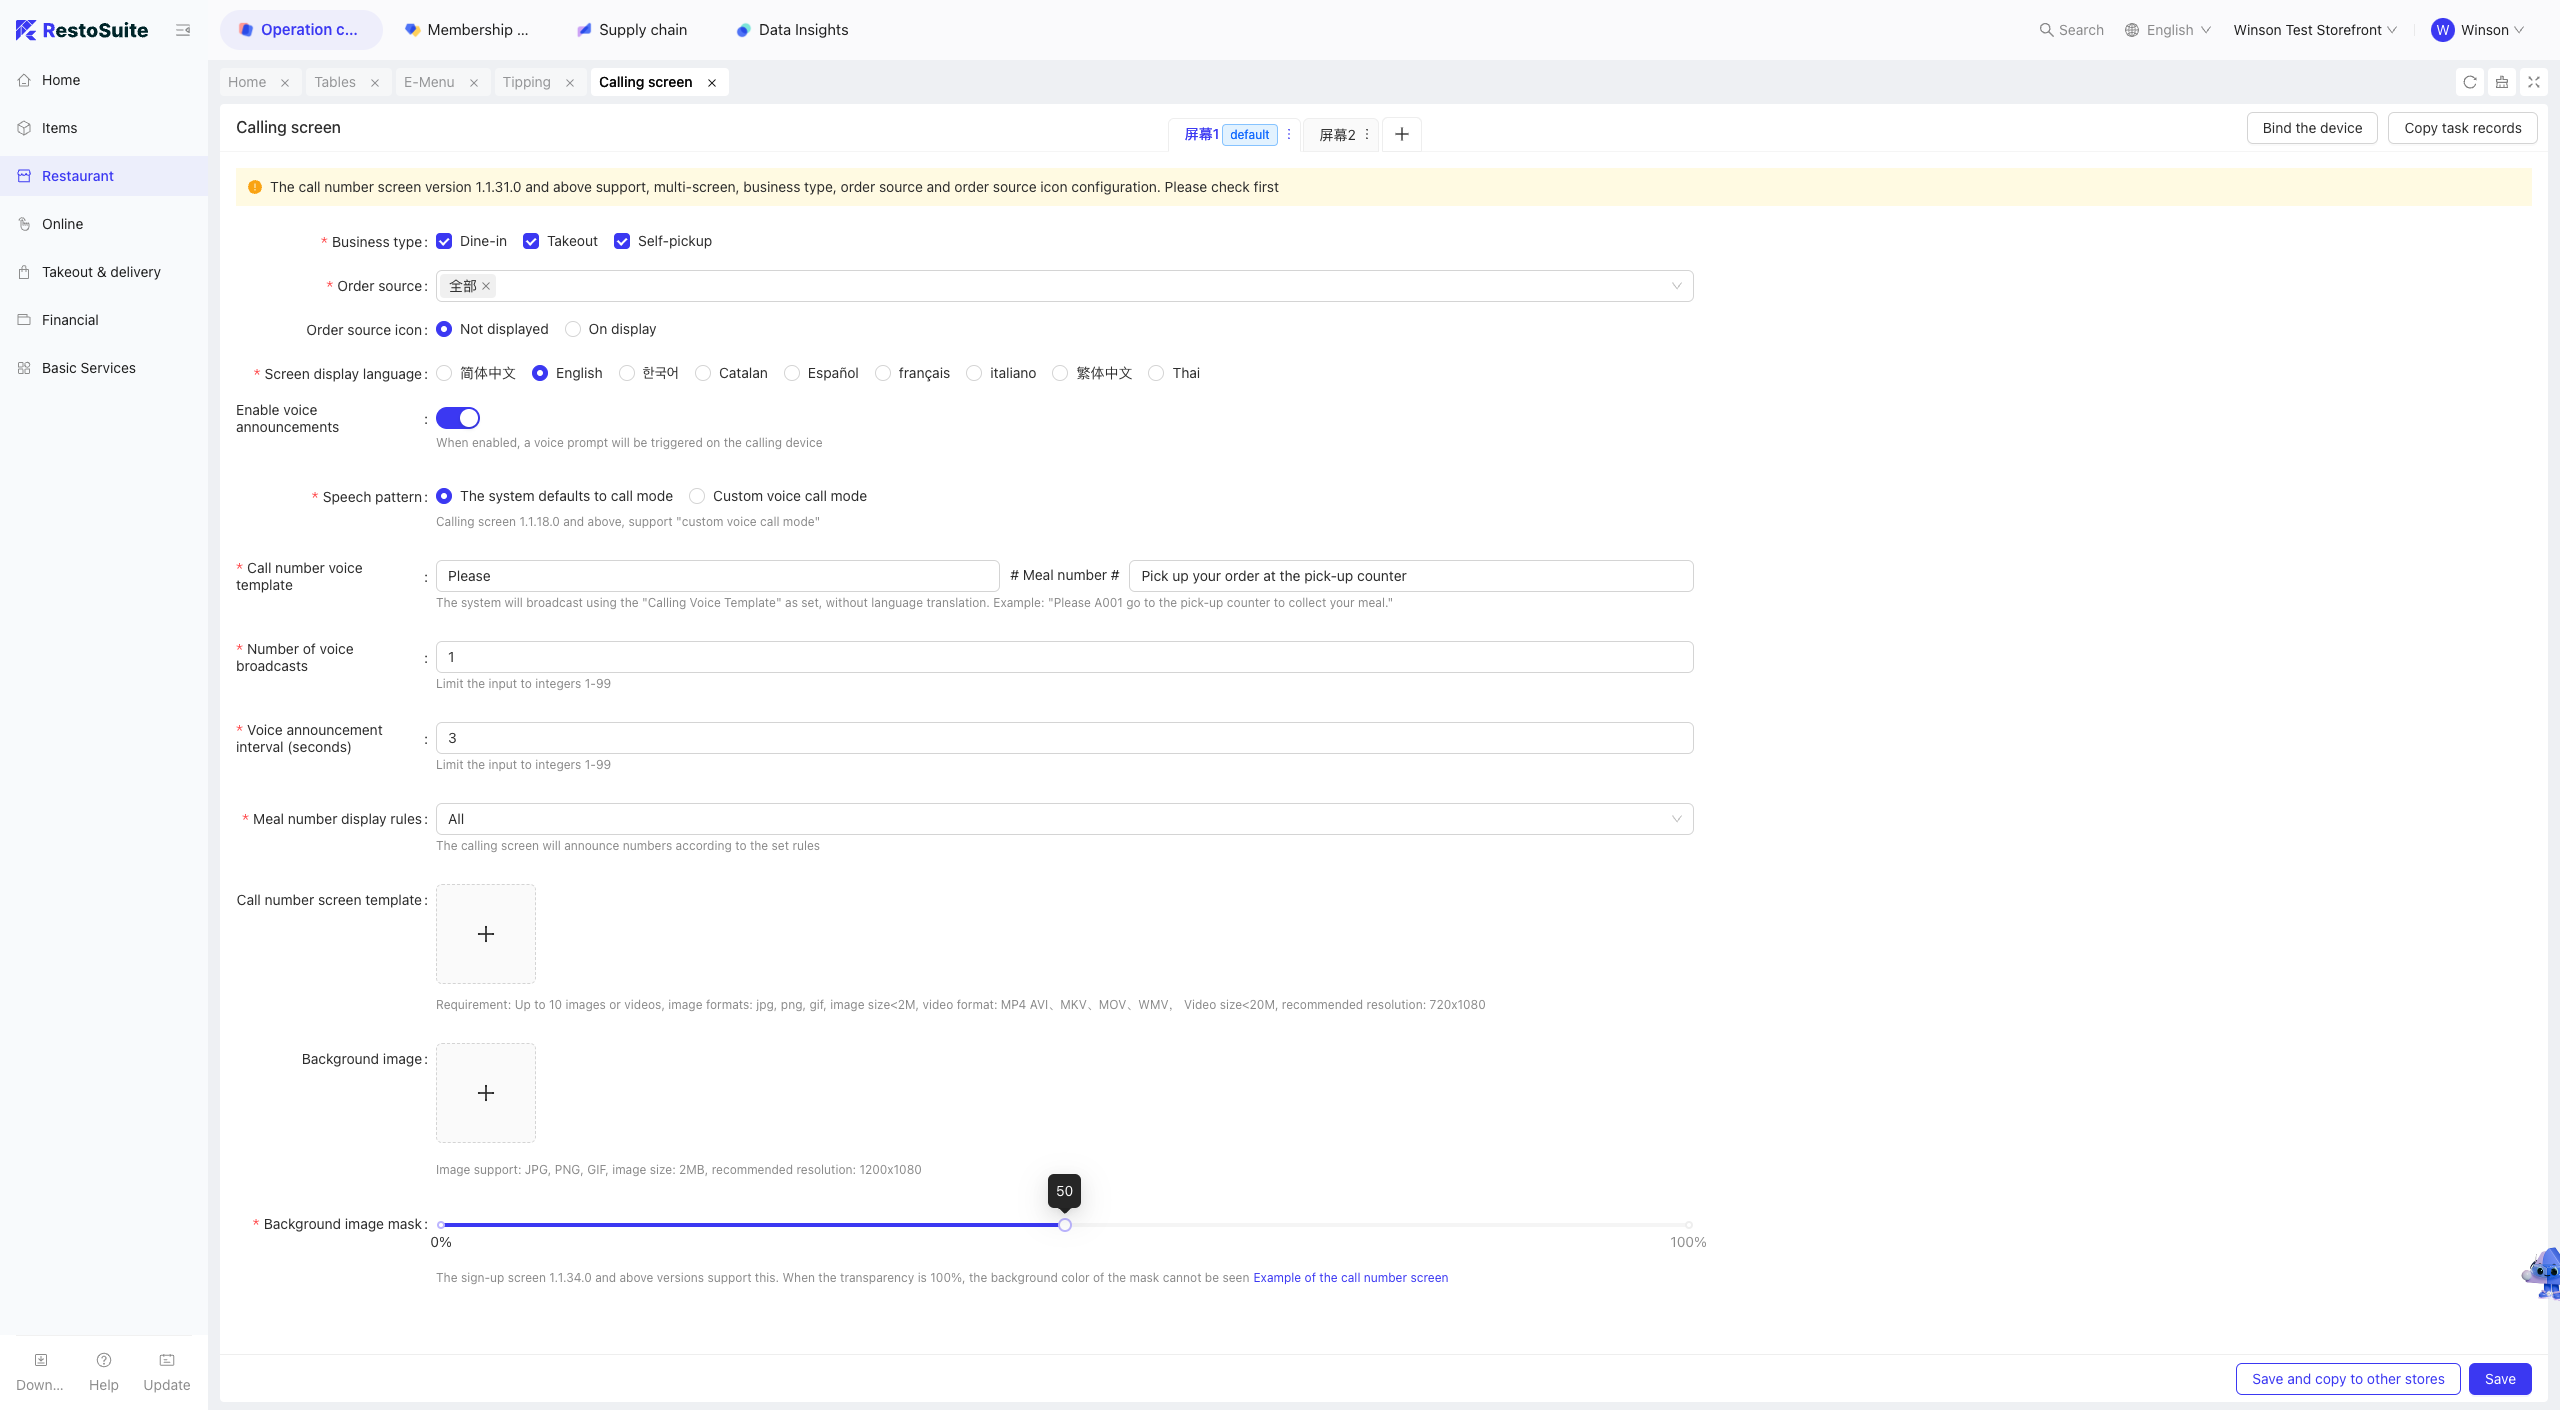
9 Calling Screen (Store Level)
Step 1: Click [Calling Screen].
Step 2: Fill in the form:
- Business Type: Dine-In, Takeaway, Pickup.
- Order Sources: Configure which order sources are displayed on the Calling Screen.
- Order Source Icons: Show/Hide order source icons.
- Display Language: Language used on the Calling Screen.
- Enable Voice Announcement: Trigger voice prompts for call notifications.
- Voice Mode: System Default, Custom Voice (supported in version 1.1.18.0 and above).
- Voice Announcement Template: Configure when using the System Default voice mode.
- Announcement Count: Number of voice repetitions (1-99 times).
- Announcement Interval: Time between consecutive announcements (1-99 seconds).
- Pickup Number Display Rule: Show full number or last 1-4 digits.
- Advertisement Carousel: Upload up to 10 carousel images.
- Background Image: Upload a background image.
- Background Image Overlay: Adjust overlay transparency (100% transparency hides the overlay).
Step 3: Click [Save] to apply the settings.