Order Management
(For Cashiers / Servers / Store Managers)
1 Introduction
This guide covers complete order lifecycle management in the POS system, including order search, status management, refund processing, and exception handling - everything you need for efficient order control.
2 Order Search
2.1 Access the Order Center
After logging into the POS system, click on the main menu【Order Center】. The default view displays the “All Orders” list.
Core areas of the page:
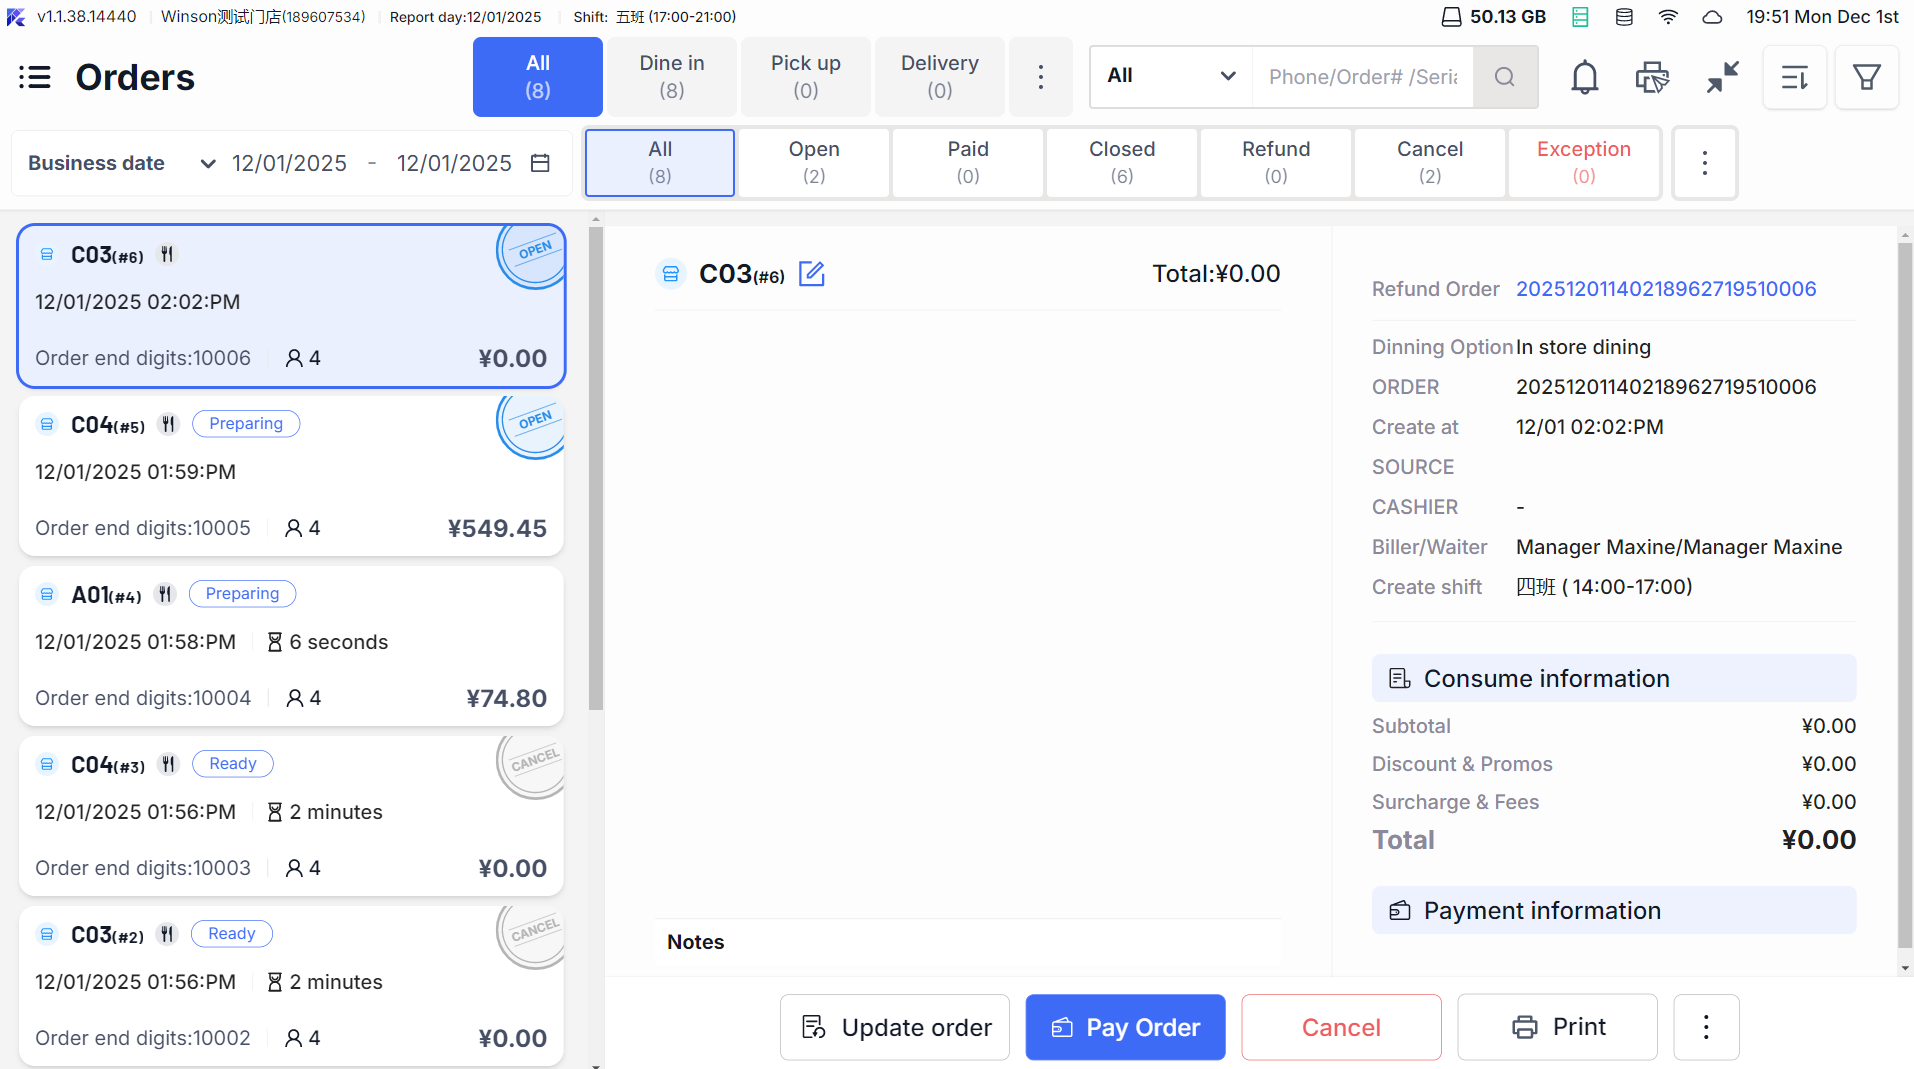
- Filter Area: Supports filtering by order status, time, source, and other criteria.
- Order List Area: Displays key order information (order number, time, amount, status).
- Statistics Area: Shows the order count and total amount for the current filter criteria at the bottom.
2.2 Search Orders by Criteria
2.2.1 Basic Filtering

- Order Status Filter: Click on the status tabs at the top (e.g., “Unpaid,” “Paid,” “Refunded,” “Abnormal”) to quickly filter orders by status.

- Order Source Filter: Click the【Source】dropdown to select “POS Dine-In,” “Online Pickup,” “Third-Party Delivery,” etc., to filter orders by channel.
- Amount Range Filter: Enter the start and end amounts in the “Amount Range” input box (e.g., “10-100”) to filter orders within that range.
2.2.2 Search by Time
-
By Creation Time:
- Click the date selector to display orders for “Today 00:00-23:59” by default.
- Supports custom time ranges (e.g., “2025-01-01 10:00 to 2025-01-02 18:00”) or select quick time options (“Yesterday,” “Last 7 Days,” “Last 30 Days”).
-
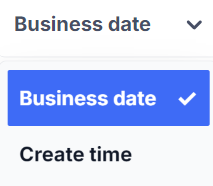
By Business Date:
- Click the【Switch】button next to the time filter box and select【Business Date】
- Choose the target business date (e.g., “2025-01-01”) to filter all orders for that business day
💡Orders spanning multiple days are attributed to their business date.
2.2.3 Advanced Filtering (Multi-Criteria Combination)
- Click【More Filters】to expand advanced criteria:
- Cashier: Select a specific cashier to filter orders they processed.
- Table Number/Pickup Number: Enter the table number (e.g., “A01”) or pickup number (e.g., “1001”) to precisely locate orders.
- Member Information: Enter the member’s phone number/card number to filter the orders of that member.
After selecting multiple criteria, click 【Confirm】and the system will return results according to the combined conditions.
2.3 Order Sorting

- Click the【Sort】icon at the top right of the Order Center to expand sorting options:
- Time: Opening time (ascending/descending), Payment time (ascending/descending).
- Amount: Order amount (ascending/descending).
- Number: Order number (ascending/descending).
- Others: Table number, opening staff, order status.
Select sorting conditions (supports multiple selections, effective in order of selection), and the sort button will show a red dot indicator. Cancel all custom sorts to revert to default (opening time descending).
3 Order Status Management (Unpaid/Closed Orders)
3.1 Opening Orders (New Order Creation)
3.1.1 Regular Order Opening (Dine-In/Pickup/Delivery)
-
Dine-In:
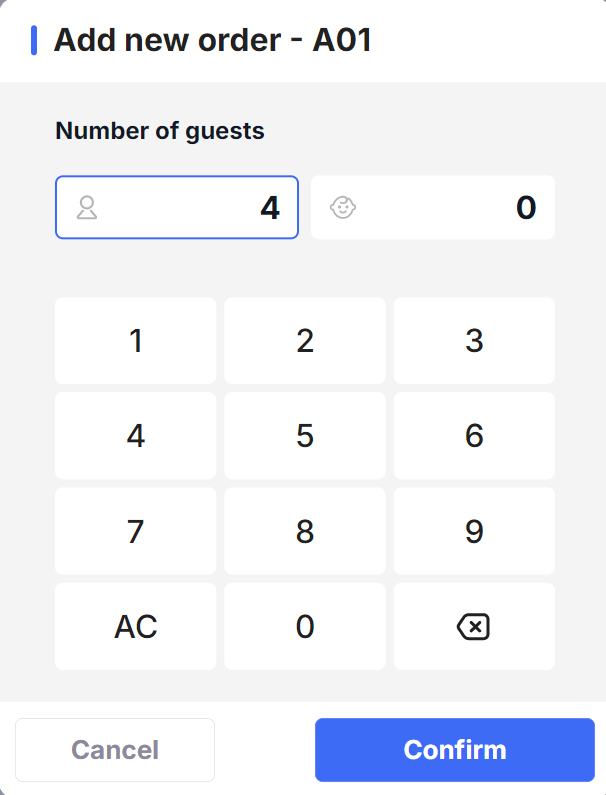
- Click【Table】→ select the target table number (e.g., “A01 - Hall”) → enter the number of diners → click【Confirm to Open】
- The system automatically creates an order, entering the menu page (supports direct item addition, specification/taste selection).
-
Pickup/Delivery:

- Click【New Order】→ select【Pickup】or【Delivery】→ fill in customer information (name, phone number, address for delivery) → click【Confirm】
- Enter the menu page, complete item selection, then click【Place Order】. The order status becomes “Ordered and Awaiting Payment.”
3.2 Closing Orders
3.2.1 Automatic Closing
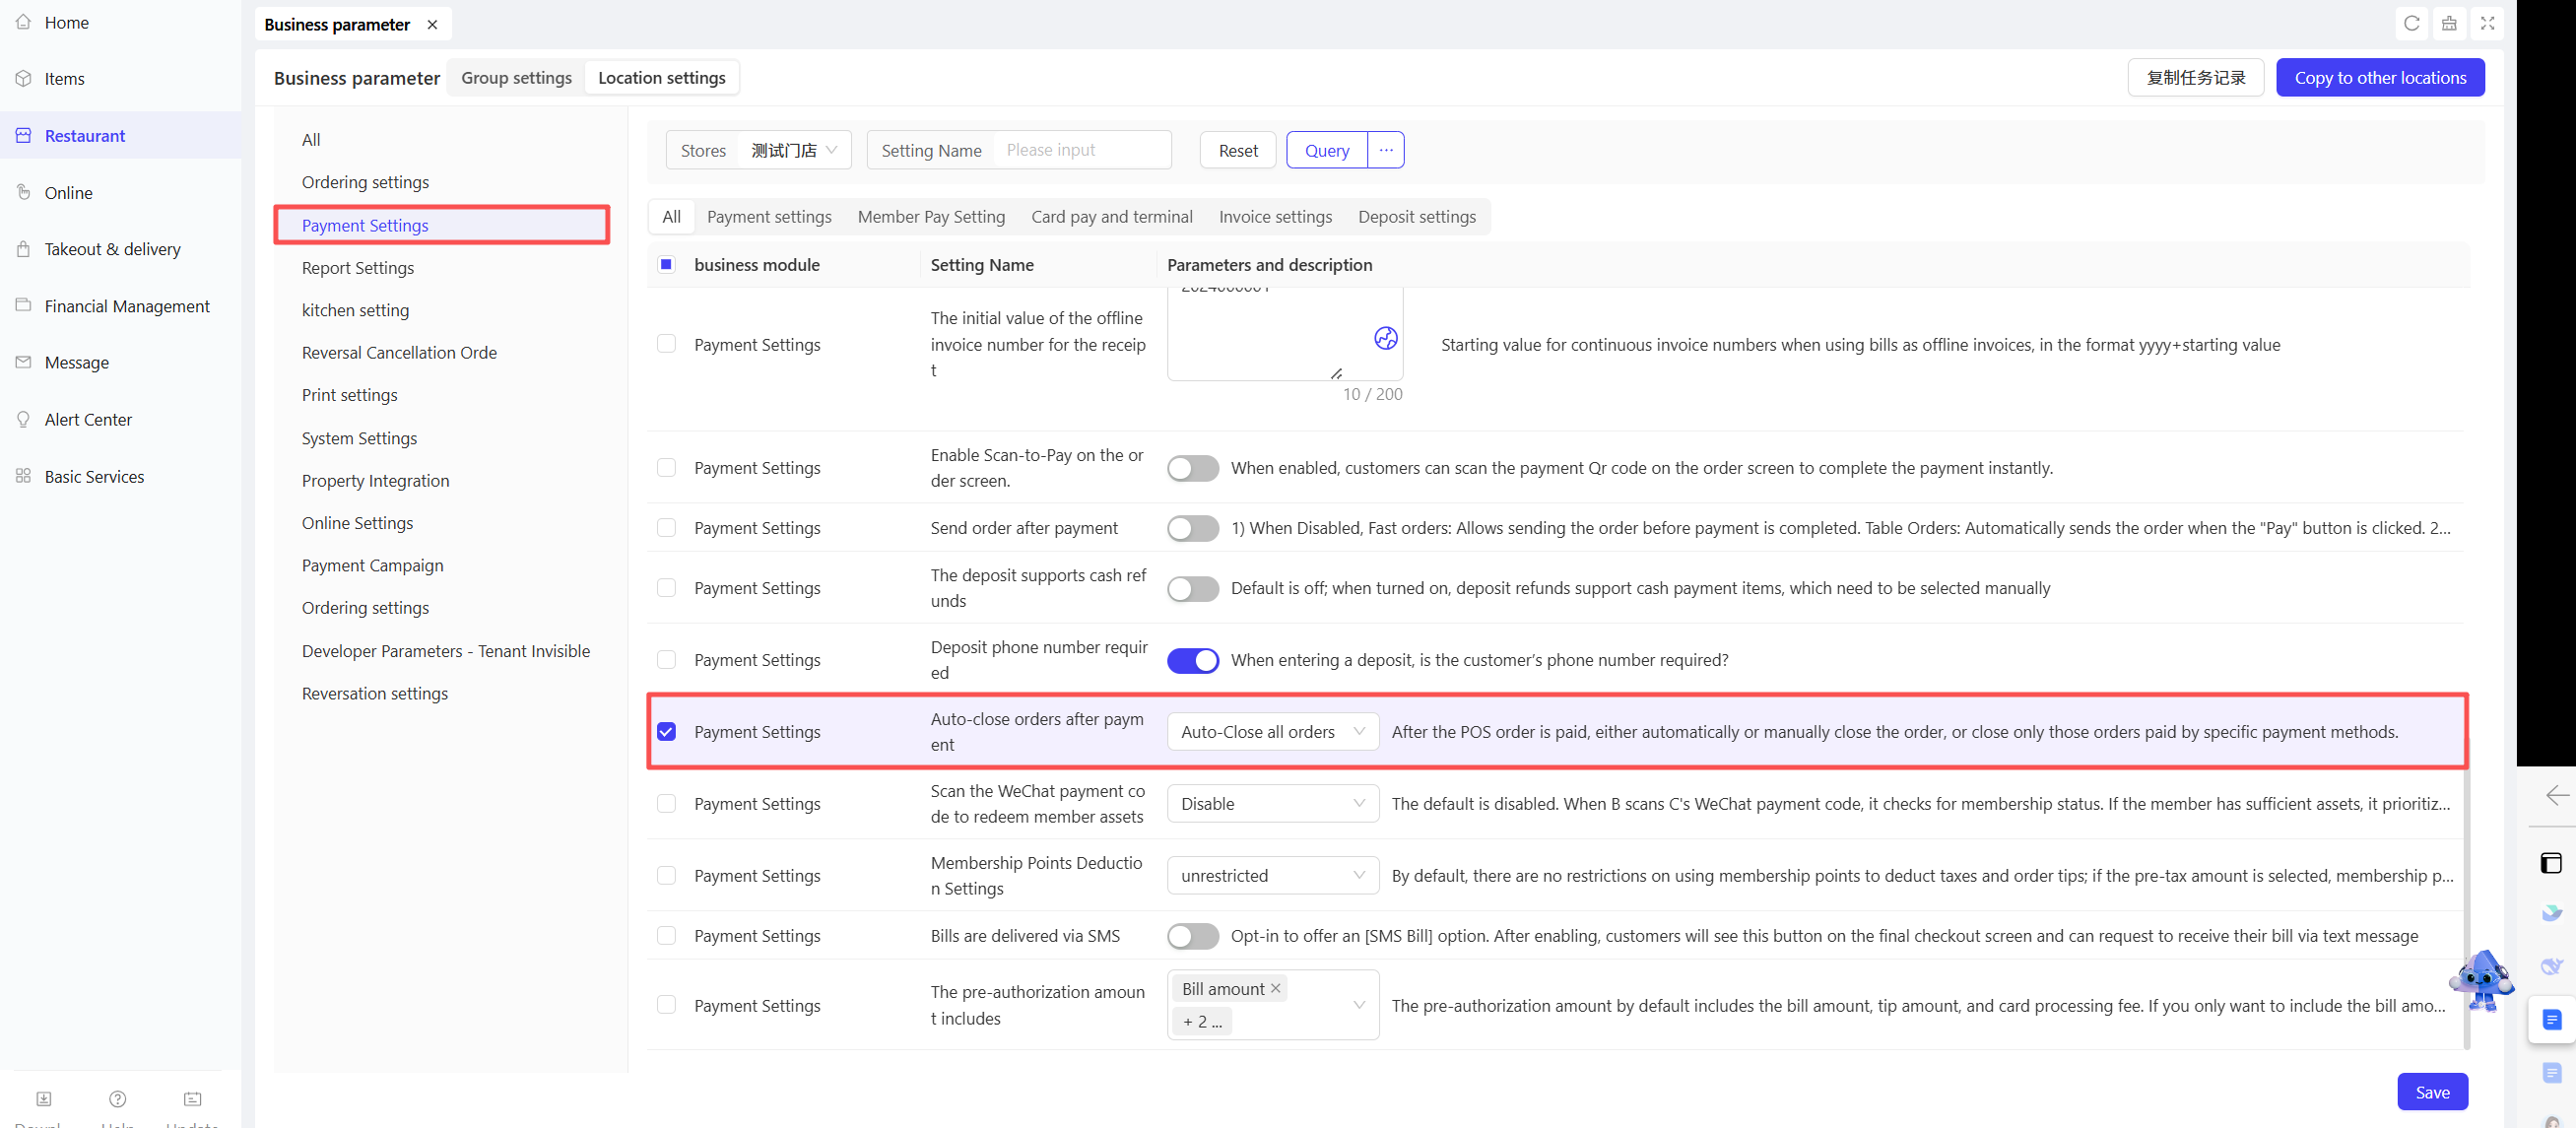
- If system parameters are set for “Auto Close” (configured in the BO end), orders will auto-close when:
- The order is fully paid (balance is 0).
- Non-bank card payments (or parameters set for “all payments auto close”).
- No pending refunds/returns.
3.2.2 Manual Closing
- Enter the order details page, confirm the order is fully paid (balance is 0).
- Click the【Close Order】at the bottom (requires permission), and a confirmation pop-up asks, “Close this order?”
- Click【Confirm】and the order status changes to “Closed,” with the table (if applicable) automatically marked as “Ready for Cleaning.”
3.3 Reopen Orders (Reactivating Closed Orders)
3.3.1 Reopen Conditions
Only "Closed" orders are supported.
Orders spanning business days cannot be reopened (e.g., if the current business day is January 2nd, you cannot reopen orders from January 1st).
Orders that are fully/partially refunded cannot be reopened.
3.3.2 Operation Steps
- Step 1: In the Order Center, find the target order, and click【Reopen】(requires permission with code: ReOpen).
- Step 2: A popup will ask for the reason for reopening (e.g., “Item Return and Refund,” “Change Payment Method,” “Add Items”). You can select multiple or manually enter other reasons.
- Step 3: Click【Confirm】and the system generates an original order snapshot (recording items, amounts, and payment methods before reopening). The order status reverts to “Paid and Awaiting Closure.”
- Step 4: After reopening, you can modify the order (add items, return items, adjust prices). Once modifications are complete, the order needs to be closed again.
4 Refund Processing (Full/Partial Refunds)
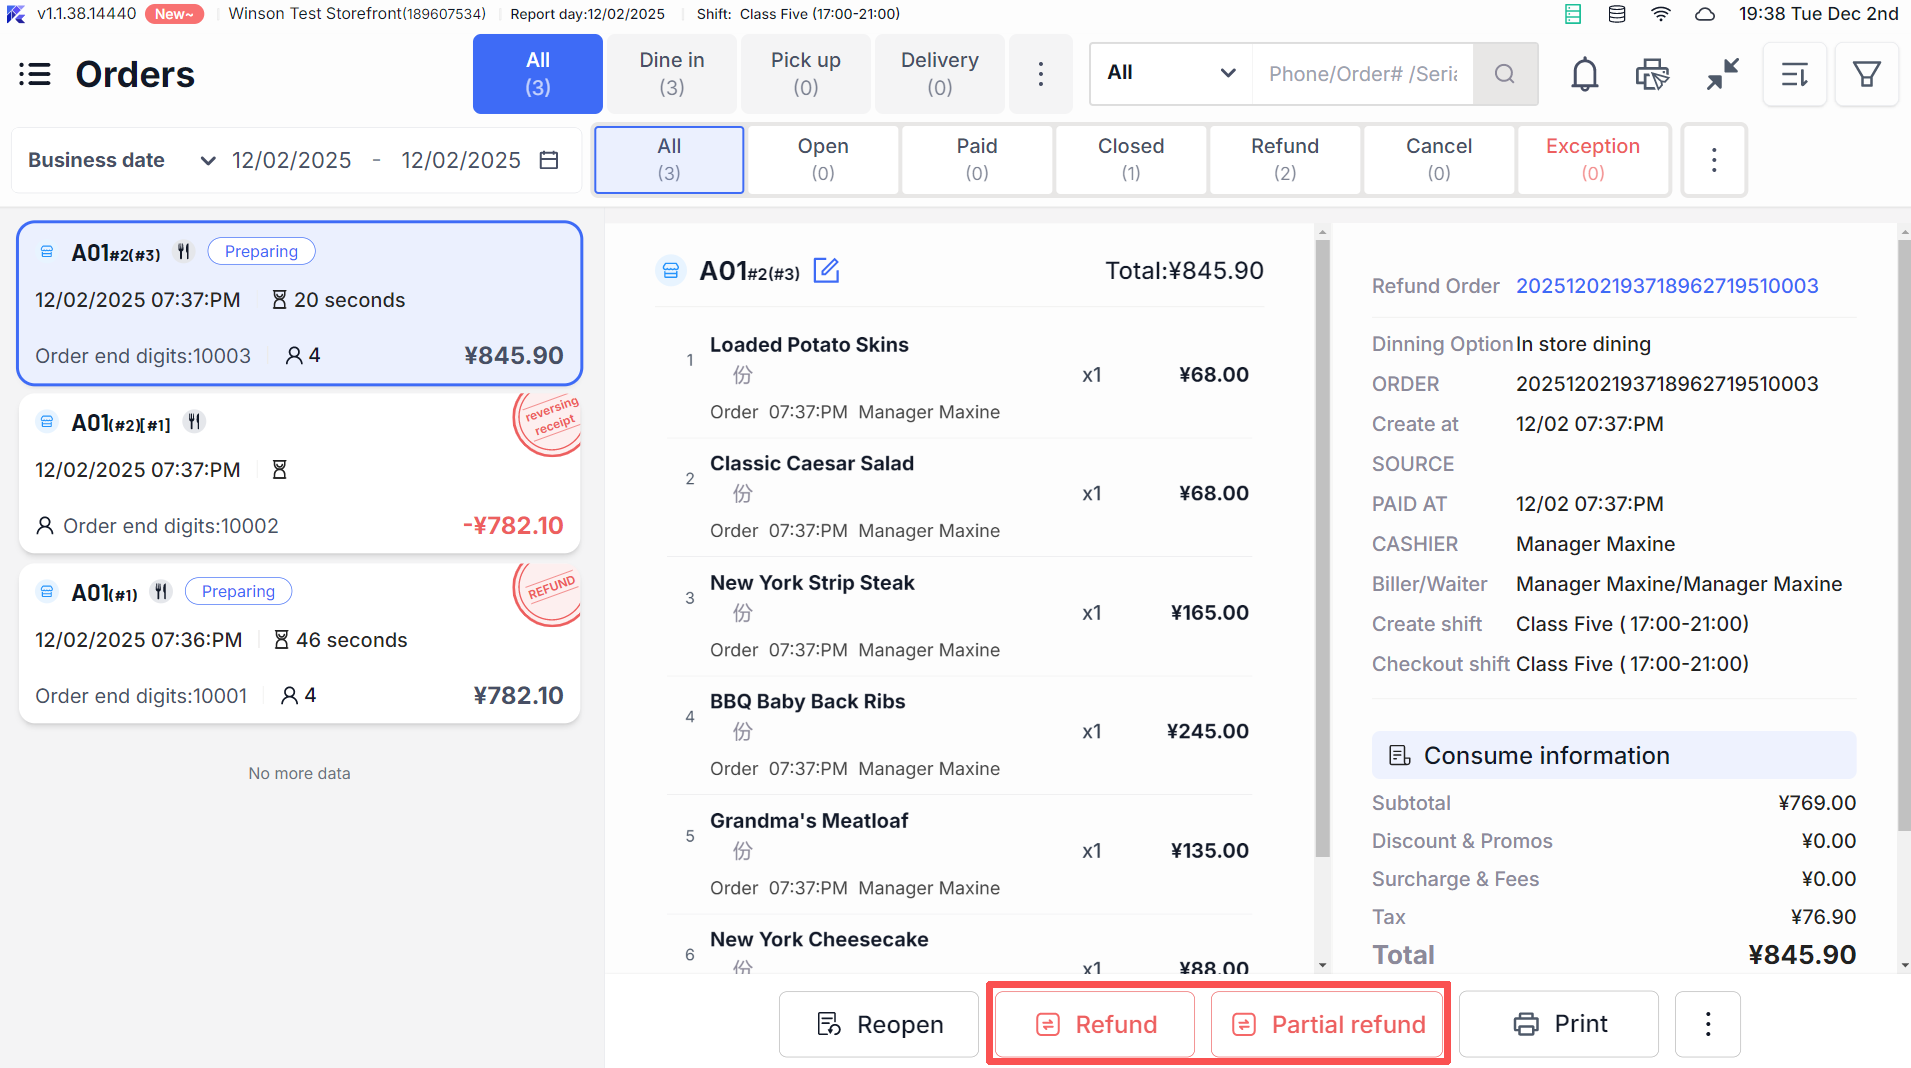
4.1 Full Refund (Closed Orders)
- Step 1: Enter the order details page and click【Full Refund】(requires permission).
- Step 2: A popup will warn, “Confirming will refund all items/charges in full, and the amount will be returned via the original payment method. This action is irreversible.” Click【Confirm】.
- Step 3: Select the refund reason (e.g., “Customer Cancelled,” “Product Issue,” “Order Error”). The system automatically generates a reversal document (recording the original order number, refund amount, and refund method).
- Step 4: Refund Results:
- Successful: A toast notification will say “Refund Successful,” and the reversal document status will be “Completed.” The original order will be marked “Fully Refunded.”
- Failed: It will display the specific reason (e.g., “Bank Card Refund Timeout”). You can retry or opt for a “Cash Refund” (requires permission).
4.2 Partial Refund (Refund Some Items/Charges)
-
Step 1: Enter the order details page, and click【Partial Refund】(requires permission).
-
Step 2: Choose the items to refund:
- Items: Check the targeted items, adjust the return quantity (cannot exceed the original order quantity), and select the return reason (e.g., “Taste Issue,” “Insufficient Portion”).
- Charges: Check the fees to refund (e.g., “Service Fee,” “Packaging Fee”) and enter the refund amount (cannot exceed the original charge amount).
-
Step 3: The system calculates the “Total Refund Amount.” Select the refund method (default is original path, supports alternate refund methods like “Cash,” requires permission).
-
Step 4: Click【Confirm Refund】to generate a reversal document (including only the refunded portion). The original order will be marked “Partially Refunded,” recording the refunded amount and remaining refundable amount.
4.3 Refund Special Scenarios
4.3.1 Item Coupons Refund
- Orders using item vouchers will automatically refund the coupon when the corresponding item is returned
Example: Return a burger purchased with a voucher, and the coupon is reinstated for use
- Coupons cannot be partially refunded and must be fully returned (once refunded, the original voucher can be reused).
4.3.2 Multi-Payment Method Refunds
- If an order uses multiple payment methods (e.g., “WeChat + Cash”), refunds are proportionally returned based on original payments
Example: If the original order paid 60 with WeChat and 40 with cash, a 50 refund would be split into 30 WeChat and 20 cash
- You can manually adjust the refund amount for each payment method (requires permission), but the total cannot exceed the refundable amount.
5 Abnormal Order Handling
5.1 Abnormal Order Definition
Key Terms:
Imbalance Orders: Order due amount ≠ actual paid amount (e.g., online prepayment with discrepancies).
Status Abnormal Orders: Timeout in payment/refund status updates (e.g., QR payment without result).
Data Inconsistency Orders: Main order and sub-table fields mismatch (e.g., total item amount ≠ total order amount).
5.2 Abnormal Order Alerts
- Real-Time Alerts: When an abnormality is detected during acceptance/payment, a pop-up will say “XX Order Abnormal, Please Process Promptly,” offering “Process Now” or “Remind Later” options.
- Scheduled Alerts: The system checks for abnormal orders every 60 minutes. If unprocessed exceptions exist, the message center sends reminders (e.g., “3 Abnormal Orders, Please Address”).
- Startup Alerts: Upon POS login, it automatically checks for unprocessed abnormal orders, prompting and guiding you to the “Abnormal” tab.
5.3 Abnormal Order Handling Steps
-
Step 1: Go to the “Abnormal” tab in the Order Center, locate the target order, and click【Process】
-
Step 2: Handle based on the type of abnormality:
- Imbalance: Verify order amounts and payment records, manually adjust (e.g., add a “Price Adjustment Fee” to balance the difference, or initiate a partial refund to return excess amounts).
- Payment Timeout: Click【Check Payment Status】. If the customer has paid, manually record the payment. If unpaid, cancel the payment record and reinitiate payment.
- Data Inconsistency: Click【Repair Data】and the system automatically synchronizes main and sub-table fields (e.g., recalculates total item amounts).
-
Step 3: After processing, the order is removed from the “Abnormal” tab and returns to normal status.
6 Reservation Order Management
6.1 Reservation Order Management
6.1.1 Reservation Inquiry and Confirmation
- Step 1: Go to the “Reservation” tab in the Order Center, filtering for “Pending Confirmation,” “Confirmed,” “Cancelled” reservation statuses.
- Step 2: When customers arrive, find the corresponding reservation, click【Confirm Arrival】→ enter actual number of guests →【Open Order】, converting it to a normal order.
6.1.2 Reservation Modification and Cancellation
- Modification: Locate the pending reservation, click【Edit】to change reservation time, number of people, or remarks, then click【Save】to apply changes.
- Cancellation: Click【Cancel Reservation】, choose a reason (e.g., “Customer Cancelled,” “No Show”), and the reservation status changes to “Cancelled,” with no order record generated.
7 Order Details and Printing
7.1 Viewing Order Details
-
In the order list, click any order to enter the details page and view three core information categories:
- Basic Information: Order number, opening time, business date, table number/pickup number, opening staff, and cashier.
- Consumption Information: Item details (name, specification, quantity, unit price, amount), charge details (service fee, tax, tip), discount details (vouchers, discounts, points redemption).
- Payment Information: Payment method, payment amount, refund records (if any), reversal records (if any).
-
Support viewing order snapshots (for reopened orders): Click the【Snapshot】dropdown, select historical snapshots to view the order status before reopening.
7.2 Order Printing
-
Receipt Printing:
- After the order completes payment, a receipt is automatically printed (customer copy + store copy).
- Reprint: Enter the order details page, click【Print】→【Receipt】and choose the number of copies (1-5).
-
Reversal Document Printing:
- Once a refund is completed, a reversal document is automatically printed (recording refund amount, original order number, refund method).
- Reprint: Find the corresponding record in the “Reversal” tab and click “Reprint.”
8 FAQs
- Issue: Unable to Reopen an Order?
- Check if it spans business days (orders across days cannot be reopened).
- Confirm if the order is fully/partially refunded (such orders cannot be reopened).
- Verify if you have reopening permission (requires “ReOpen” permission).
-
Issue: Can’t Select Items for Partial Refund?
- Check if the item has been fully refunded (remaining refundable quantity is 0).
- Confirm if the order is closed (non-closed orders need to be closed before a refund can be processed).
-
Issue: Unable to Repair Abnormal Orders?
- If the “Repair Data” button is grey, contact the administrator for backend data synchronization.
- Imbalanced orders can manually add a “Price Adjustment Fee” to balance the discrepancy (requires permission).
-
Issue: Test Bill Appearing in Reports?
- Check if you have “Query Test Bill” permission (without permission, reports automatically exclude test bills; with permission, manually filter “Non-Test Bills”).
- Confirm if the test bill mark is effective (the order details page should show a “Test Bill” tag).
9 Need Help?
- For further inquiries, click on【Settings】→【Help Center】in the system to view video tutorials
- Contact the store manager for permission issues or exceptions