RS KDS
1 Introduction
What is an RS KDS? Guide to Your Kitchen Display Systems
A Kitchen Display System (KDS) is the digital command center for your kitchen. It seamlessly integrates with your POS and online ordering channels, instantly transforming orders into clear, actionable tickets. With features like colour-coded prioritisation and step-by-step tracking, it empowers your team to streamline workflows, accelerate service, and turn valuable preparation data into continuous operational improvement.
KEY TERMS:
KDS (Kitchen Display System): A digital system aiding kitchen workflow management.
POS System: The system used by front-end staff to process customer orders.
BO (Back Office): The administrative interface for managing restaurant operations.
2 Module Business Value & Product Management Features
2.1 Module Business Value
2.1.1 Core Value: Enhance Kitchen Operational Efficiency
The core value of KDS lies in connecting front-end orders with back-end kitchen preparation, replacing traditional paper tickets with digital processes to enhance both output efficiency and quality control.
- Real-Time Order Sync: Orders from the front desk are immediately displayed on kitchen screens, eliminating paper ticket handling and reducing errors.
- Visualized Workflow: Chefs can see order priorities, time limits, and ingredient requirements directly on the screen, minimizing verification time and shortening preparation cycles.
- Controlled Output Pace: Orders can be organized by table, order time, or dish type, helping kitchens manage order flow and avoid chaos from accumulated orders.
2.1.2 Key Value: Quality Control and Management
Beyond efficiency, KDS provides data support for restaurant management, helping improve dish quality and operational decision-making.
- Standardized Procedures: Screens can display preparation steps and ingredient quantities, reducing variability due to chefs’ differing experiences.
- Operational Data Analysis: The system records preparation times and serving efficiencies, helping managers identify inefficiencies.
- Cost and Waste Management: By tracking order data and ingredient usage, restaurants can optimize inventory and reduce waste.
2.1.3 Extended Value: Customer Experience Optimization
Efficient kitchen operations enhance customer dining experiences, indirectly boosting brand competitiveness.
- Standardized Procedures: Consistent preparation reduces flavor variability.
- Reduced Order Errors: Digital order transmission significantly lowers the chances of incorrect or missed orders, reducing communication costs and disputes with customers.
2.2 Product Management Features
2.2.1 Order Management: Precise Sync and Dynamic Scheduling
This is the most basic management feature of the KDS system, addressing issues with traditional paper tickets and information sync.
- Real-Time Sync: Orders from the POS or online platforms instantly transmit to kitchen stations without delay or omission.
- Intelligent Sorting: Orders can be sorted automatically by “Order Time,” “Table Number,” or “Dish Preparation Time.”
- Status Tracking: Orders can be manually or automatically updated with statuses like “Pending,” “In Progress,” “Completed,” and “Served.”
2.2.2 Process Management: Standardization and Visualization
Digital methods standardize kitchen processes, reducing human error and improving overall efficiency.
- Standard Procedures: Screens can display preparation steps, ingredient amounts, and cooking durations to guide new chefs.
- Station Coordination: Multi-station kitchens (e.g., hot, cold, main dishes) display relevant orders to avoid cross-station communication errors.
- Exception Alerts: Orders exceeding preparation time trigger visual or auditory alerts to prevent long customer waits.
2.2.3 Data Management: Traceability and Decision Support
Unlike traditional management, KDS can store operational data, providing a basis for management optimization.
- Data Recording: Automatically logs “Order Time,” “Preparation Duration,” and “Serving Time” for each order.
- Report Generation: Export daily/weekly efficiency reports to identify inefficiencies.
- Issue Traceability: Tracks order records to quickly resolve customer complaints about incorrect or missing dishes.
2.2.4 Permission Management: Clear Roles and Risk Control
Ensures system operations are standardized, preventing unauthorized personnel from disrupting kitchen workflows.
- Role-Based Permissions: Different roles can be set, such as chefs viewing orders and updating statuses, kitchen managers modifying standards and viewing reports, and administrators configuring system parameters.
- Operation Logging: Key operations leave a record of the operator and time for accountability.
3 Module Capabilities
3.1 How to Install and Activate❓
3.1.1 For Android System:
- Installation:
- Download the Android installation package from the Restosuite website.

- Select your region and choose the product as KDS.
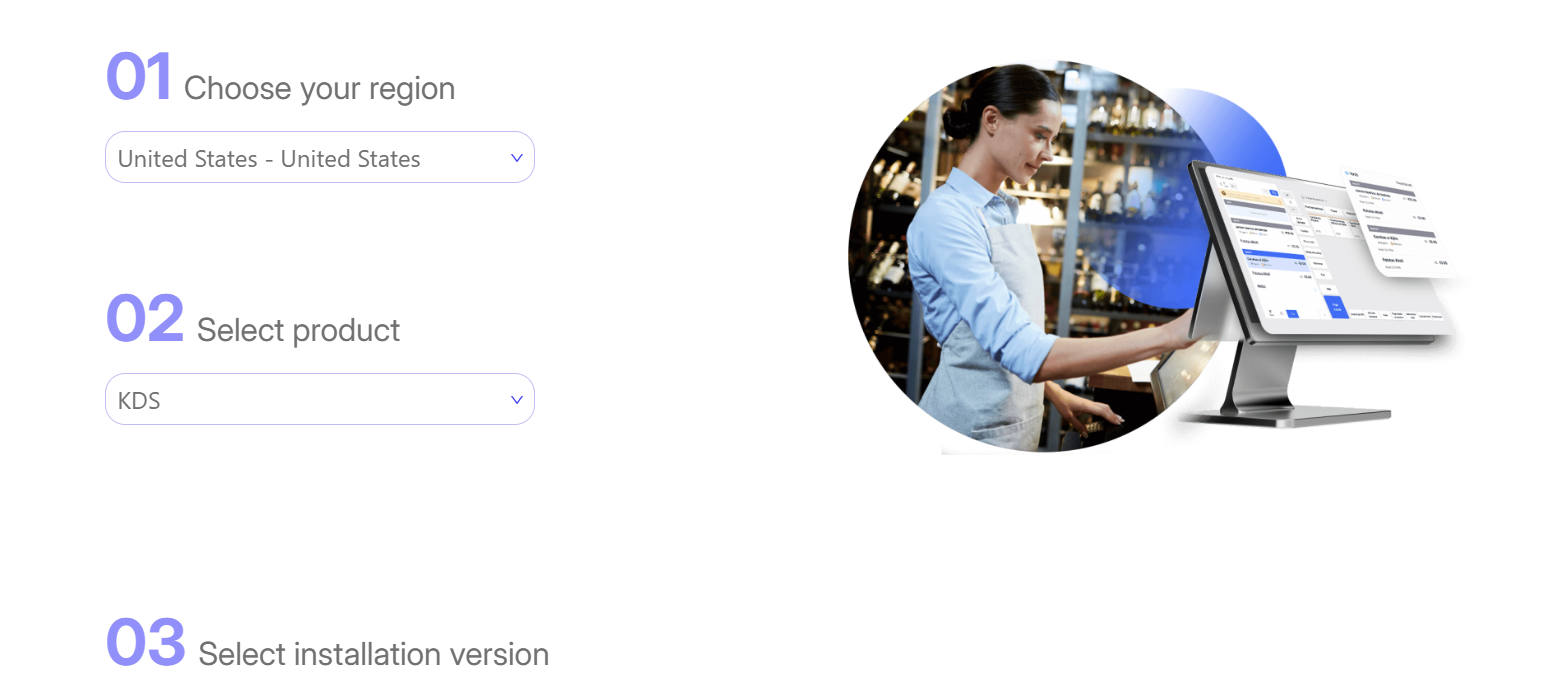
- During installation, when prompted to allow installation from unknown sources, click【Allow】to complete the installation process.
- Start Connection:
- Open the application and select KDS. When prompted for authorization, choose【Agree to All】
- If there are multiple KDS devices in the store, choose the one with the best performance as the KDS server. There must be one and only one KDS server per store.
- Enter the corresponding store ID to quickly find the POS server address associated with the store.
- If not found, you can manually enter the POS server address.
- Activation and Login:
- Enter the activation code for the store to activate the device.
- Once activation is complete, you can access the KDS login interface.
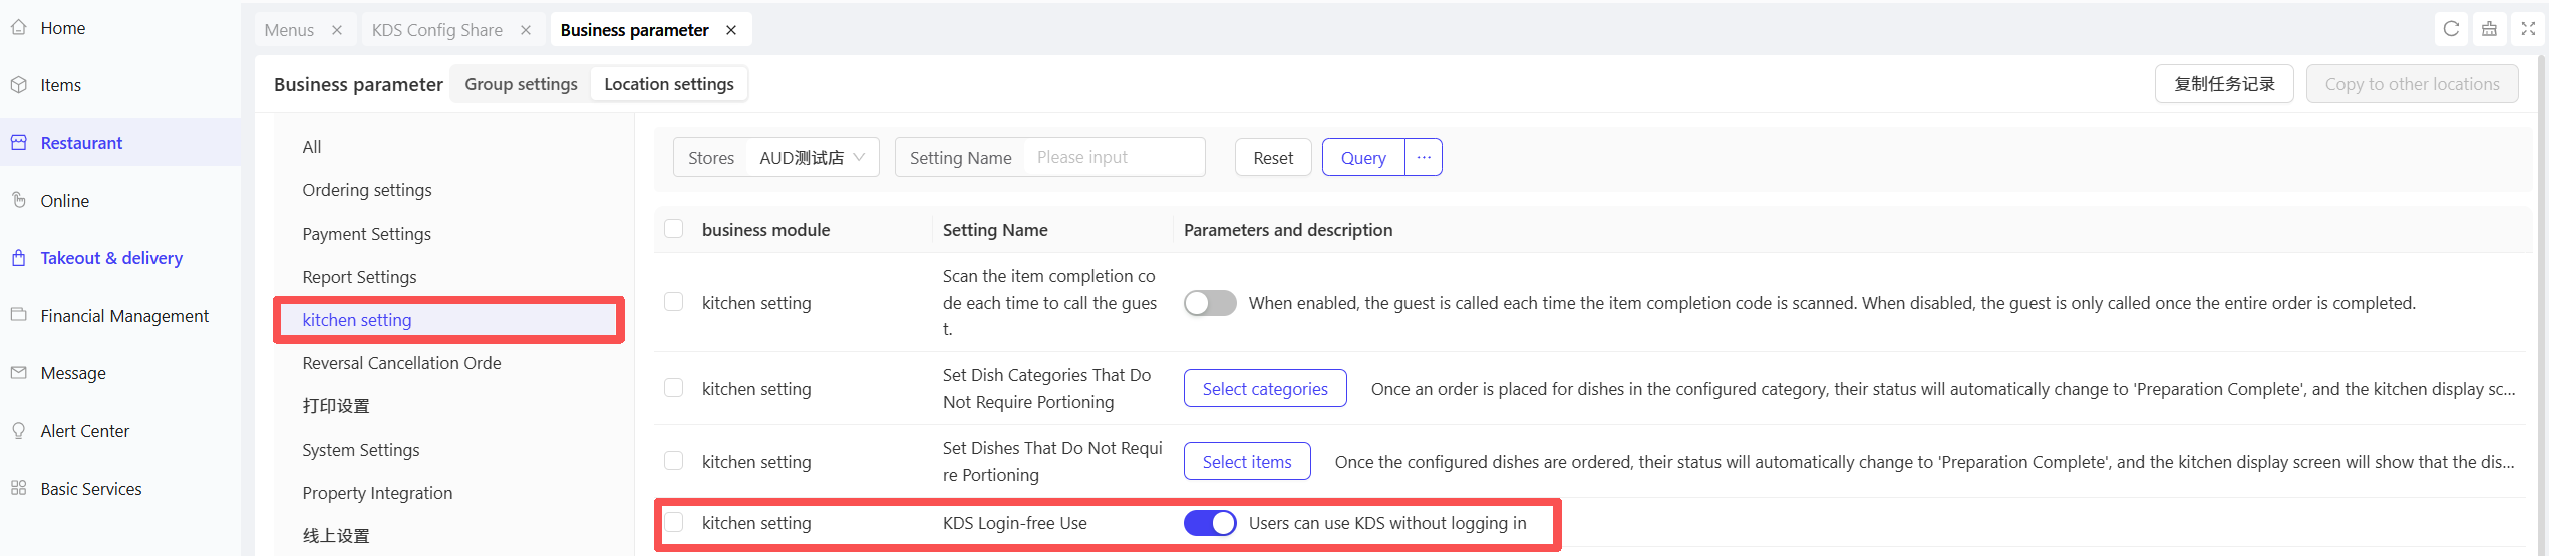
- If the login screen does not prompt employee PIN entry and goes directly to the settings interface, you can check in the BO end under【Restaurant Management → Business Parameter → KDS Login-Free Use】to see if it is enabled.
3.1.2 For Windows System:
- Installation:
- Download the Windows installation package from the Restosuite website
- Select your region and choose the product as KDS
- During installation, when prompted to allow installation from unknown sources, click【Allow】to complete the installation process
- Start Connection:
- Open the installed application and first configure the KDS server (each store must have one and only one KDS server), connecting to the LocalServer address.
- You can discover the LocalServer address (POS server address) through service discovery, or you can manually enter the server IP as a custom address.
- Activation and Login:
- Enter the activation code for the store to activate the device.
- Once activation is complete, you can access the KDS login interface.
- If the login screen does not prompt employee PIN entry and goes directly to the settings interface, you can check in the BO end under【Restaurant Management → Business Parameter → KDS Login-Free Use】to see if it is enabled.

3.2 How to Receive Ordered Items❓
Step 1: On the BO end, navigate to【Items Management】page. You can configure the production department for items when you【edit】or【add】new items.

Step 2: POS Setting
On the POS system, 【Setting → General Settings → KDS】enable the KDS switch

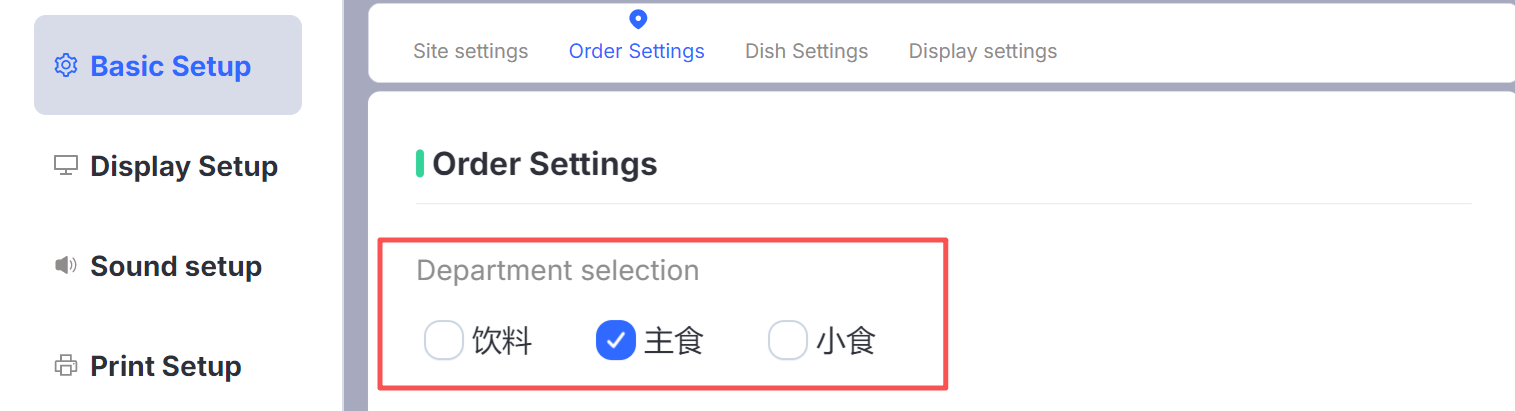
Step 3: KDS Setting
On the KDS system, you can select the dishes department

3.3 How to Configure and Use the KDS❓
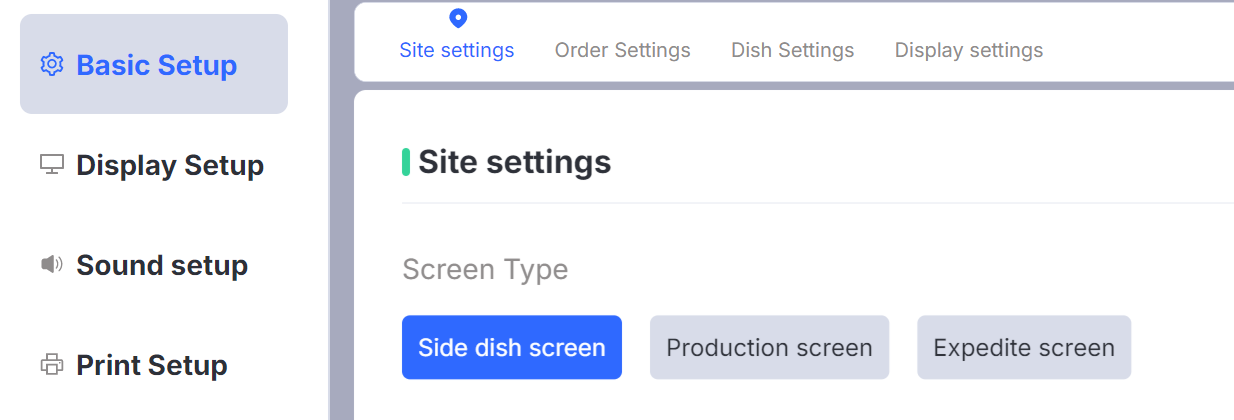
3.3.1 Basic Settings
Configuration Item | Options/Description | Enable | Disable |
|---|---|---|---|
Site Settings > Screen Type |
|
| |
Site Settings > Display Timing |
|
| |
Order Settings > Department Selection | Multiple Selection:
|
| |
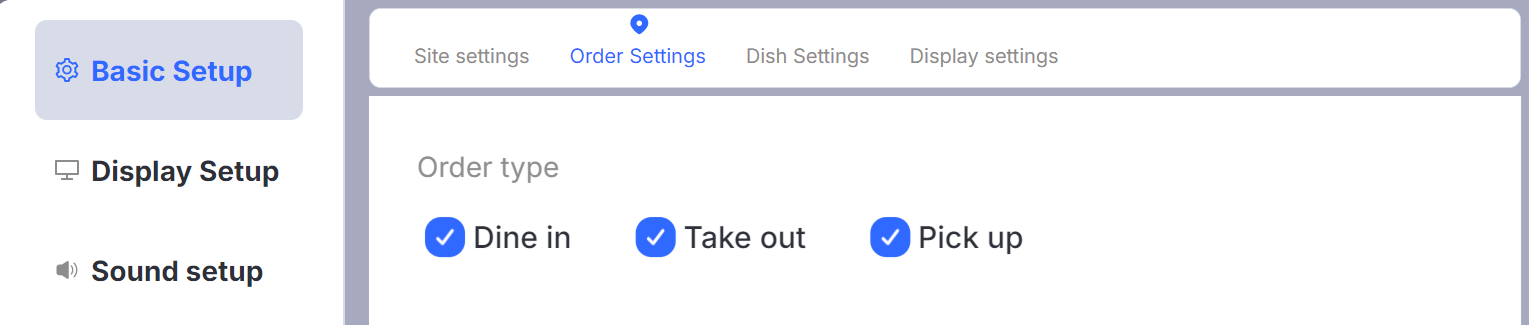
Order Settings > Order Type |
|
|
|
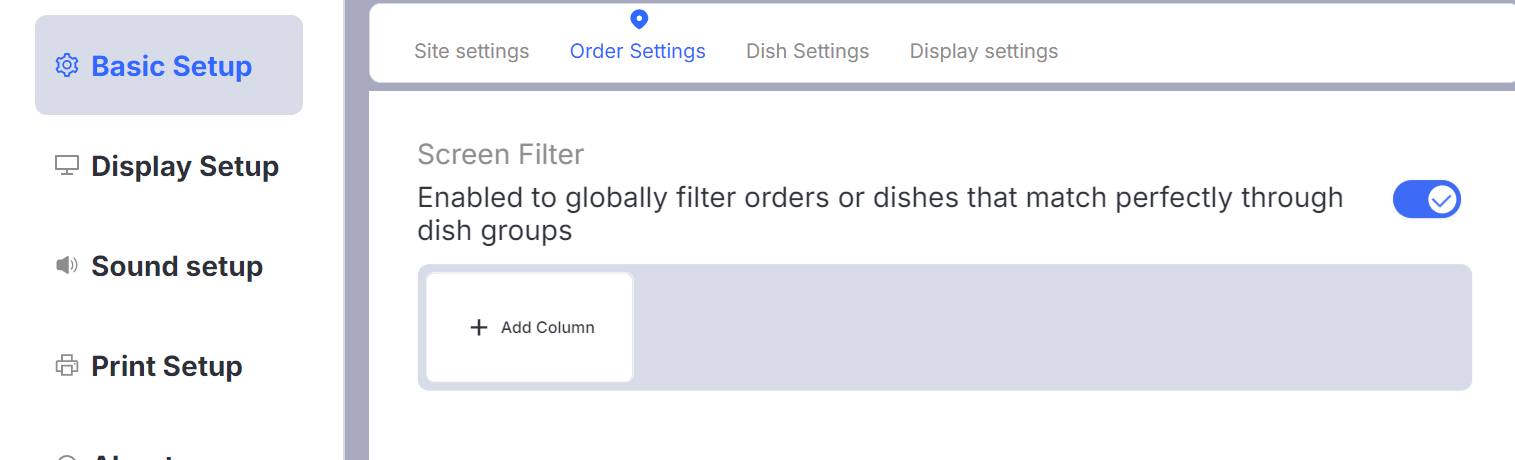
Order Settings > Screen Filter | Switch |
|
|
Order Settings > Side Dish Output |
|
|
|
Order Settings > Table Area | Switch |
|
|
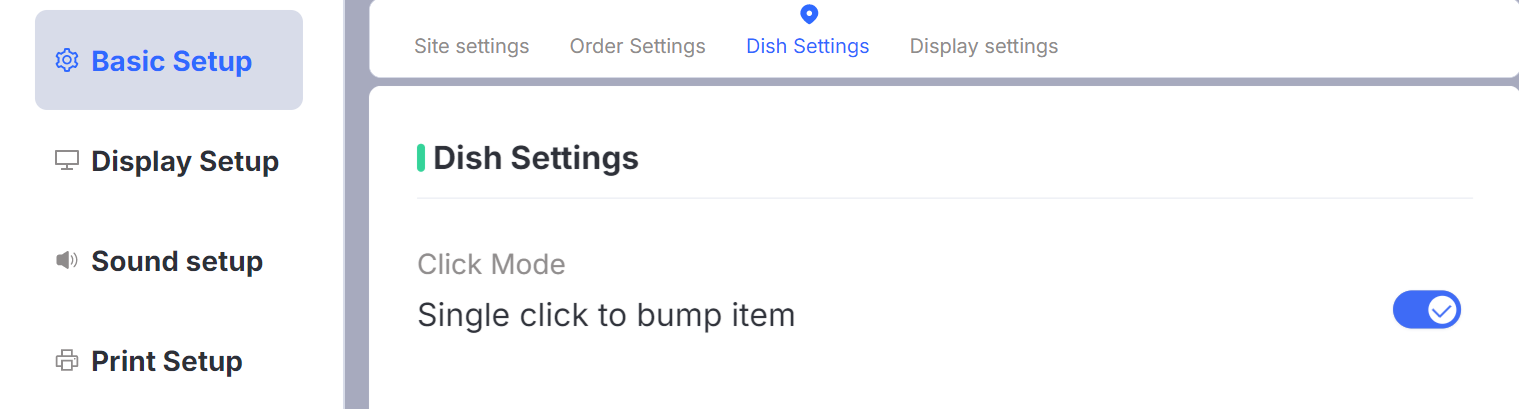
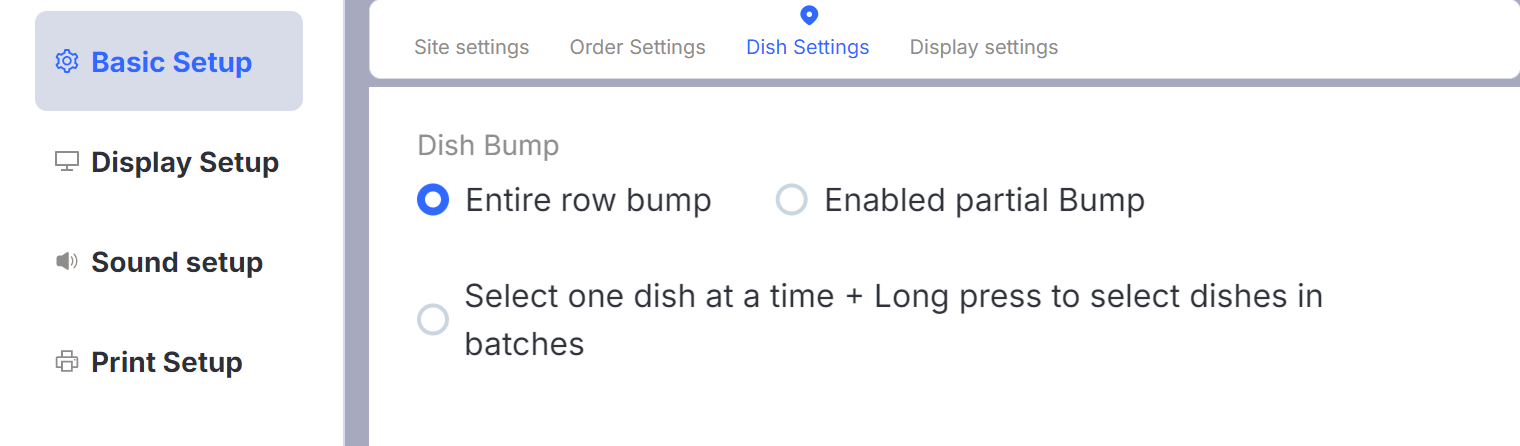
Dish Settings > Click Mode |
|
|
|
Dish Settings > Dish Marking |
|
| |
Dish Settings > Select Marking | |||
Dish Settings > Order Marking (Order Mode) |
|
|
|
Dish Settings > Marking Tip |
|
|
|
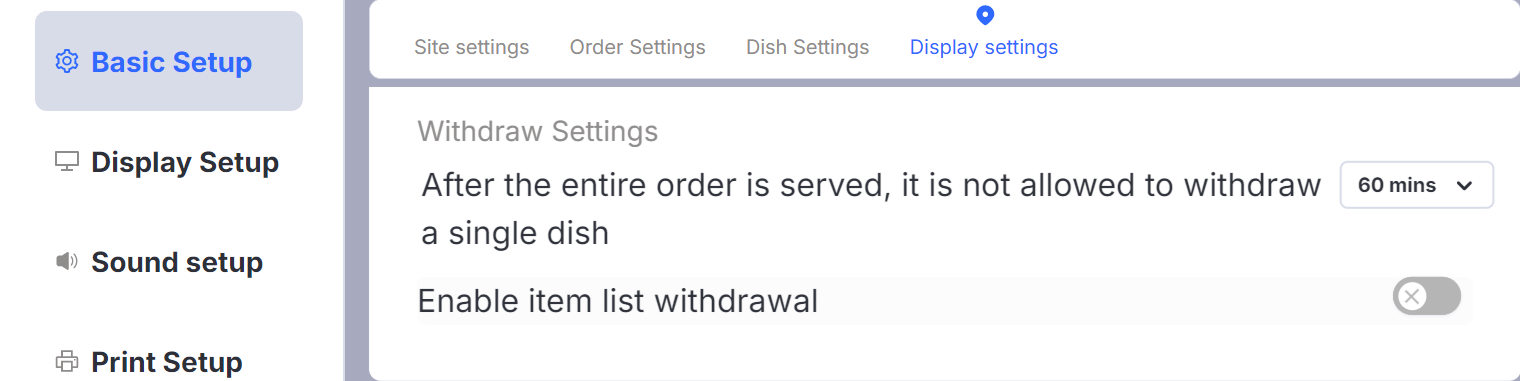
Dish Settings > Withdrawal Settings |
|
|
|


3.3.2 Display Settings

Configuration Item | Options/Description | Enable | Disable |
|---|---|---|---|
Page Icon |
|
| |
Item Colors |
|
|
|
Guest Count | Switch |
|
|
Display Code Configuration |
|
|
|
Order Sorting Rule |
|
|
|
Flicker Seconds | Configuration |
|
|
Blinking Disappearance |
|
|
|
Card Display |
|
|
|
Merge Display |
|
|
|
Replenish Enabled | Switch |
|
|
Number Calling for Pickup | Switch |
|
|
Table Transfer | Switch |
|
|
Order Center | Switch |
|
|
Text Size |
|
| |
Screen Mode |
|
| |
Dish Configuration > Mode Type |
|
| |
Dish Configuration > Combo Logic | Set meal header is not displayed for set meals |
|
|
Fixed Row and Column Settings |
|
| Default |
Row & Column Settings |
|
| |
Fixed Lane Configuration |
|
| |
Height Type |
|
| |
Fixed Height |
|
|
|
Dish Merge |
|
|
|
Merge Detail Logic |
|
|
|
Follow Main Dish to Place Order and Display on Main Dish Lane | Switch |
|
|
Dish Split Settings | Configuration |
|
|
Unfinished Dishes Summary | Switch |
|
|
Timeout Settings > Timeout Reminder Type |
|
|
3.3.3 Sound Settings
Configuration Item | Options/Description | Enable | Disable |
|---|---|---|---|
New Order Sound | Configuration + Switch |
|
|
Next Screen Marking Sound | Configuration + Switch |
|
|
Yellow Timeout Alert | Configuration + Switch |
|
|
Red Timeout Alert | Configuration + Switch |
|
|
Current Screen Marking Sound | Configuration + Switch |
|
|
Void item Sound | Configuration + Switch |
|
|
Other Sound | Configuration + Switch |
|
|
Broadcast Frequency | If there is a new trigger within the configured time period, it will not be re-broadcast |
|
3.3.4 Printer Settings
Configuration Item | Options/Description | Enable | Disable |
|---|---|---|---|
Choose a Printer | Configuration |
| |
Print Receipts |
|
|
|
Print Language | Configuration |
| |
Non-printable Order Type |
|
|
|
Print Using Graphics |
|
|
|
3.3.5 Cloud Scheme
Configuration Item | Options/Description | Enable |
|---|---|---|
Sync Local Scheme to Cloud |
|
|
Select Cloud Scheme |
|
|
3.3.6 Settings Bar
Configuration Item | Options/Description | Enable |
|---|---|---|
Information Display |
| |
Language Switch | Language files supported by the store |
|
Background Color Switch |
|
|
Screen Merge Mode | Configuration |
|
3.4 How to Configure and Use Order Number Calling for Pickup❓
- Calling Screen Settings: On the BO end, navigate【Restaurant Management → Calling Screen】

- There are two KDS call-out rules:
- Automatic call-out:Automatically call out after the entire process and dish marking are completed
- Manual call-out: Enable the【Call number to pick up meal】button. Click the【call-out】button on the dish card to announce the order.


3.5 How to Configure and Use the Print Function❓
Step 1:
On the BO end, navigate to【Restaurant Management → Receipt Template】page, after selecting the receipt type, click【Add Receipt Template】in the upper right corner of the page.

You can customize and configure templates for kitchen tickets, transfer menus, and other receipt templates.

Step 2: KDS Configuration
On the KDS【Settings → Printer Setup】page:
-
Choose a Printer (Required)
-
Select Print receipt types: Kitchen Order Receipt /transfer Dish Receipt (Required)
-
Select Print Language (Required)
-
Set Non-printing Order Types/Enable Image Printing (Optional)
-
KDS Printing Rules:
- Trigger Condition: Marking a dish prepared (order bump)
- Production Receipt: One per dish (default)
- Transfer Dish Receipt: One consolidated ticket per order
- First-Dish Rule: Printing the full transfer dish receipt when the first dish is marked

- KDS Reprinting
On【Completed Orders】page, Click【Re-Print】button to reprint the order receipt

3.6 How to Configure the KDS for Login-Free Operation❓
On the BO end, navigate to 【Restaurant Management → Business Parameters → Kitchen Setting】, turn on the【KDS Login-free Use】switch.
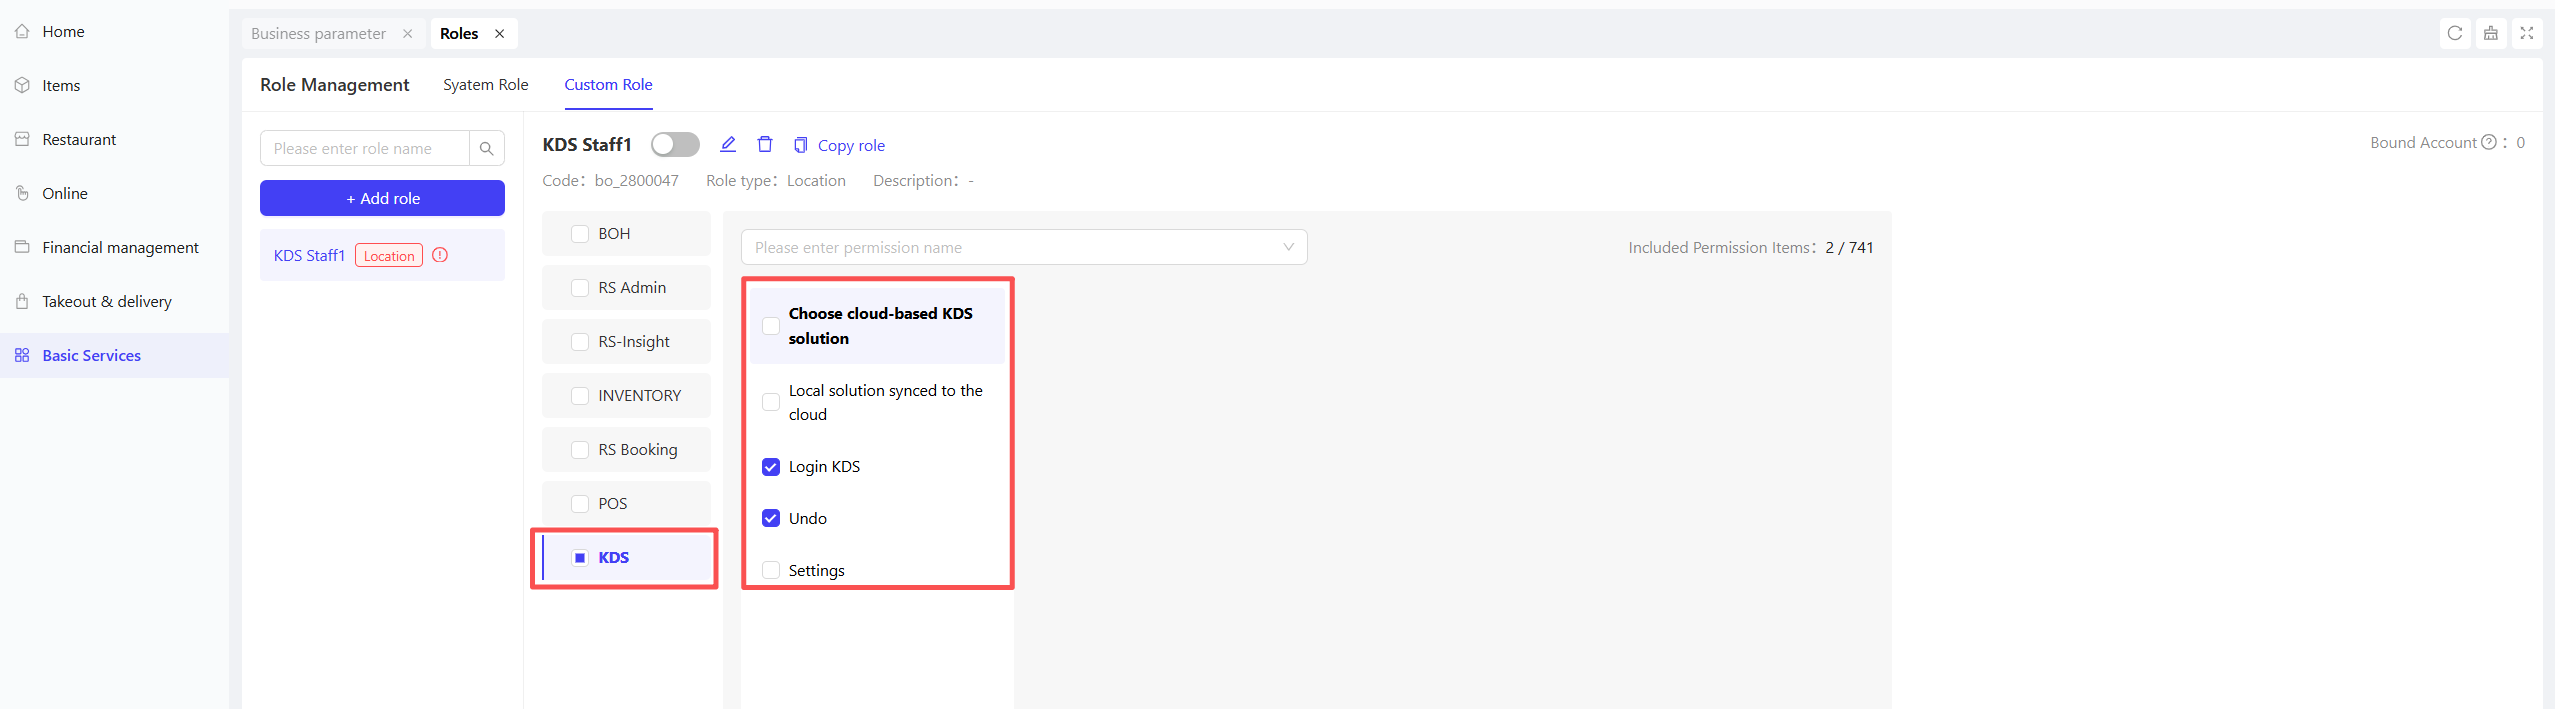
3.7 How to Configure KDS User Accounts and Permissions❓
Step 1:
From the store’s perspective on the BO end, navigate to the【Basic Services → Role Management】page. Here, you can view the system’s “Kitchen Manager” role, which has all KDS permissions by default. You can also create new custom roles and configure their permissions as needed.
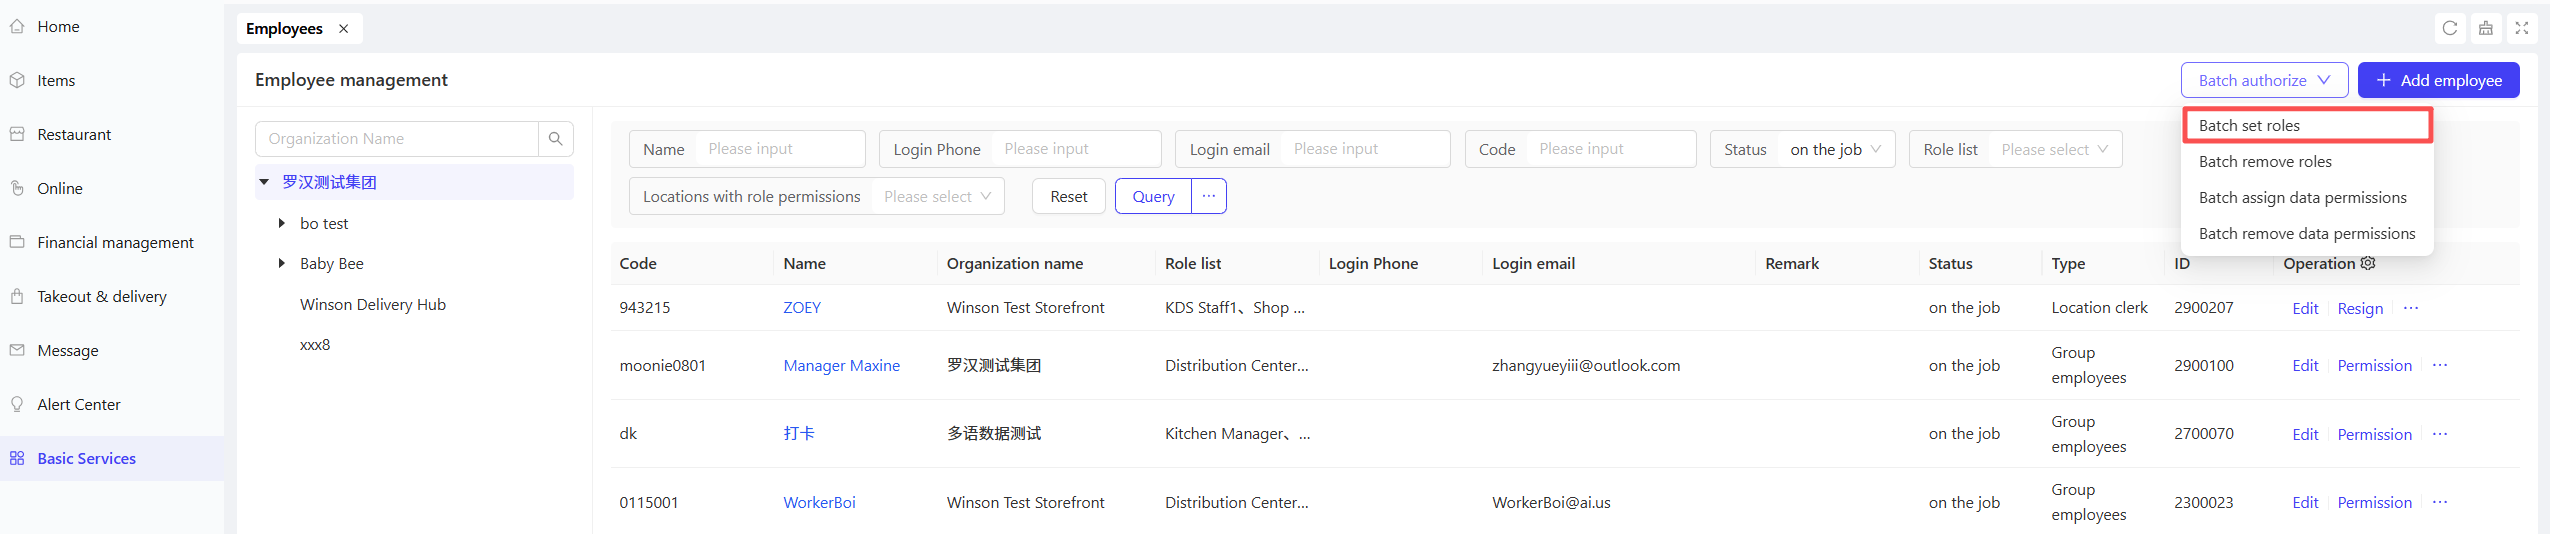
Step 2:
In the【Basic Services】→【Employee Accounts】page, you can batch assign roles to employees.
3.8 How to Configure and Use Solution Uploading and Distribution❓
Step 1:
On the KDS【Settings】page, after completing the configuration, select【Upload & Create Cloud Scheme】
Note: The KDS login account requires plan upload/distribution permissions (which can be set through employee roles).


Step 2:
On the BO system, from the group perspective, go to the【Restaurant Management → Kitchen Management → KDS Configuration Share】page. In the list, select the plan that was uploaded locally and click【Distribute】to send it to the target stores.

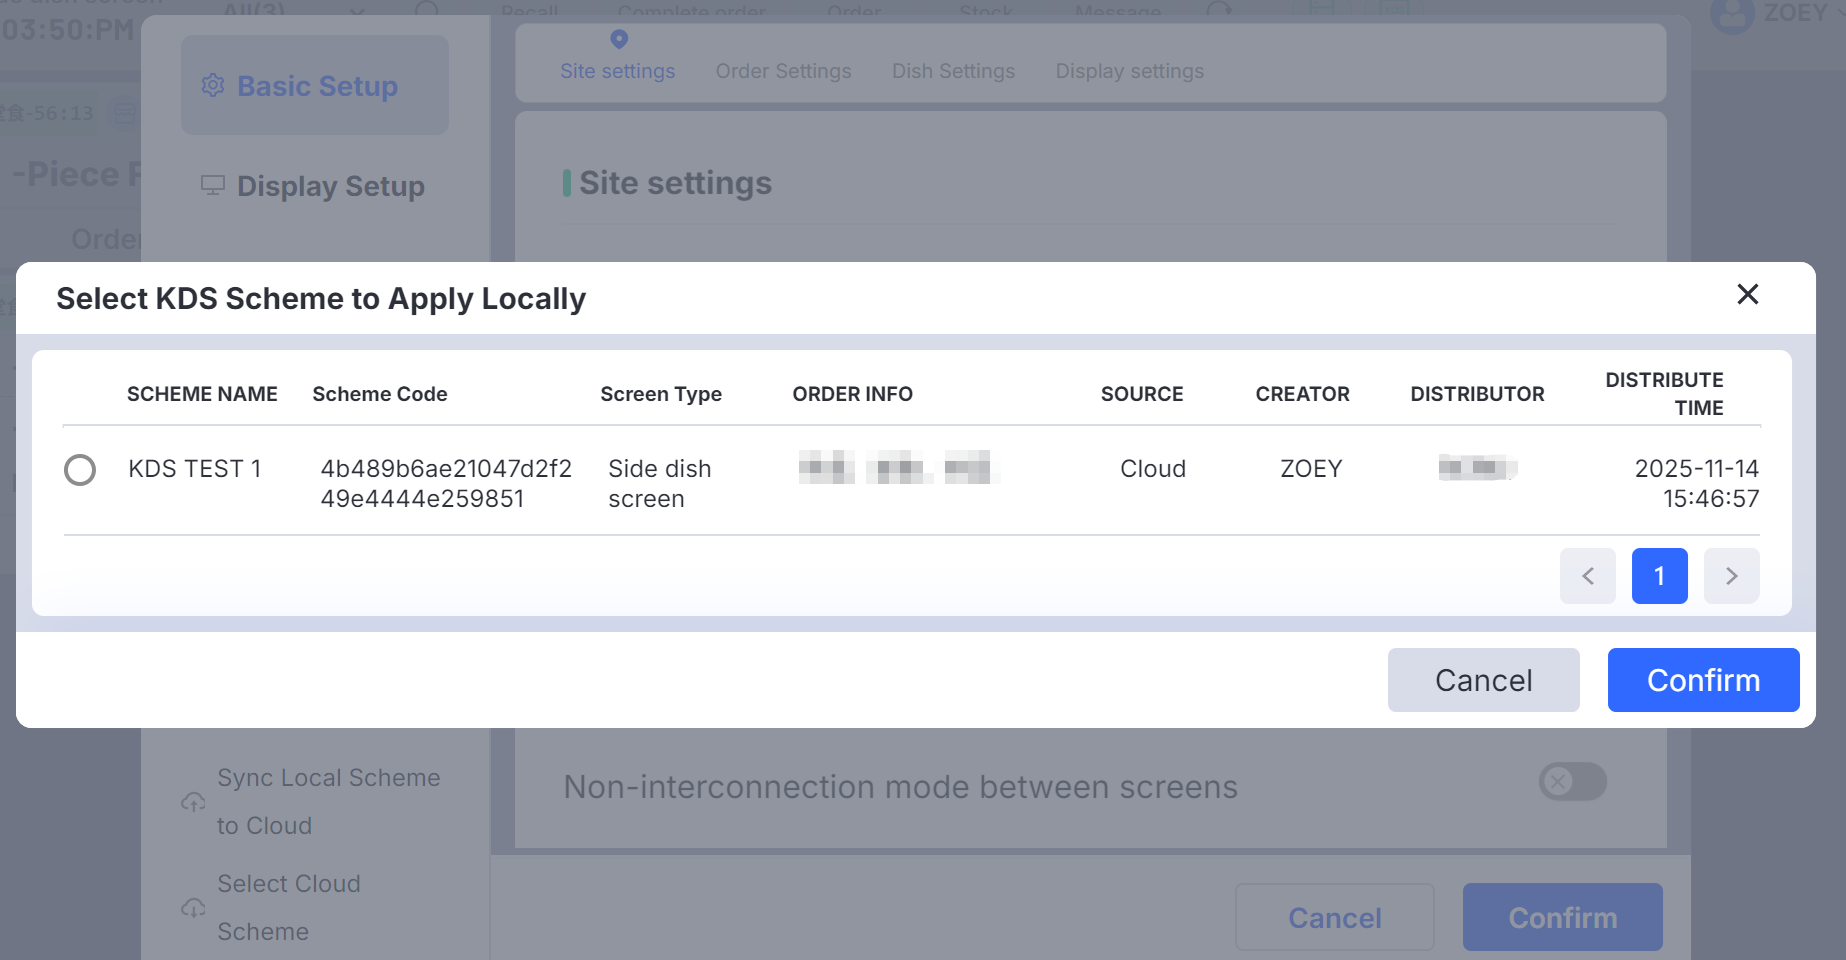
Step 3:
After distribution, on the KDS side, click【Settings → Select Cloud Scheme】and choose the appropriate cloud plan from the list. Then click 【Confirm】 to complete the application.
3.9 How to Configure Items That Do Not Require Marking as Completed❓
On the BO end, under【Restaurant Management → Business Parameter → Kitchen Setting】, select and configure the dishes and categories that do not require marking as served.
