Receipt Template Management
1 Module Introduction
Receipt Template Management is used to configure and publish receipt templates required for printing during business processes.
2 Glossary
Default Printer: When no printer is manually specified, the system automatically selects the USB printer directly connected to the POS or the built-in printer of the all-in-one machine.
Designated Printer: A receipt-specific printer manually bound in BO/POS settings (e.g., Epson TM-88V bound to the Hot Dishes Section in the kitchen).
Backup Printer: A standby device configured in advance to automatically take over printing tasks when the primary printer malfunctions.
Print Template: A template that controls the content layout of receipts (pre-configured by the system or customizable, supporting adjustments to fonts and component positions).
Failover: A function that automatically transfers printing tasks to the backup printer when the primary printer encounters an exception.
3 Receipt Template Scenario Classification & Glossary
Receipt Type | Applicable Scenarios | Printing Timing |
|---|---|---|
Front-of-House Receipts | Customer settlement, pre-settlement, and refunds (e.g., dine-in bills, pickup bills) | Automatically printed after payment completion / pre-settlement operation / refund completion (configurable) |
Kitchen Receipts | Dish preparation, dish returns, and food delivery (e.g., production orders, return orders) | Automatically printed after successful order placement / dish return operation / delivery confirmation |
Label Receipts | Cup stickers and meal labels (e.g., milk tea cup stickers, dine-in meal labels) | Automatically printed after successful order placement (in accordance with production department rules) |
Special Receipts | Card payments/refunds, member recharge, and card purchases (e.g., card payment receipts) | Automatically printed after successful card swiping / recharge completion / card purchase payment |
4 Importing/Exporting Receipt Templates
Step 1: Switch Perspective: Select the store for which you want to import or export receipt templates.
Step 2: Navigate to the Restaurant Management > Print Management > Receipt Template Management page.
Step 3: Import or export receipt templates in the upper right corner.
Note: The file format for imported/exported receipt templates is JSON.
5 Adding and Configuring Receipt Templates
5.1 Template Types and Acquisition Methods
Template Type | Source | Features | Applicable Scenarios |
|---|---|---|---|
System-Preconfigured Templates | Provided by the system | No design required; default adapted to common scenarios (e.g., 80mm settlement bills) | Quick activation without custom layout |
Custom Templates | User-defined | Support adjustments to components, fonts, and colors (e.g., adding brand logos) | Need for personalized receipt layouts (e.g., special cup sticker designs) |
Cross-Template Copying | Copied from existing templates | Modify copied templates to reduce repetitive work | Multiple receipt layouts with similarities (e.g., converting a dine-in bill template to a pickup bill template) |
5.2 Custom Template Design Steps

Step 1: Access the Template Management Page: Log in to the BO system, go to Restaurant Management > Print Management > Receipt Template Management, and click Add Receipt Template.
Step 2: Configure Basic Information:
- Select the receipt type (e.g., “Dine-in Settlement Bill”).
- Select the size (58mm/80mm; select the corresponding size for label receipts).
- Enter the template name (e.g., “2024 Dine-in Settlement Bill_v1”).
Step 3: Edit Components: Drag and drop components from the right side to the template area, and adjust content and styles:
- Basic Components: Store name, order number, payment time (required).
- Settlement Components: Payment method, discount details, change amount (added as needed).
- Member Components: Member card number, stored value balance (added for member orders).
- Style Adjustments: Font (Microsoft YaHei / Universal Font), font size (Size 1 / Size 2), color (black background with white text / white background with black text; support independent style settings for components).
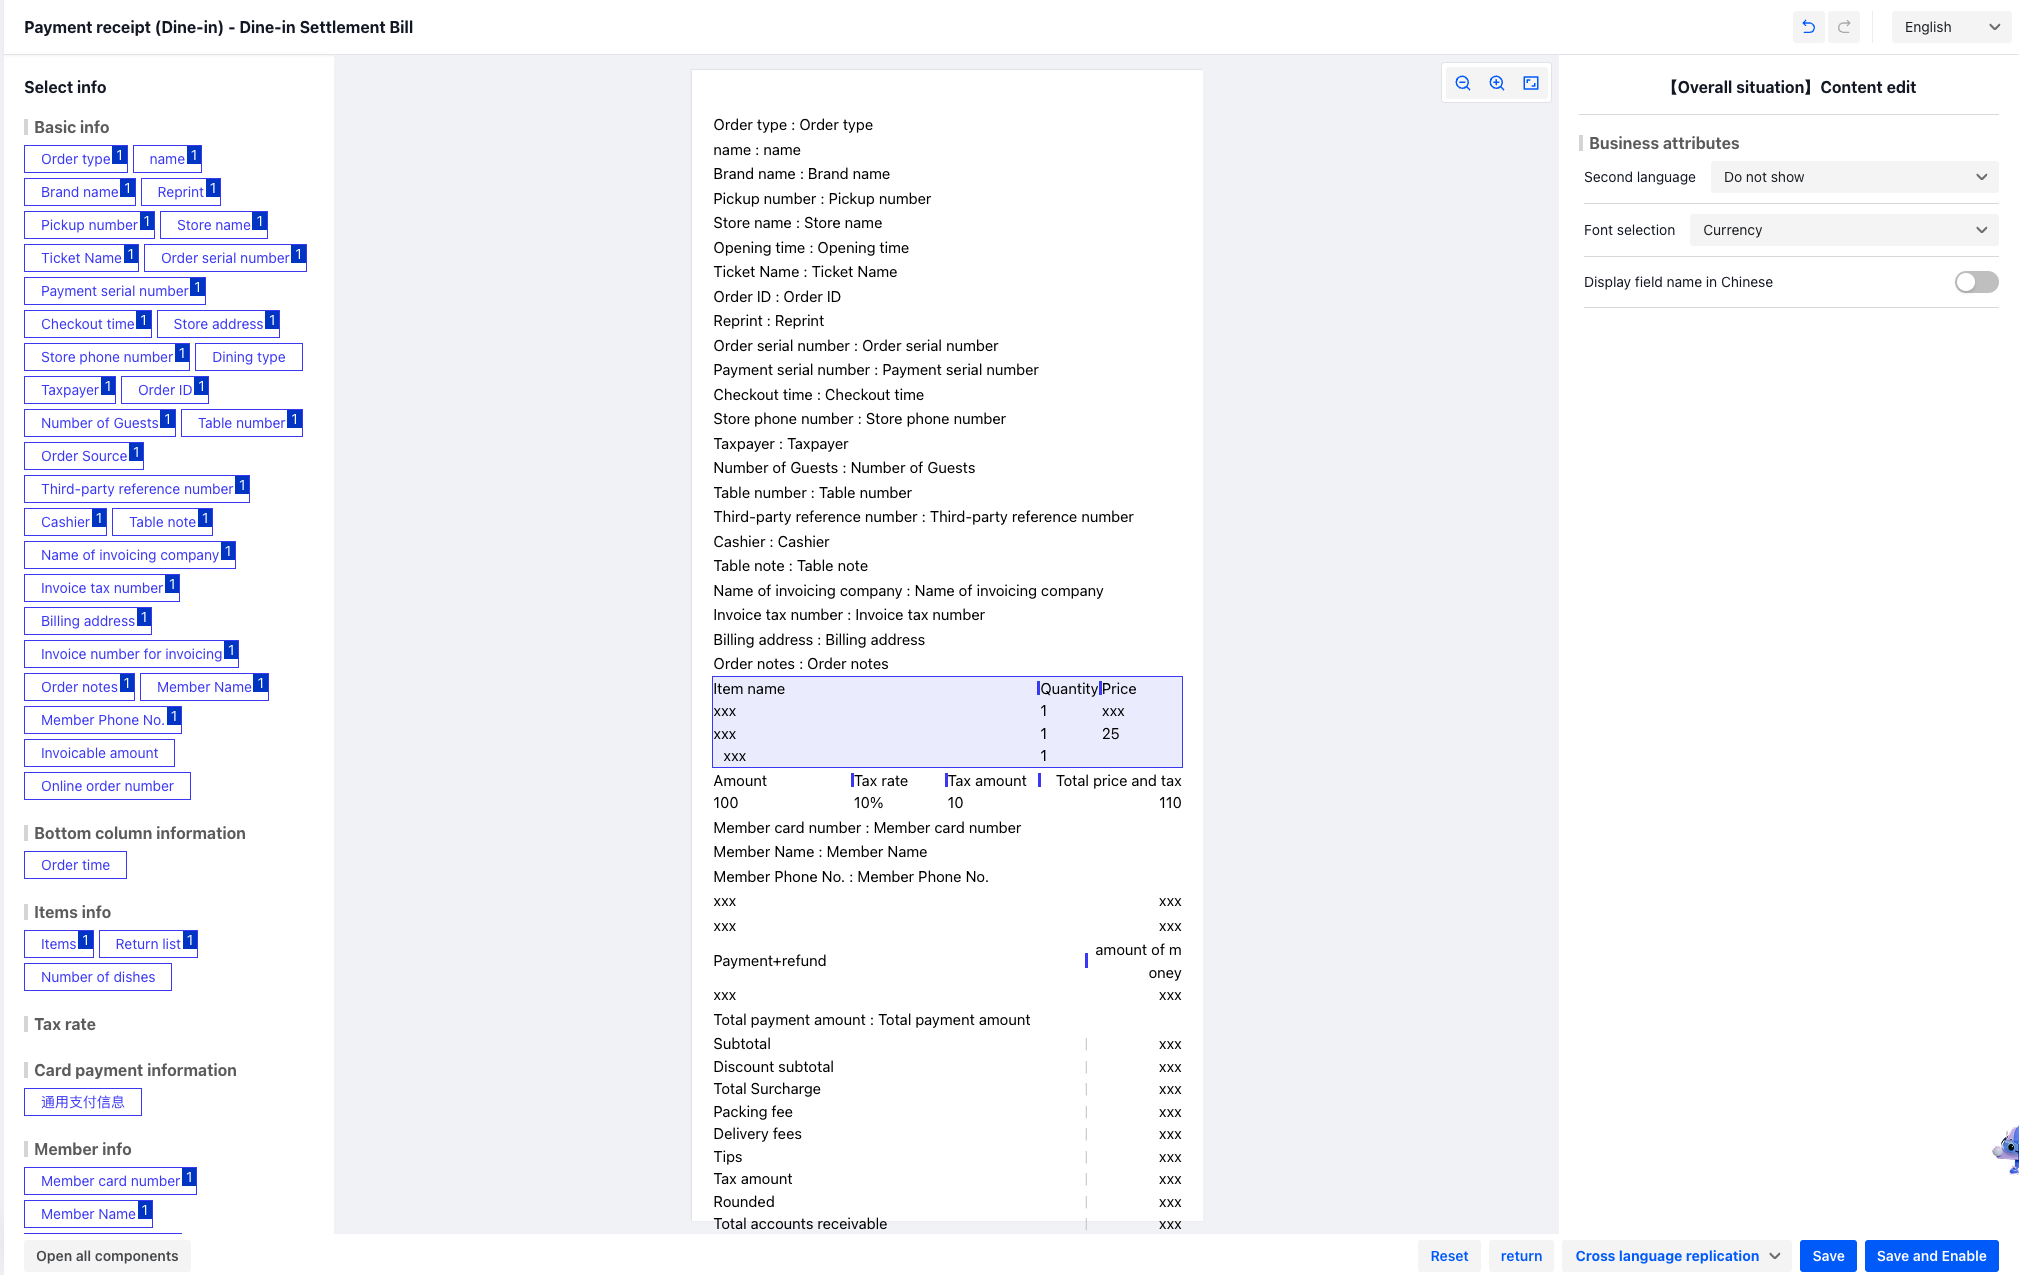
Step 4: Preview and Save: Click Preview to view the receipt effect. Confirm the details are correct, then click Save and Activate to make the template take effect immediately.
5.3 Template Optimization and Update
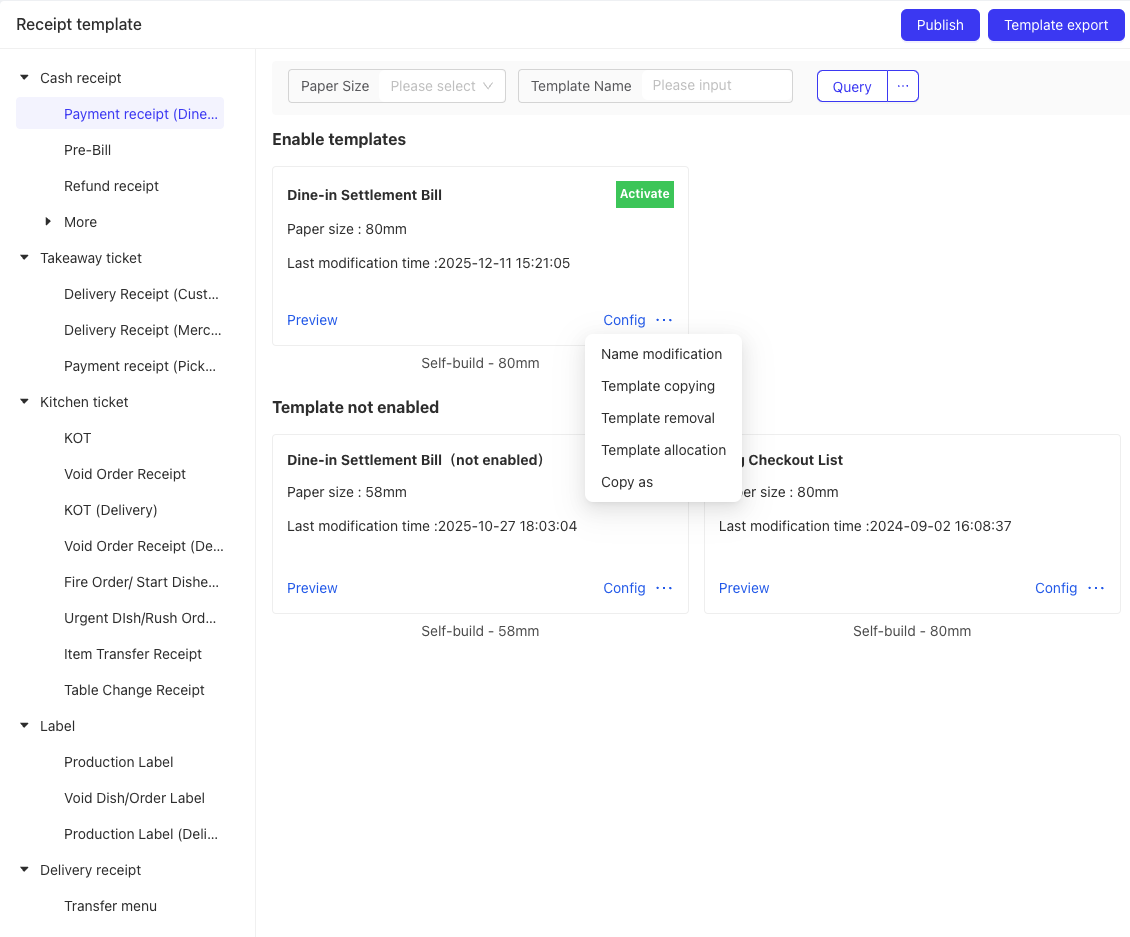
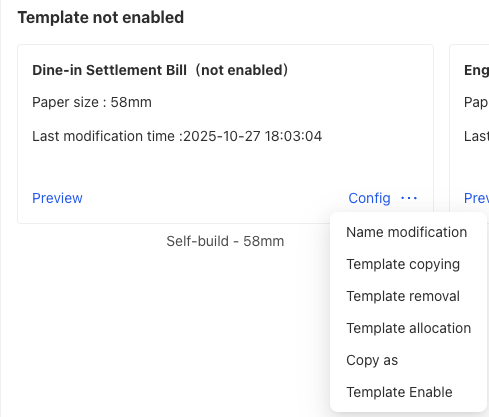
- Template Copying: Click Copy As for an existing template, select the target receipt type (e.g., copy the “Dine-in Settlement Bill” to “Pickup Settlement Bill”), modify the template, and save it as a new one.
- Template Update: When an update is available for a system-preconfigured template, an Update button will display on the template card. Click the button to sync the latest version (without overwriting custom content).
- Bilingual Settings: Front-of-house receipts and label receipts support bilingual display (e.g., Chinese + English). In the template editing page, check Second Language, select the target language (e.g., English), and the system will automatically add bilingual content below dish names and component names.
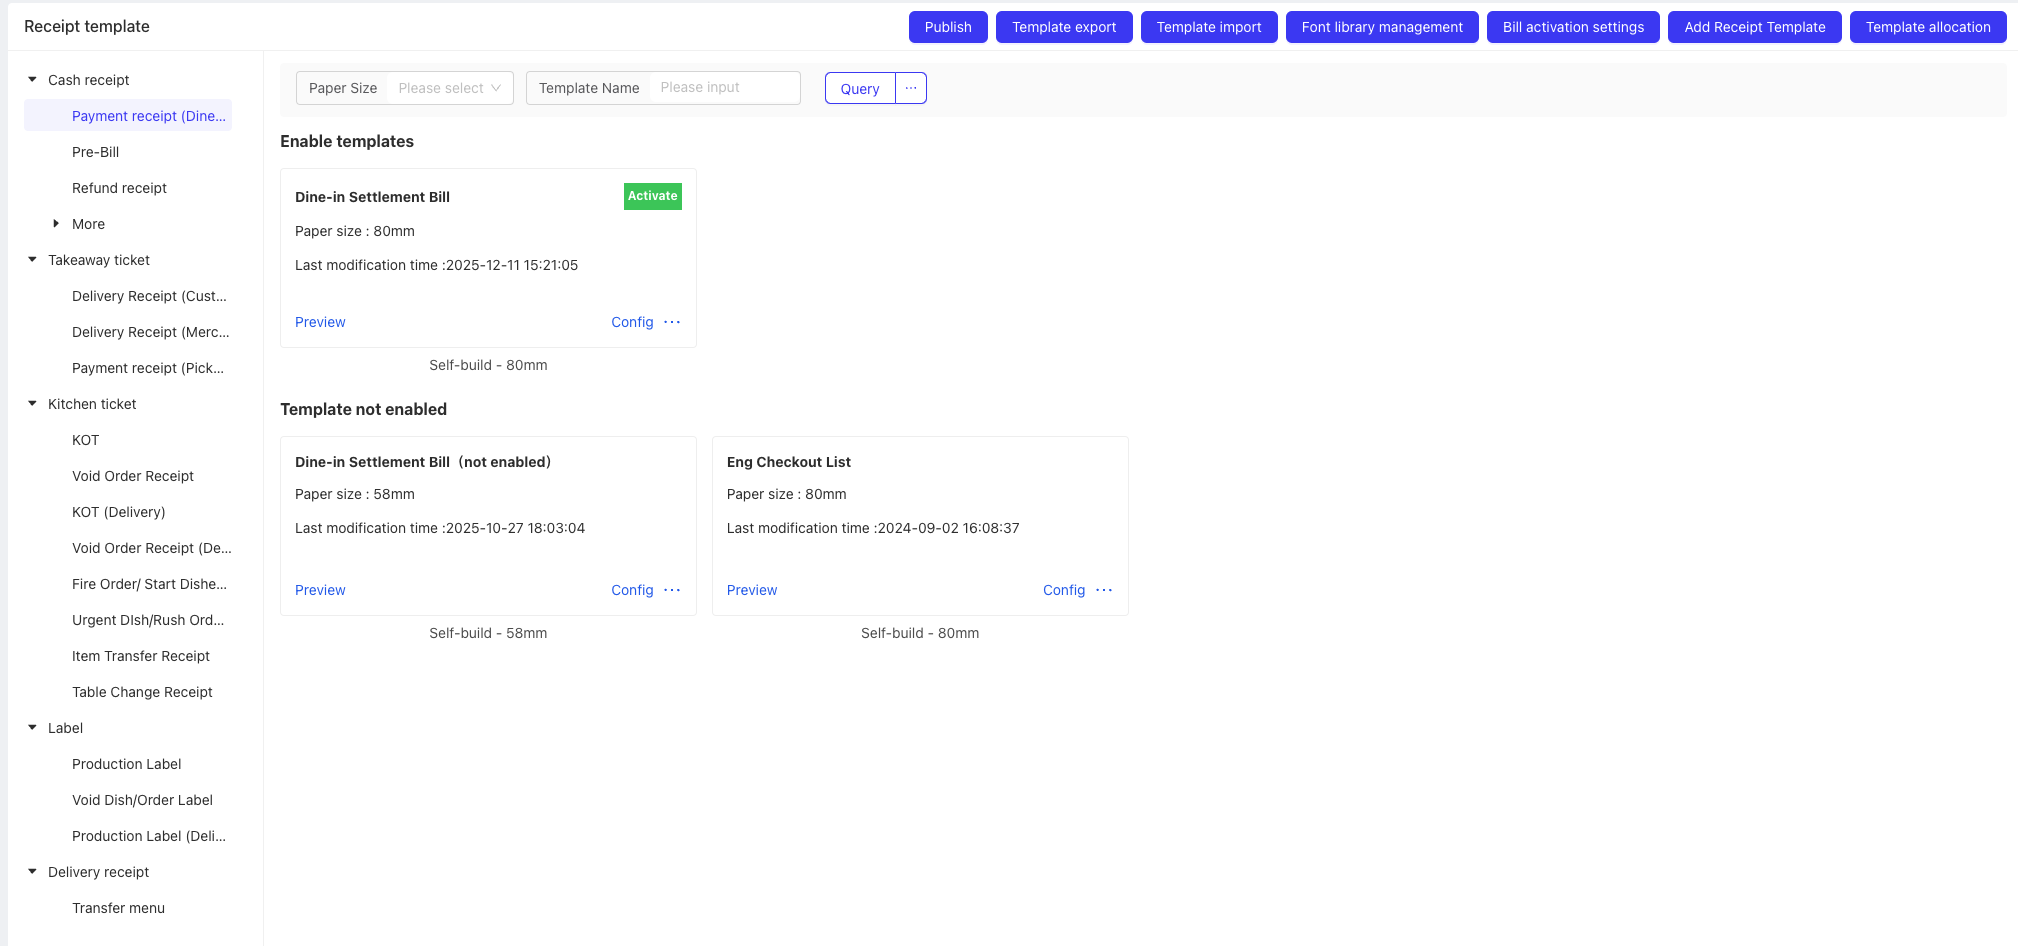
6 Receipt Activation Settings
Method 1: After configuring the receipt template, click Save and Activate to enable the template immediately.

Method 2: On the Receipt Template Management page, activate the template from the Inactive Templates list.
Method 3: On the Receipt Template Management page, click the Receipt Activation Settings button in the upper right corner to batch activate or deactivate templates.
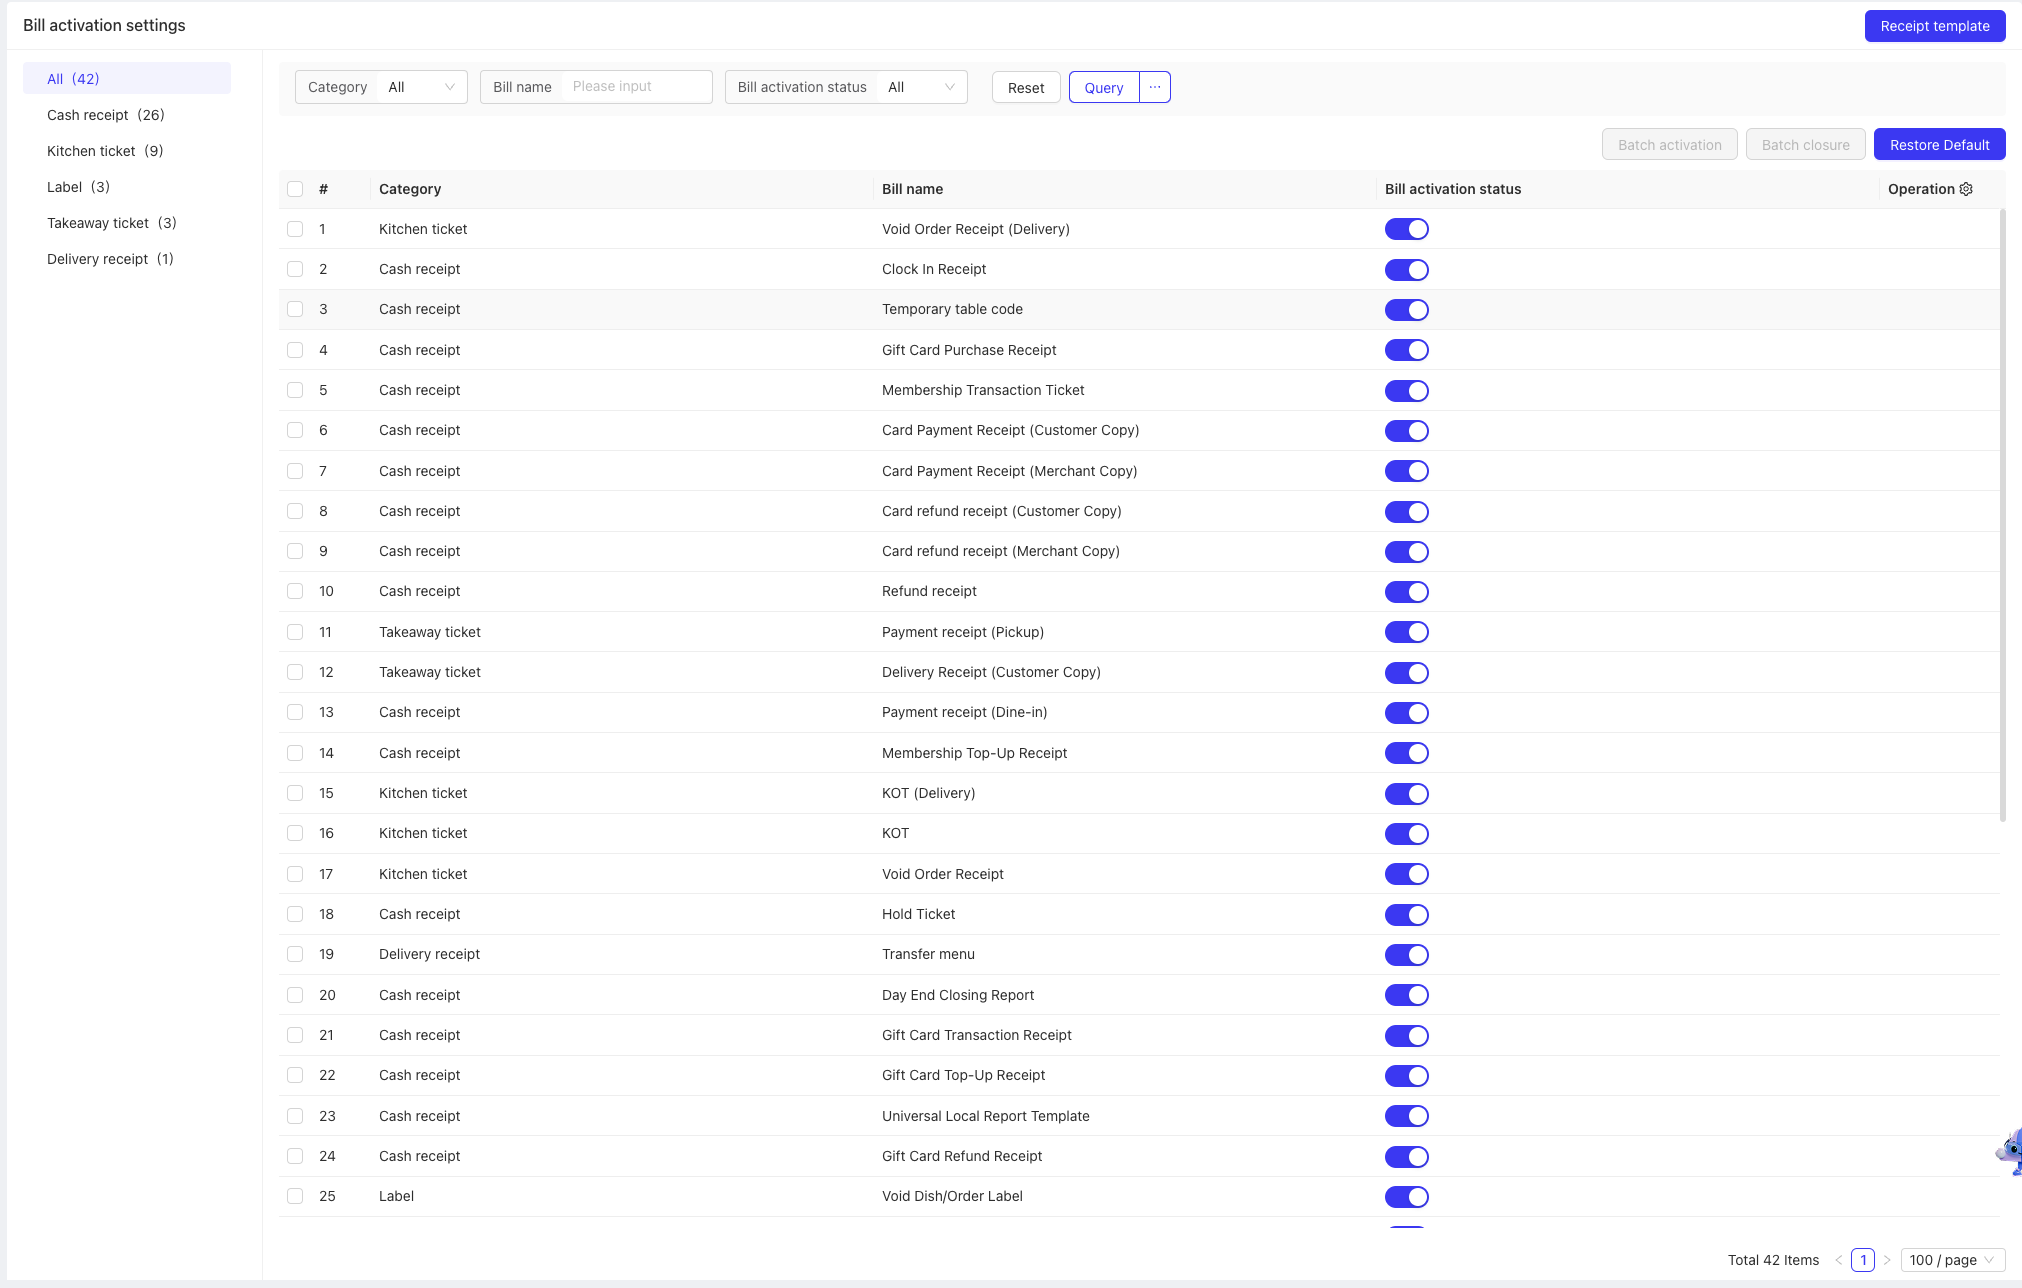
Note: Only one receipt template can be activated for the same type of receipt at any given time.
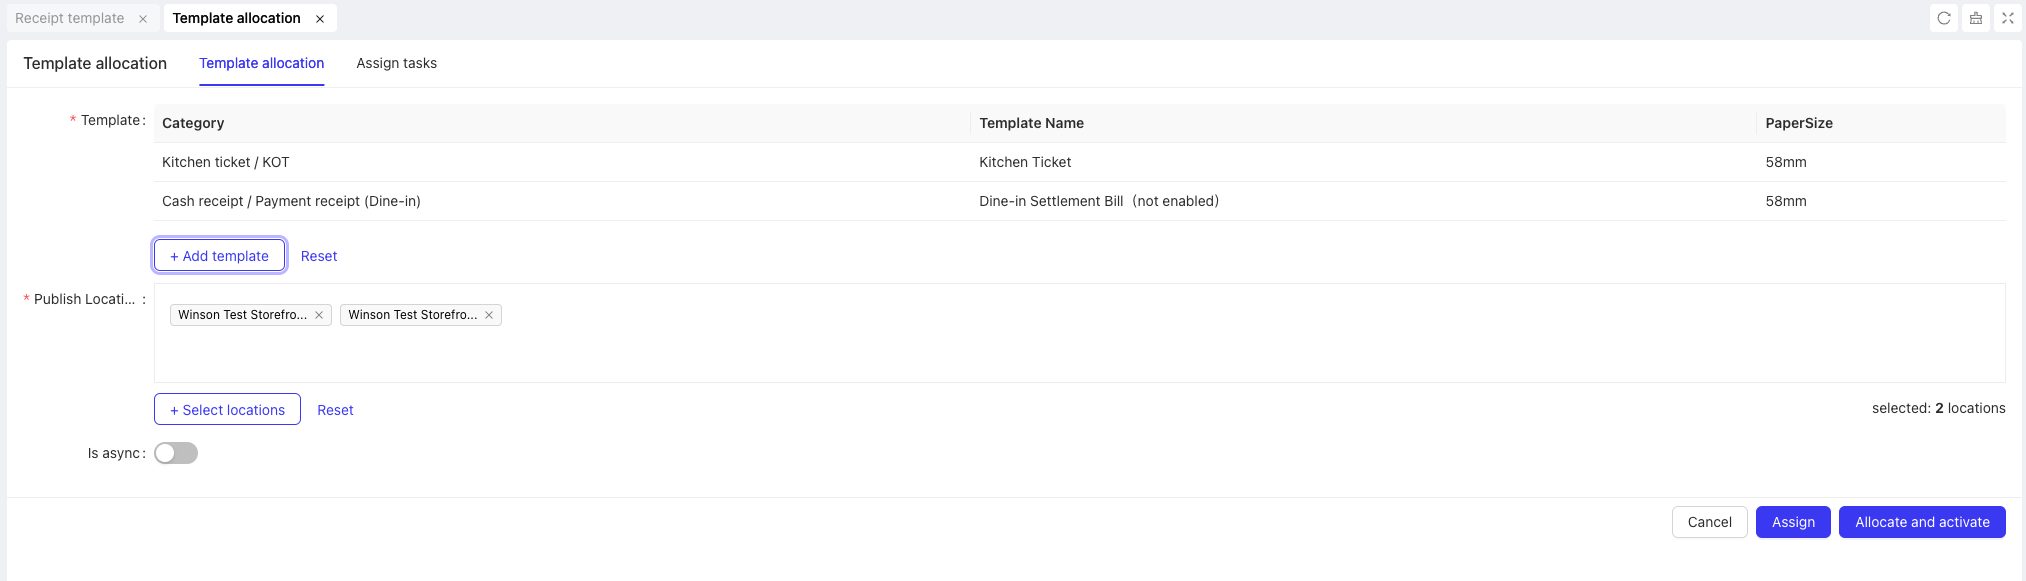
7 Receipt Template Allocation
Receipt Template Allocation allows you to assign configured templates to other stores.
Step 1: Access the Template Management Page: Log in to the BO system, go to Restaurant Management > Print Management > Receipt Template Management, and click the Template Allocation button in the upper right corner.
Step 2: Select the templates and target stores for allocation.
Step 3: Click Allocate and Activate to complete the template allocation.
8 Receipt Template Publishing
After completing the receipt template configuration, click Publish in the upper right corner of the Receipt Template Management page. Only after successful publishing will the printing rules, template information, and printer information be synced to the local device.
9 Font Library Management
The system provides two built-in fonts: Universal and Microsoft YaHei. For special requirements that need other fonts, import the required fonts on the Font Library Management page first, then select the imported fonts in the corresponding receipt templates.
10 Frequently Asked Questions
Problem Scenario | Troubleshooting Steps |
|---|---|
Custom templates do not take effect |
|
Template components are not displayed (e.g., member card number) |
|