Email Marketing
1 Module Introduction
Email Marketing is a member marketing tool in RestoSuite. It delivers offers, event updates, and other information to members via targeted emails, enabling user reactivation, increased repurchases, and brand promotion.
2 Creating an Activity
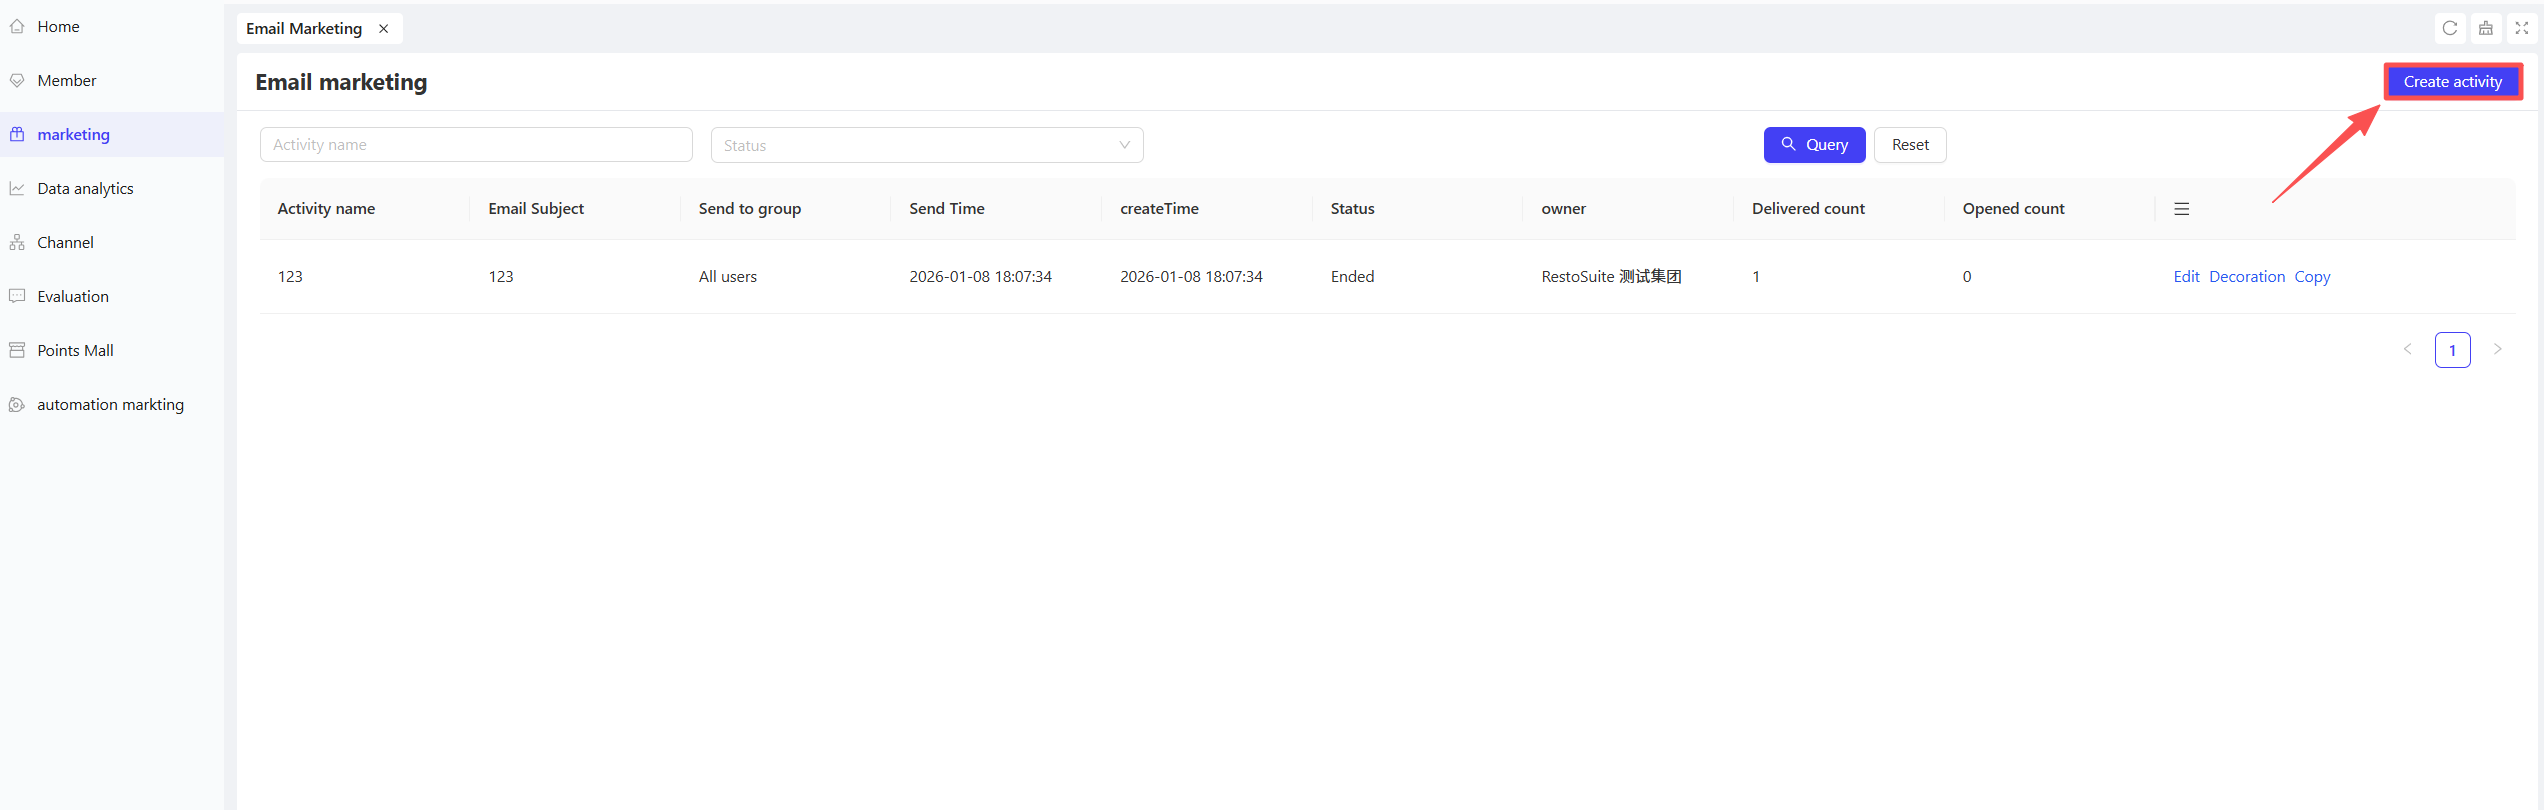
STEP 1: Access the Email Marketing Page
From the target view, navigate to【Membership Marketing】>【Marketing】>【Email Marketing】.
STEP 2: Click the【Create Activity】button in the upper right corner of the page.
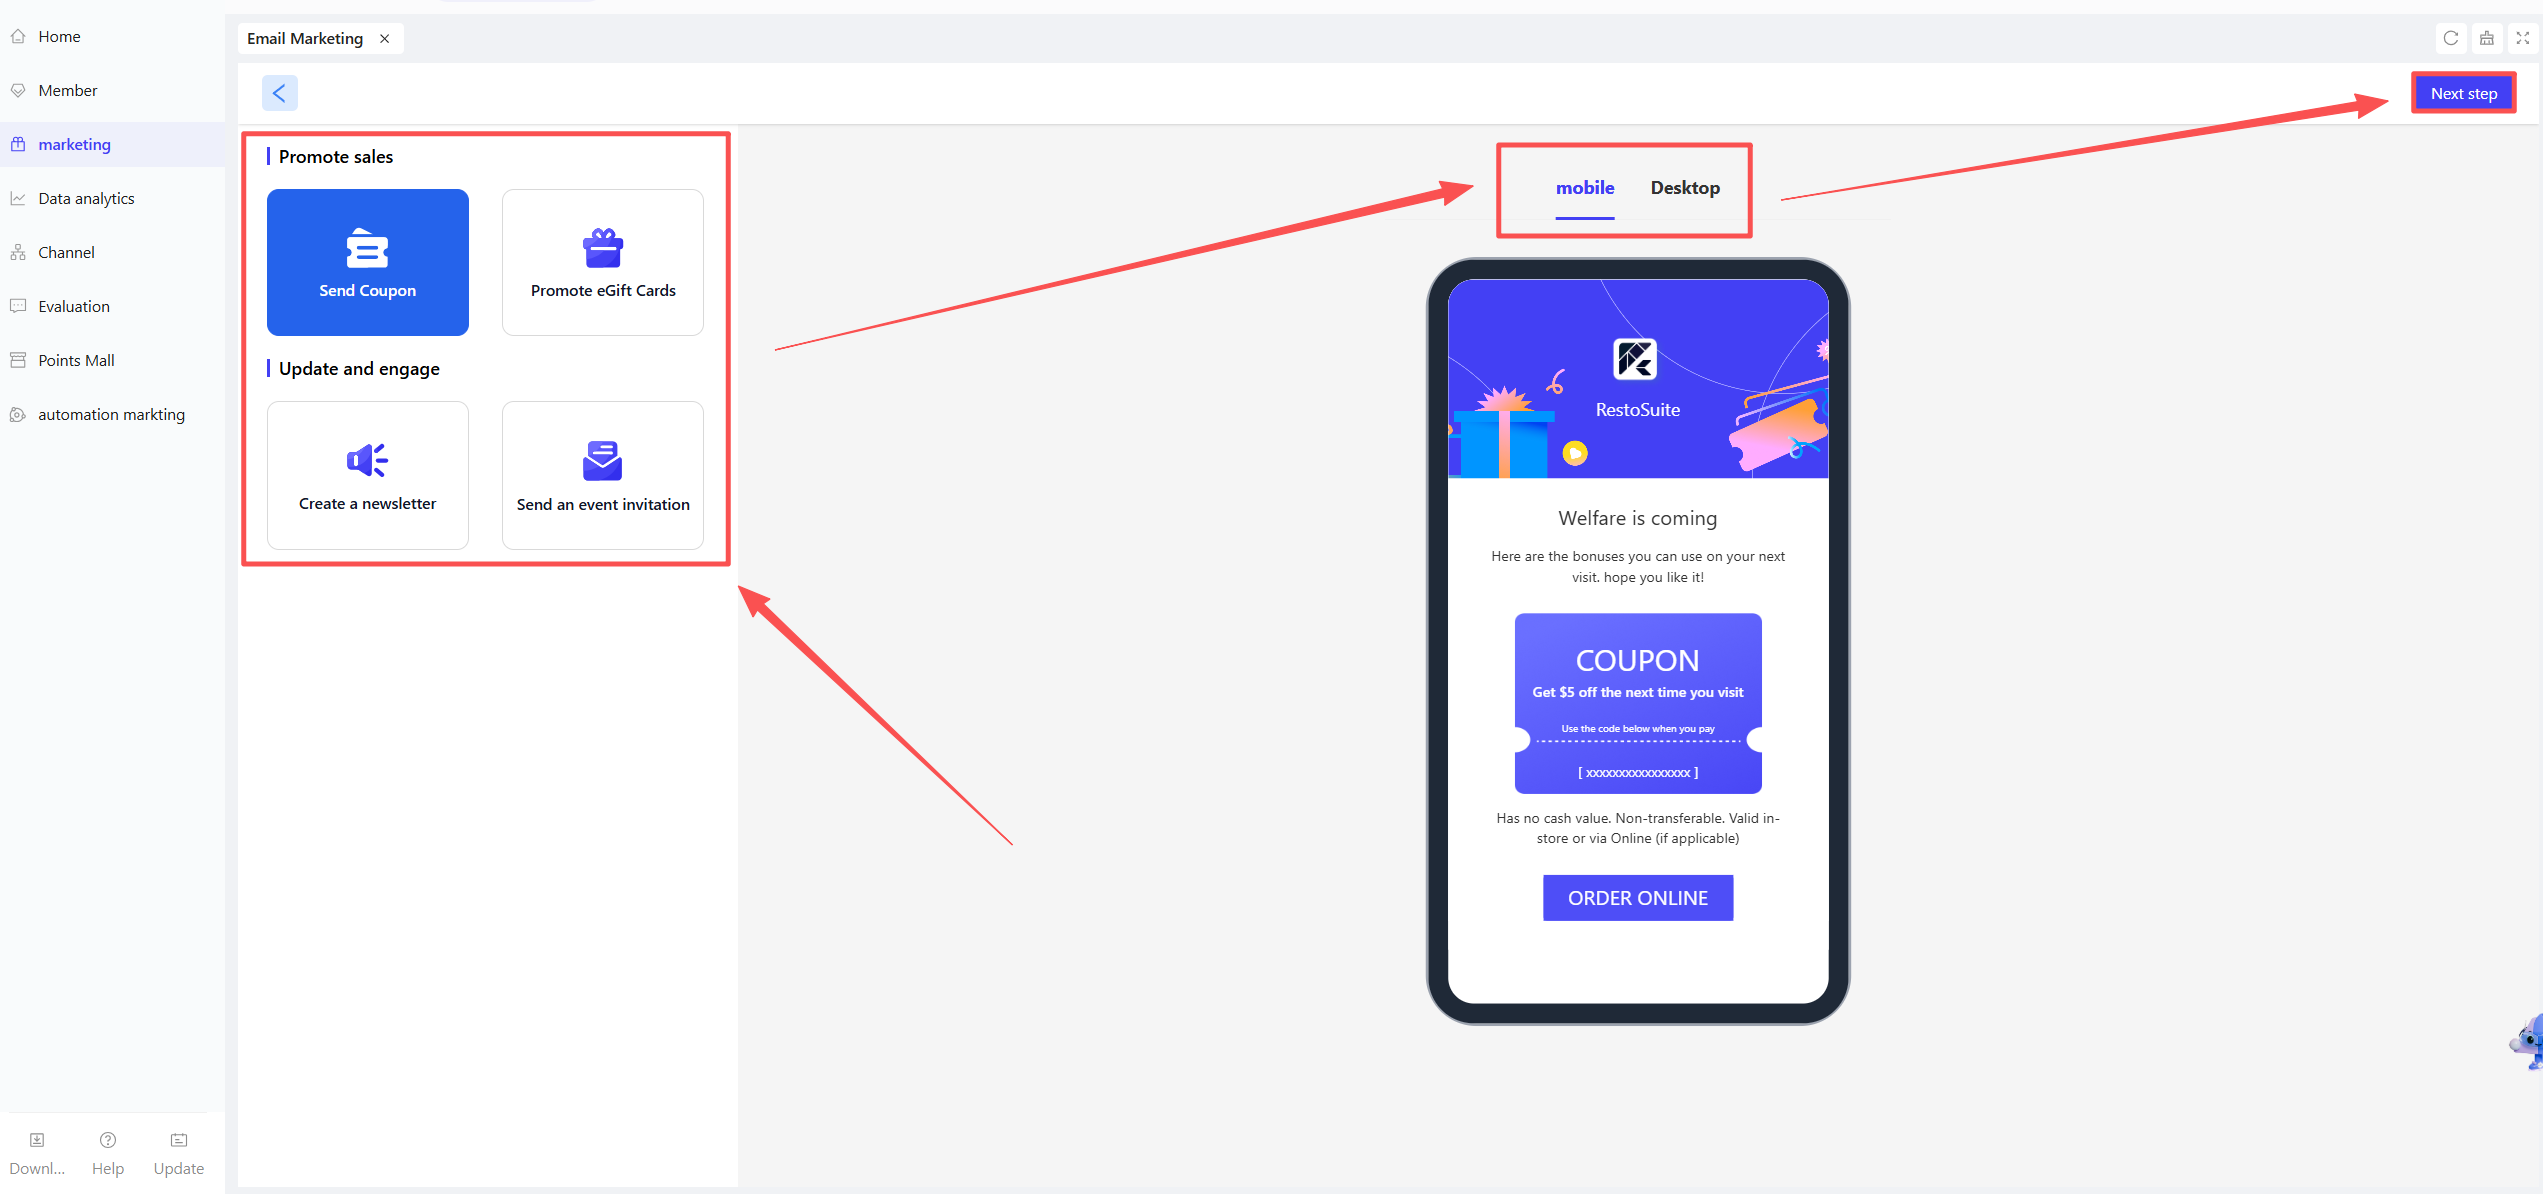
STEP 3: Select Activity Type and Templates
- Choose your desired activity type from the page. On the right side, browse and select templates for both【Mobile】and【Desktop】versions, then click【Next】.
- Send Coupon: Ideal for new item promotion, holiday campaigns, and reactivating inactive members (e.g., “Summer New Arrival Exclusive Coupon,” “Member Return Gift”).
- E-Gift Card Promotion: Suitable for holiday gifting and prepaid value conversion (e.g., “Mid-Autumn E-Gift Card Limited-Time Discount”).
- Notification & Updates: For event reminders, member benefit announcements, and brand news (e.g., “Anniversary Event: 3 Days Left,” “Member Points Expiration Notice”).
- Event Invitation: Perfect for offline tastings, store anniversaries, and exclusive member events (e.g., “New Product Tasting Exclusive Invitation,” “VIP Member Appreciation Dinner”).
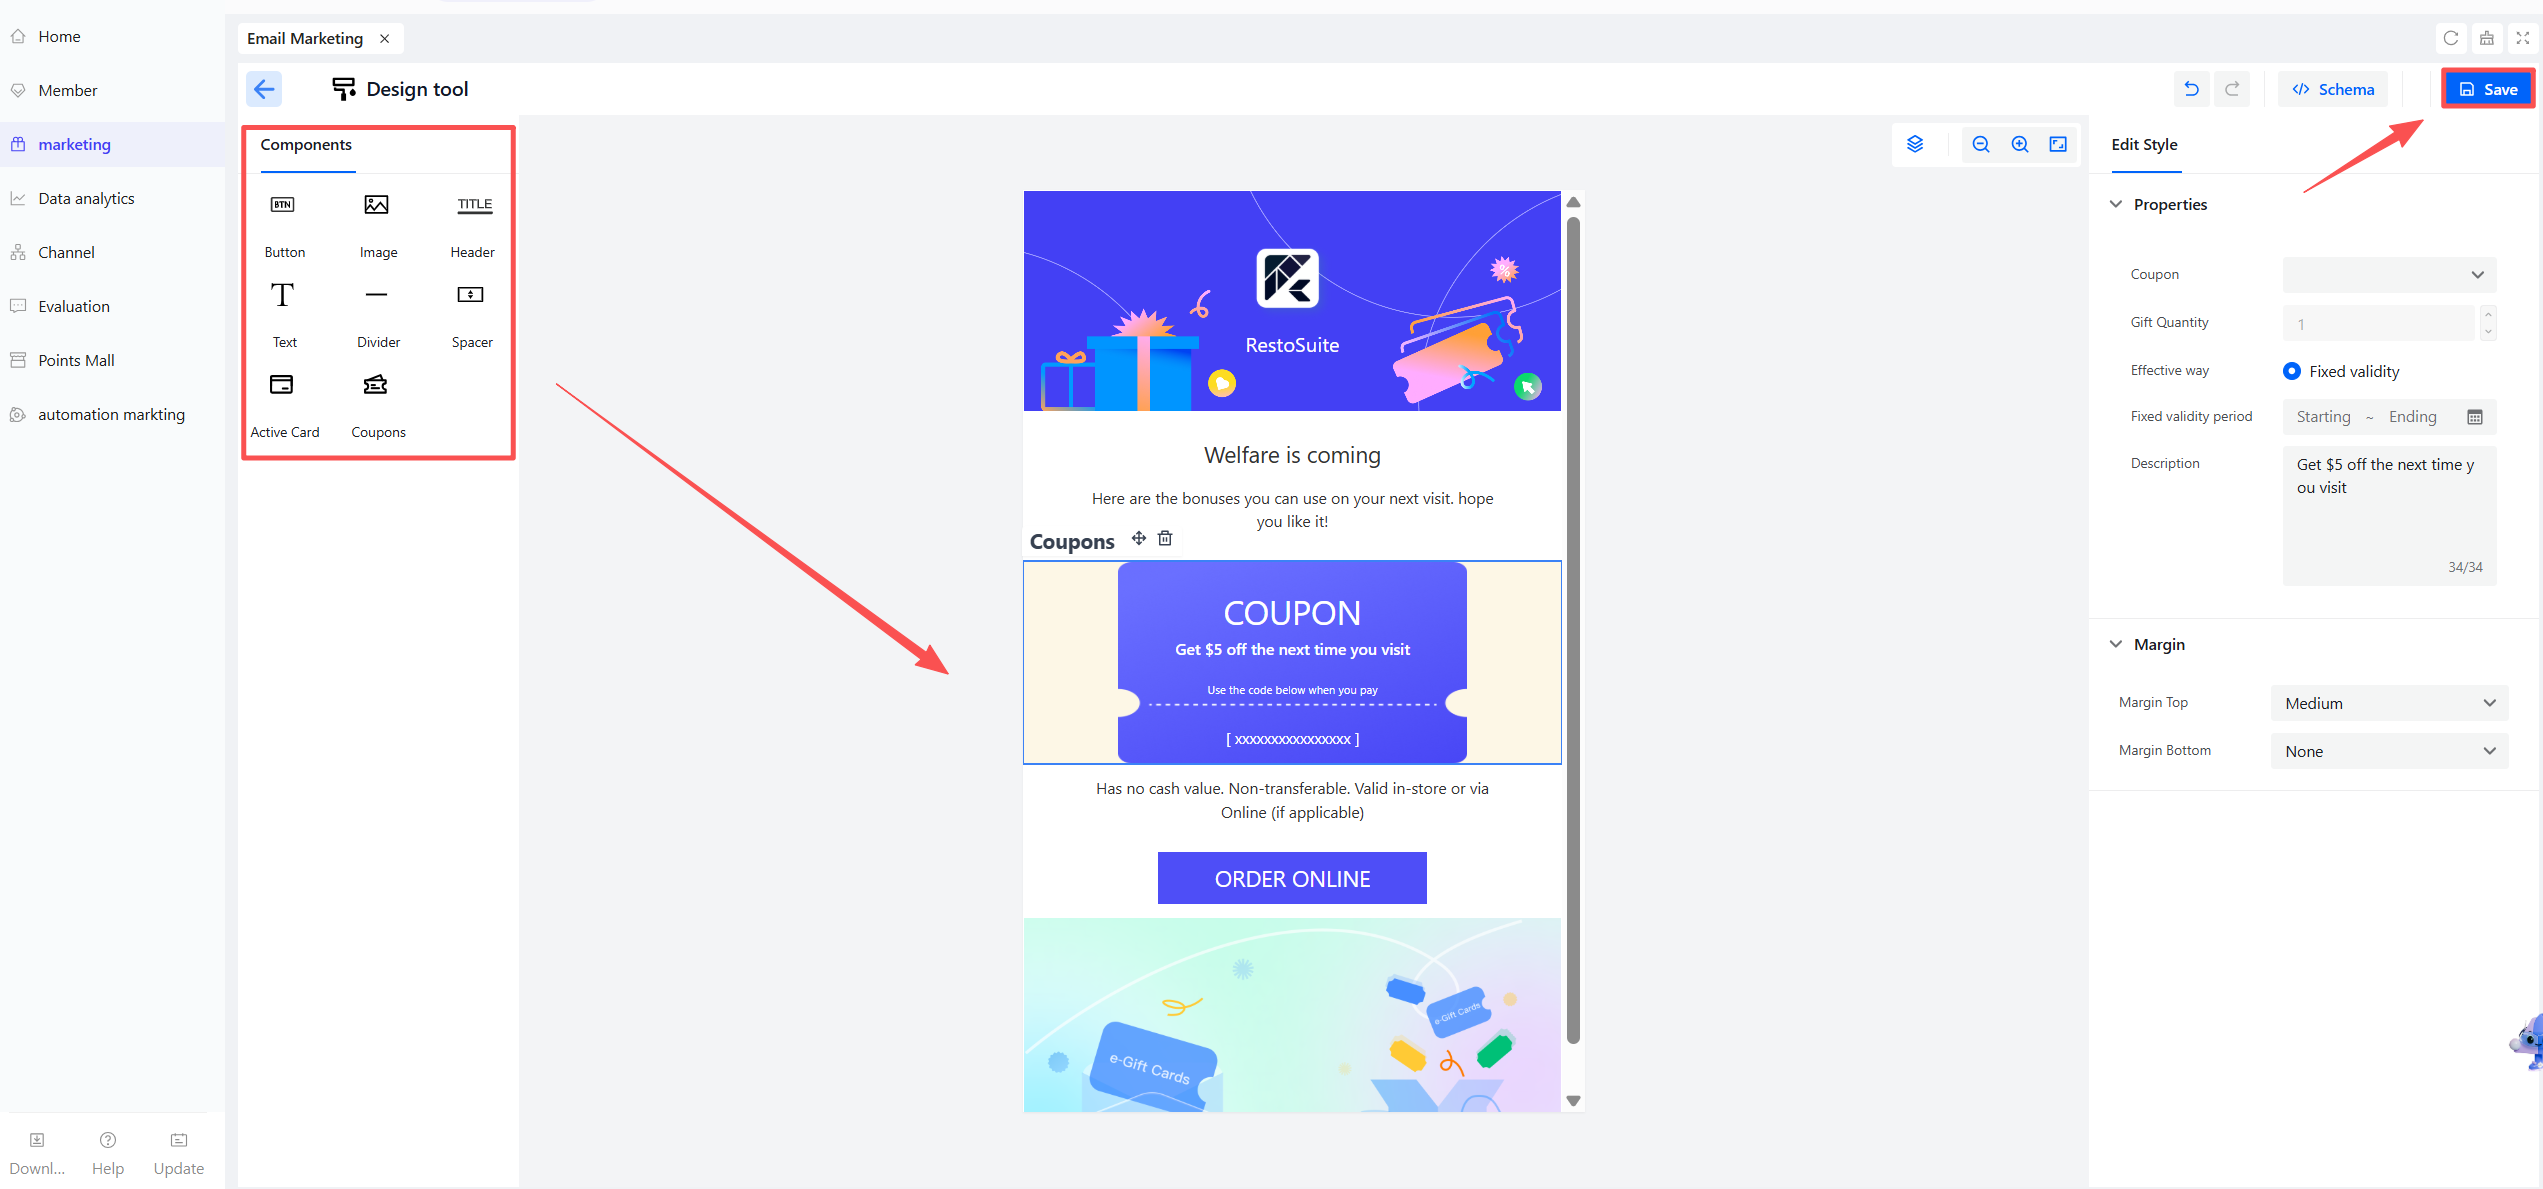
STEP 4: Customize the Activity Page
In the page editor, use drag-and-drop components to design your custom page. After completing the design, click the【Save】button.
STEP 5: Configure Sending Details
Fill in/configure the following information on the sending page:
- Activity Name: Internal identifier for distinguishing activities in the backend. It is recommended to clearly reflect the core of the activity (e.g., “2026 Summer New Item Coupon Email Campaign”).
- Email Subject: Title displayed in users’ email inboxes. Include offer/event keywords (within 20 characters) and avoid sensitive words that may affect open rates.
- Email Sender: Select either the system default email or a verified custom email.
- Benefit Account: Link to the settlement account for benefits (e.g., coupons) in the email. Choose a valid account with sufficient balance in the system to ensure successful benefit distribution.
- Send to Group: Select the email reach scope. “All Users” targets all members, while “Users” enables targeted outreach to specific member groups.

STEP 6: Test and Send an Email
- After completing all configurations, click【Send Test Email】to verify the email content and formatting.
- Once confirmed, proceed to send:
- Select【Send Now】to dispatch the email right away.
- Or choose【Scheduled Send】to set a specific delivery time.
3 Activity Management
For created email marketing activities, the following operations are available:【Edit】, 【Decoration】, and【Copy】.
