Notification Center
1 Module Overview
This module is primarily used to configure messages (such as SMS, emails, and push notifications) under the group. It delivers various alerts to users and group managers, facilitating system usage for roles across the organisation. Additionally, it provides system data alerts to help group managers anticipate operational risks in advance and improve operational efficiency.
The Message Platform categorises messages into three core scenarios:
-
Business Event Messages: Triggered by specific business actions during operations, these messages are sent to designated recipients via predefined templates and channels. Since businesses operate across different brands and countries, templates are customised by brand. For example:
- Order notifications differ between Hushang Ayi and Huka brands.
- Birthday greetings are automatically sent to members when their birthday occurs. Merchants can create personalised templates based on their business needs, leveraging the platform’s template management and message delivery capabilities.
-
Alert Messages: Notify relevant personnel of unexpected events to enable proactive risk mitigation. These messages include alert content and delivery functionality. For example:
- Notify store managers and kitchen staff of inventory shortages. The platform provides pre-built templates and reliable message delivery services for such scenarios.
-
Process Messages: Focus on approval tasks and notifications. They inform approvers of pending requests and update submitters/related parties on approval status. The platform supports these workflows with customizable templates and multi-channel delivery.
2 Message Settings
- Switch to Group View
STEP 1: Group administrators log in to the merchant backend.
STEP 2: Click [View Switch] in the top-right corner and select [Group View].
- SMS Signature Settings
STEP 1: Access the menu path:
【Operation Centre】>【Message Centre】>【Settings】>【SMS Signature Settings】
STEP 2: The system automatically creates default SMS signature configurations for the group and all brands. Locate the target configuration and click [Edit].
STEP 3: In the pop-up window, enter the pre-approved SMS signature (must comply with signature standards; otherwise, messages cannot be delivered normally).
STEP 4: Save the configuration to activate it.
- WhatsApp Message Verification
STEP 1: Access the menu path:
【Operations Management】>【Message Centre】>【Settings】>【WhatsApp Message Verification】
STEP 2: The system automatically creates [Pending Certification] records for the group and all stores. Locate the target record and click [Initiate Certification].
STEP 3: After successful certification, the RestoSuite platform can send messages via your WhatsApp account.
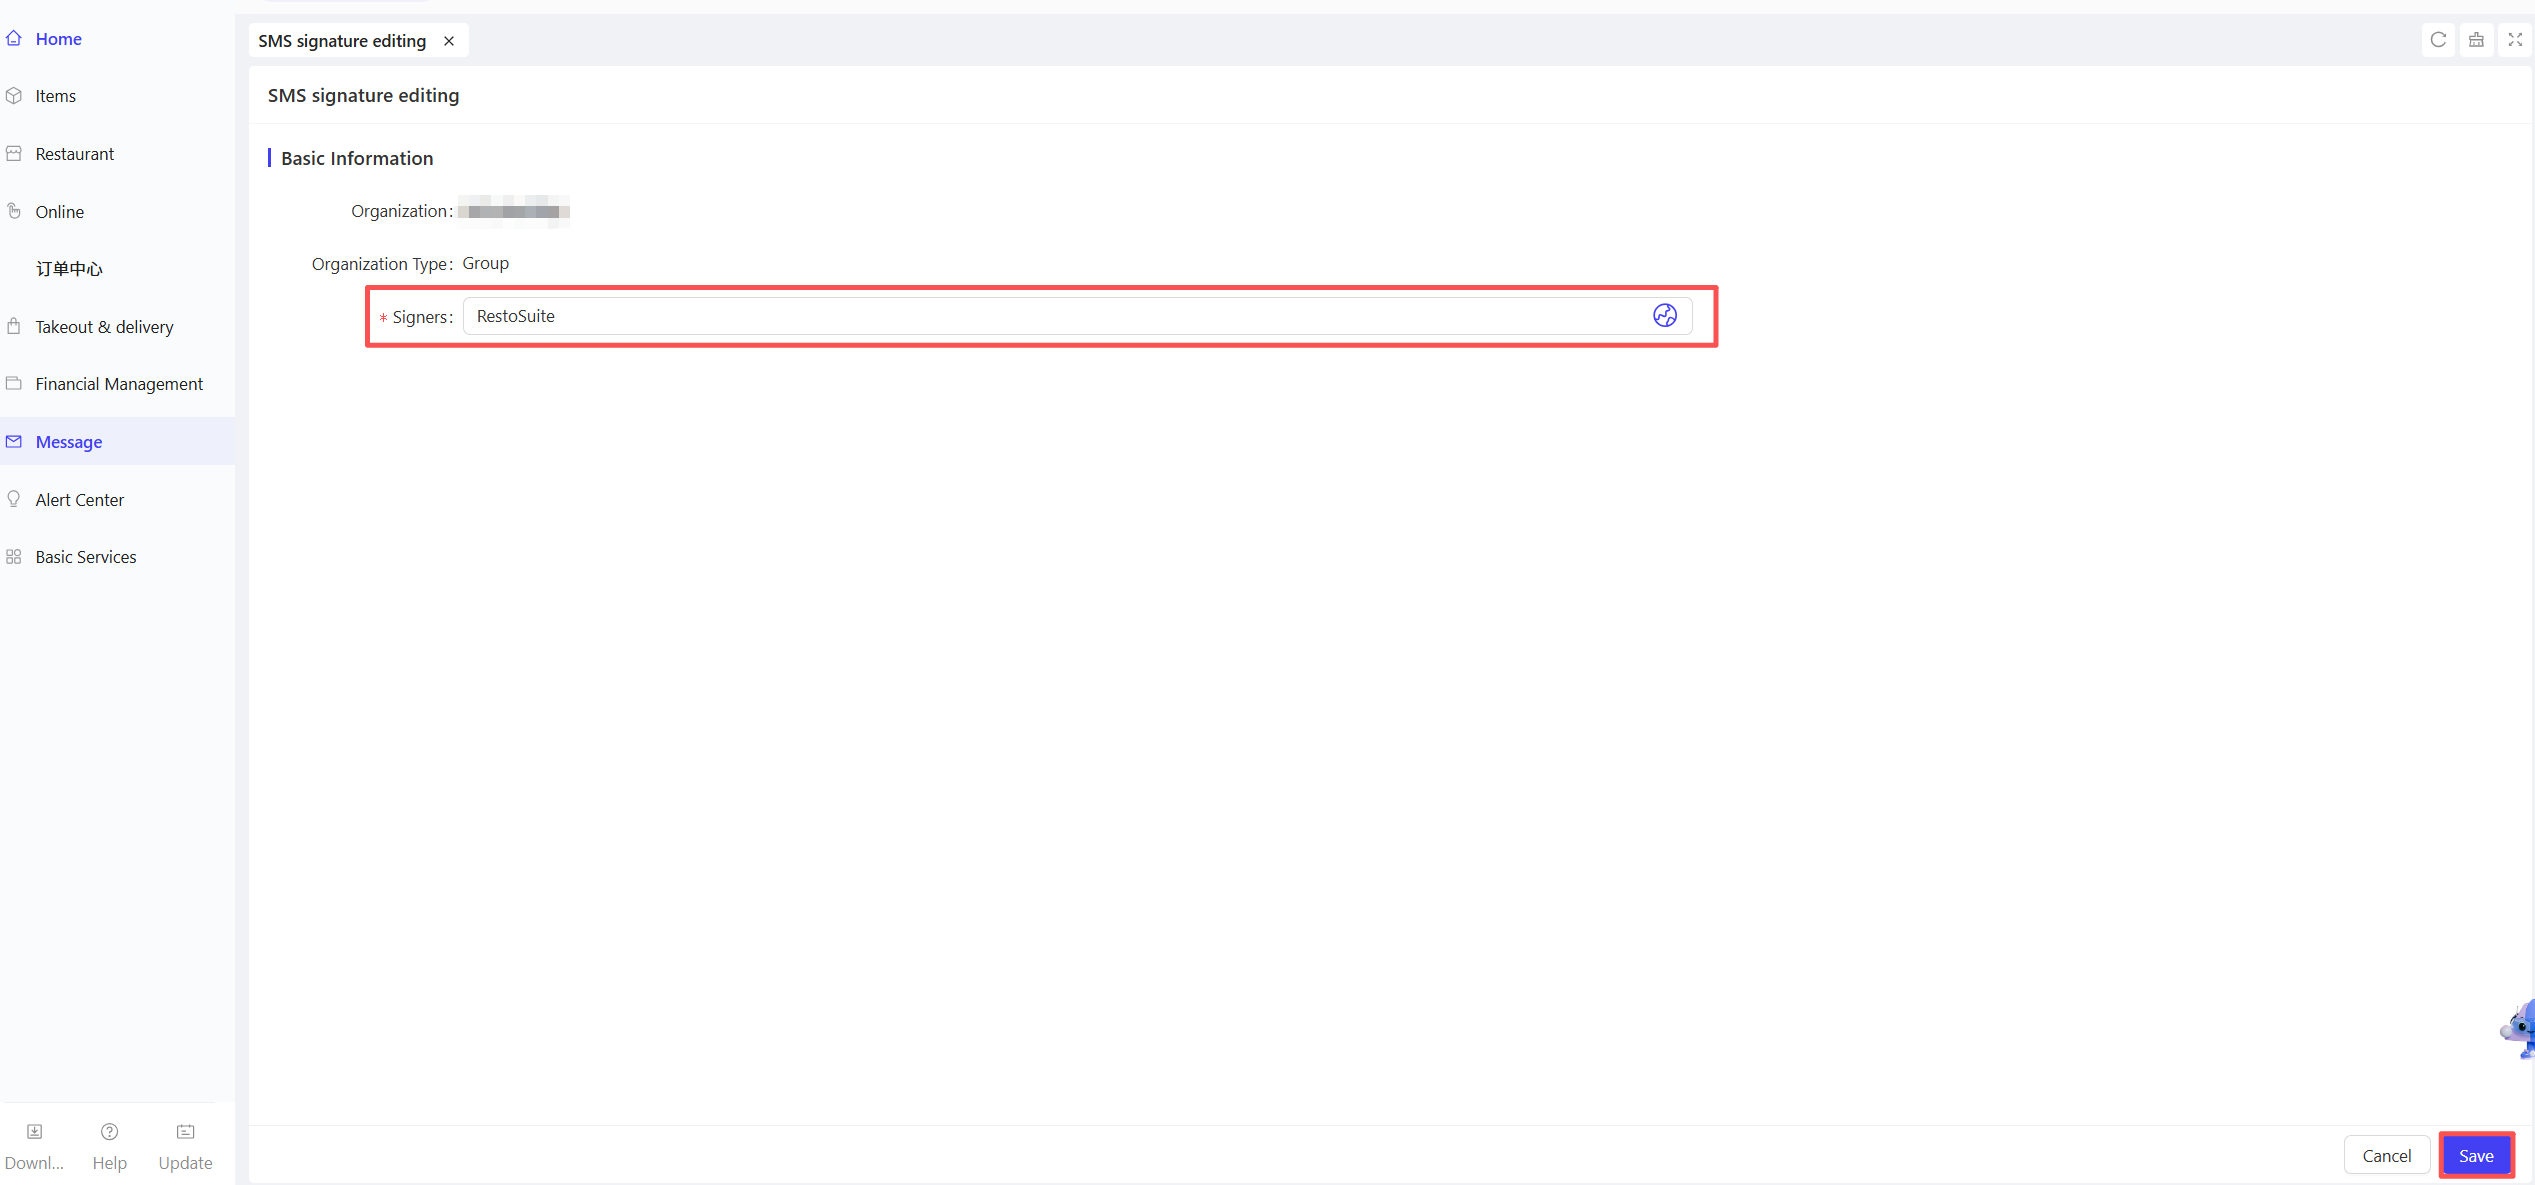
- Email Sender Settings
STEP 1: Access the menu path:
【Operations Management】>【Message Centre】>【Settings】>【Email Sender Settings】
STEP 2: The system automatically creates default configurations for the group and all brands. Locate the target configuration and click [Edit].
STEP 3: In the pop-up window, enter the designated sender email address and click [Save].
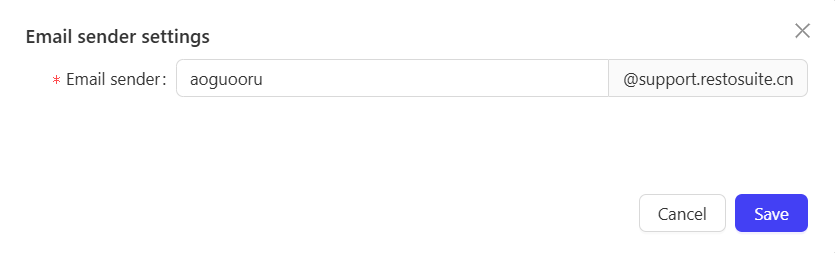
STEP 4: Subsequent email notifications from the group or brand will display this configured email as the sender.
3 Message Management
- Switch to Group View
(Follow the same steps as 【Message Settings】>【1. Switch to Group View】)
- Access the Message Management Page
STEP 1: Access the menu path:
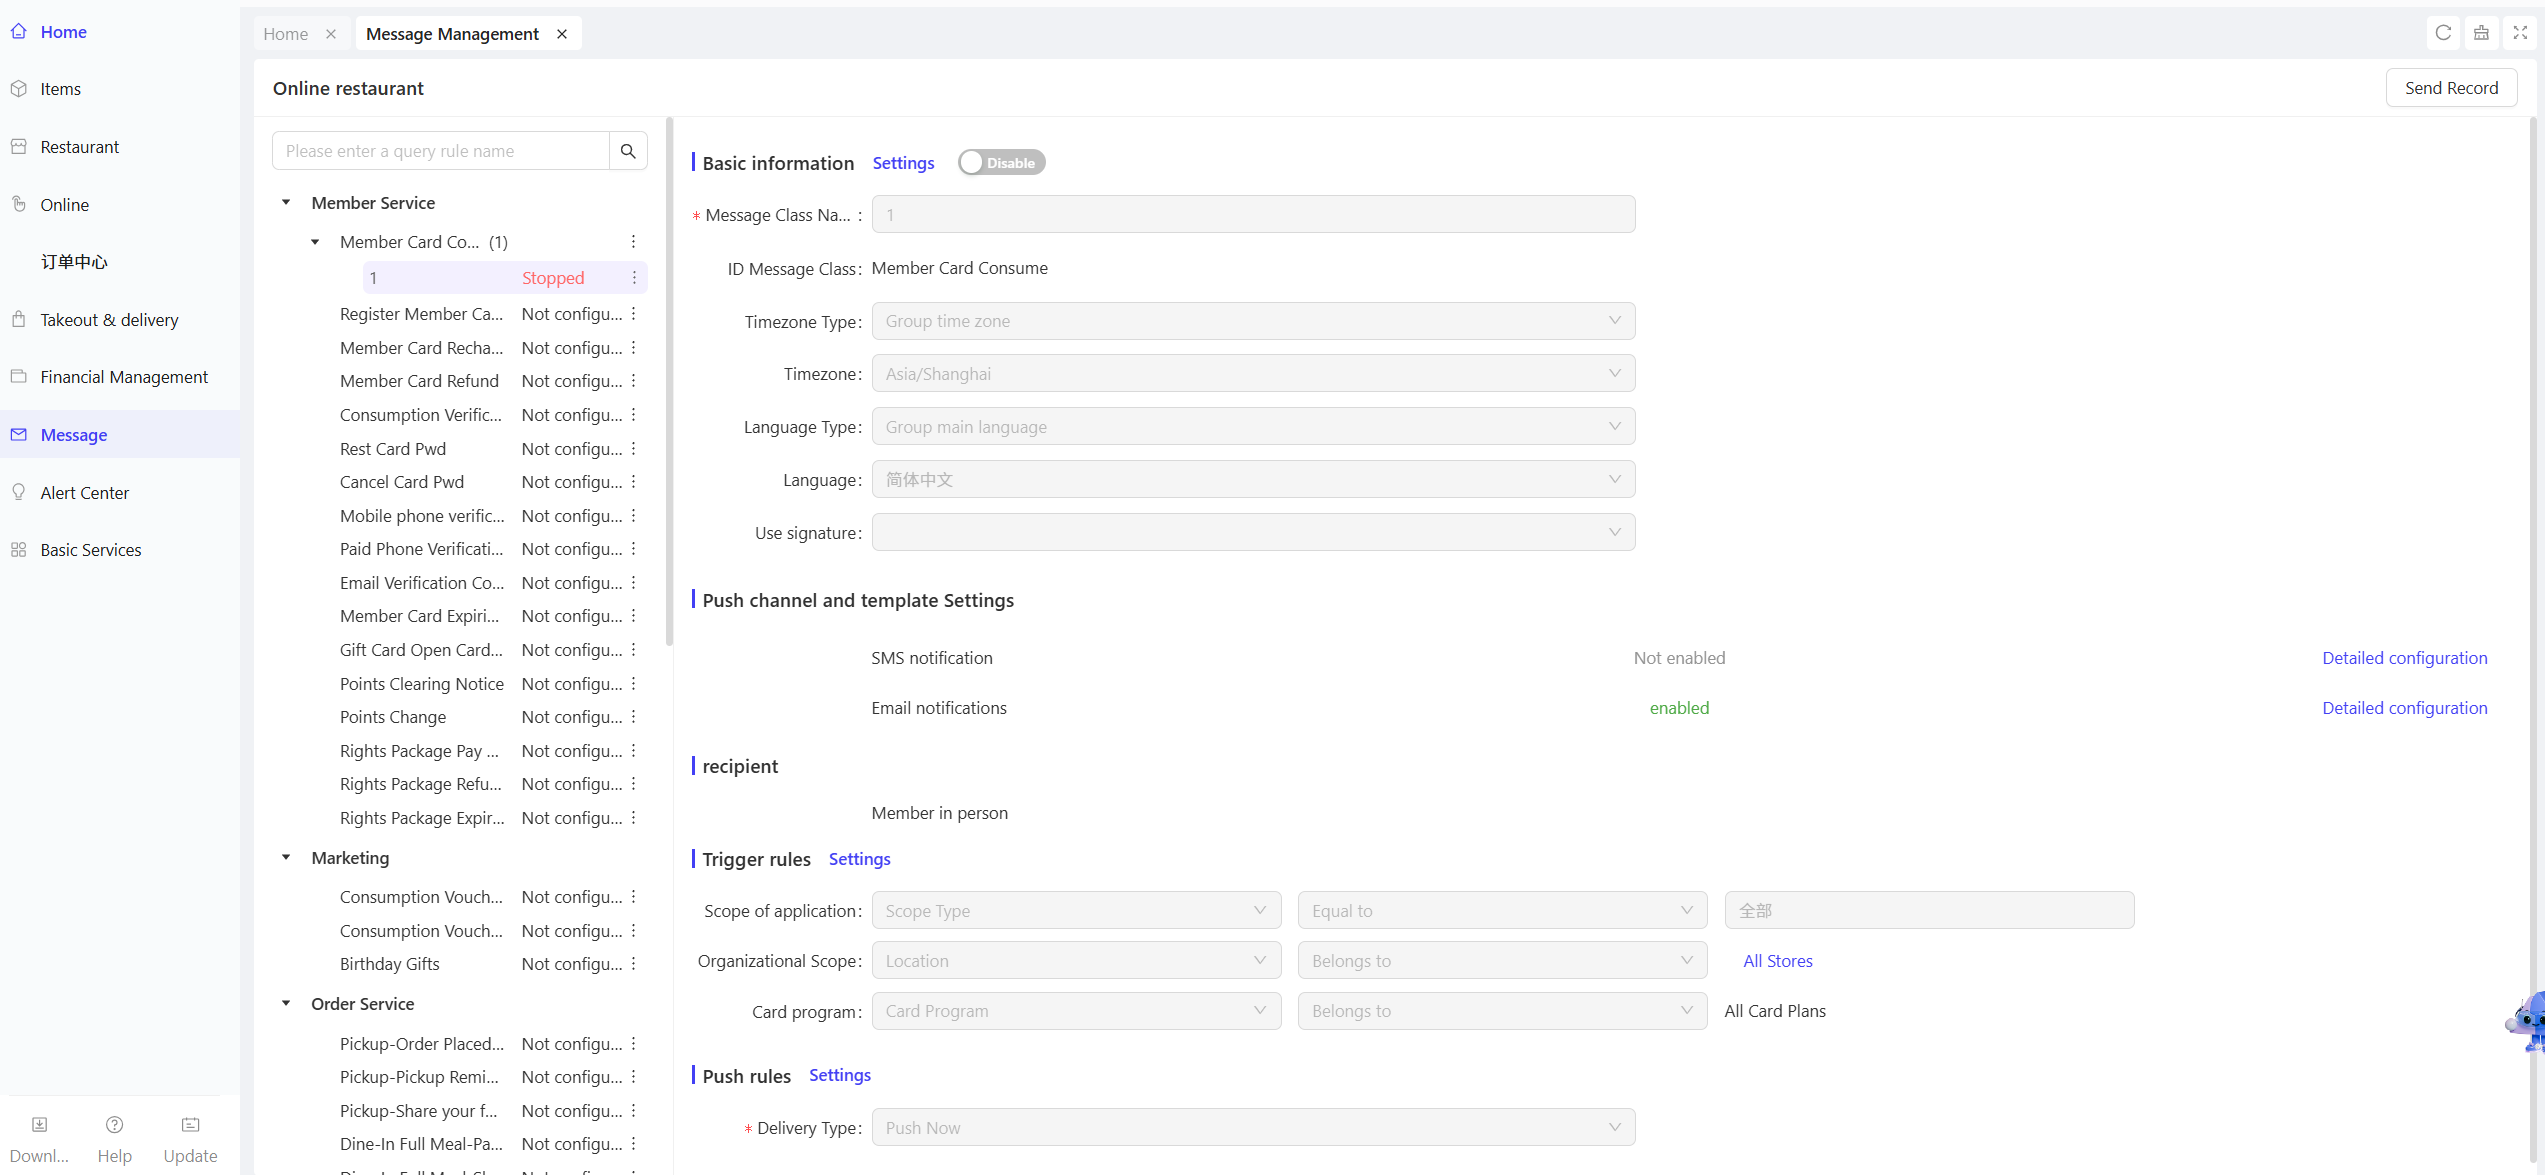
【Operations Centre】>【Message Centre】>【Rule Management】>【Message Management】
STEP 2: Supported message types include: Member Services, Marketing Notifications, Order Services, Reservations, Supply Chain, On-Account Bills, Store Notifications, etc.
- Create a Message Rule
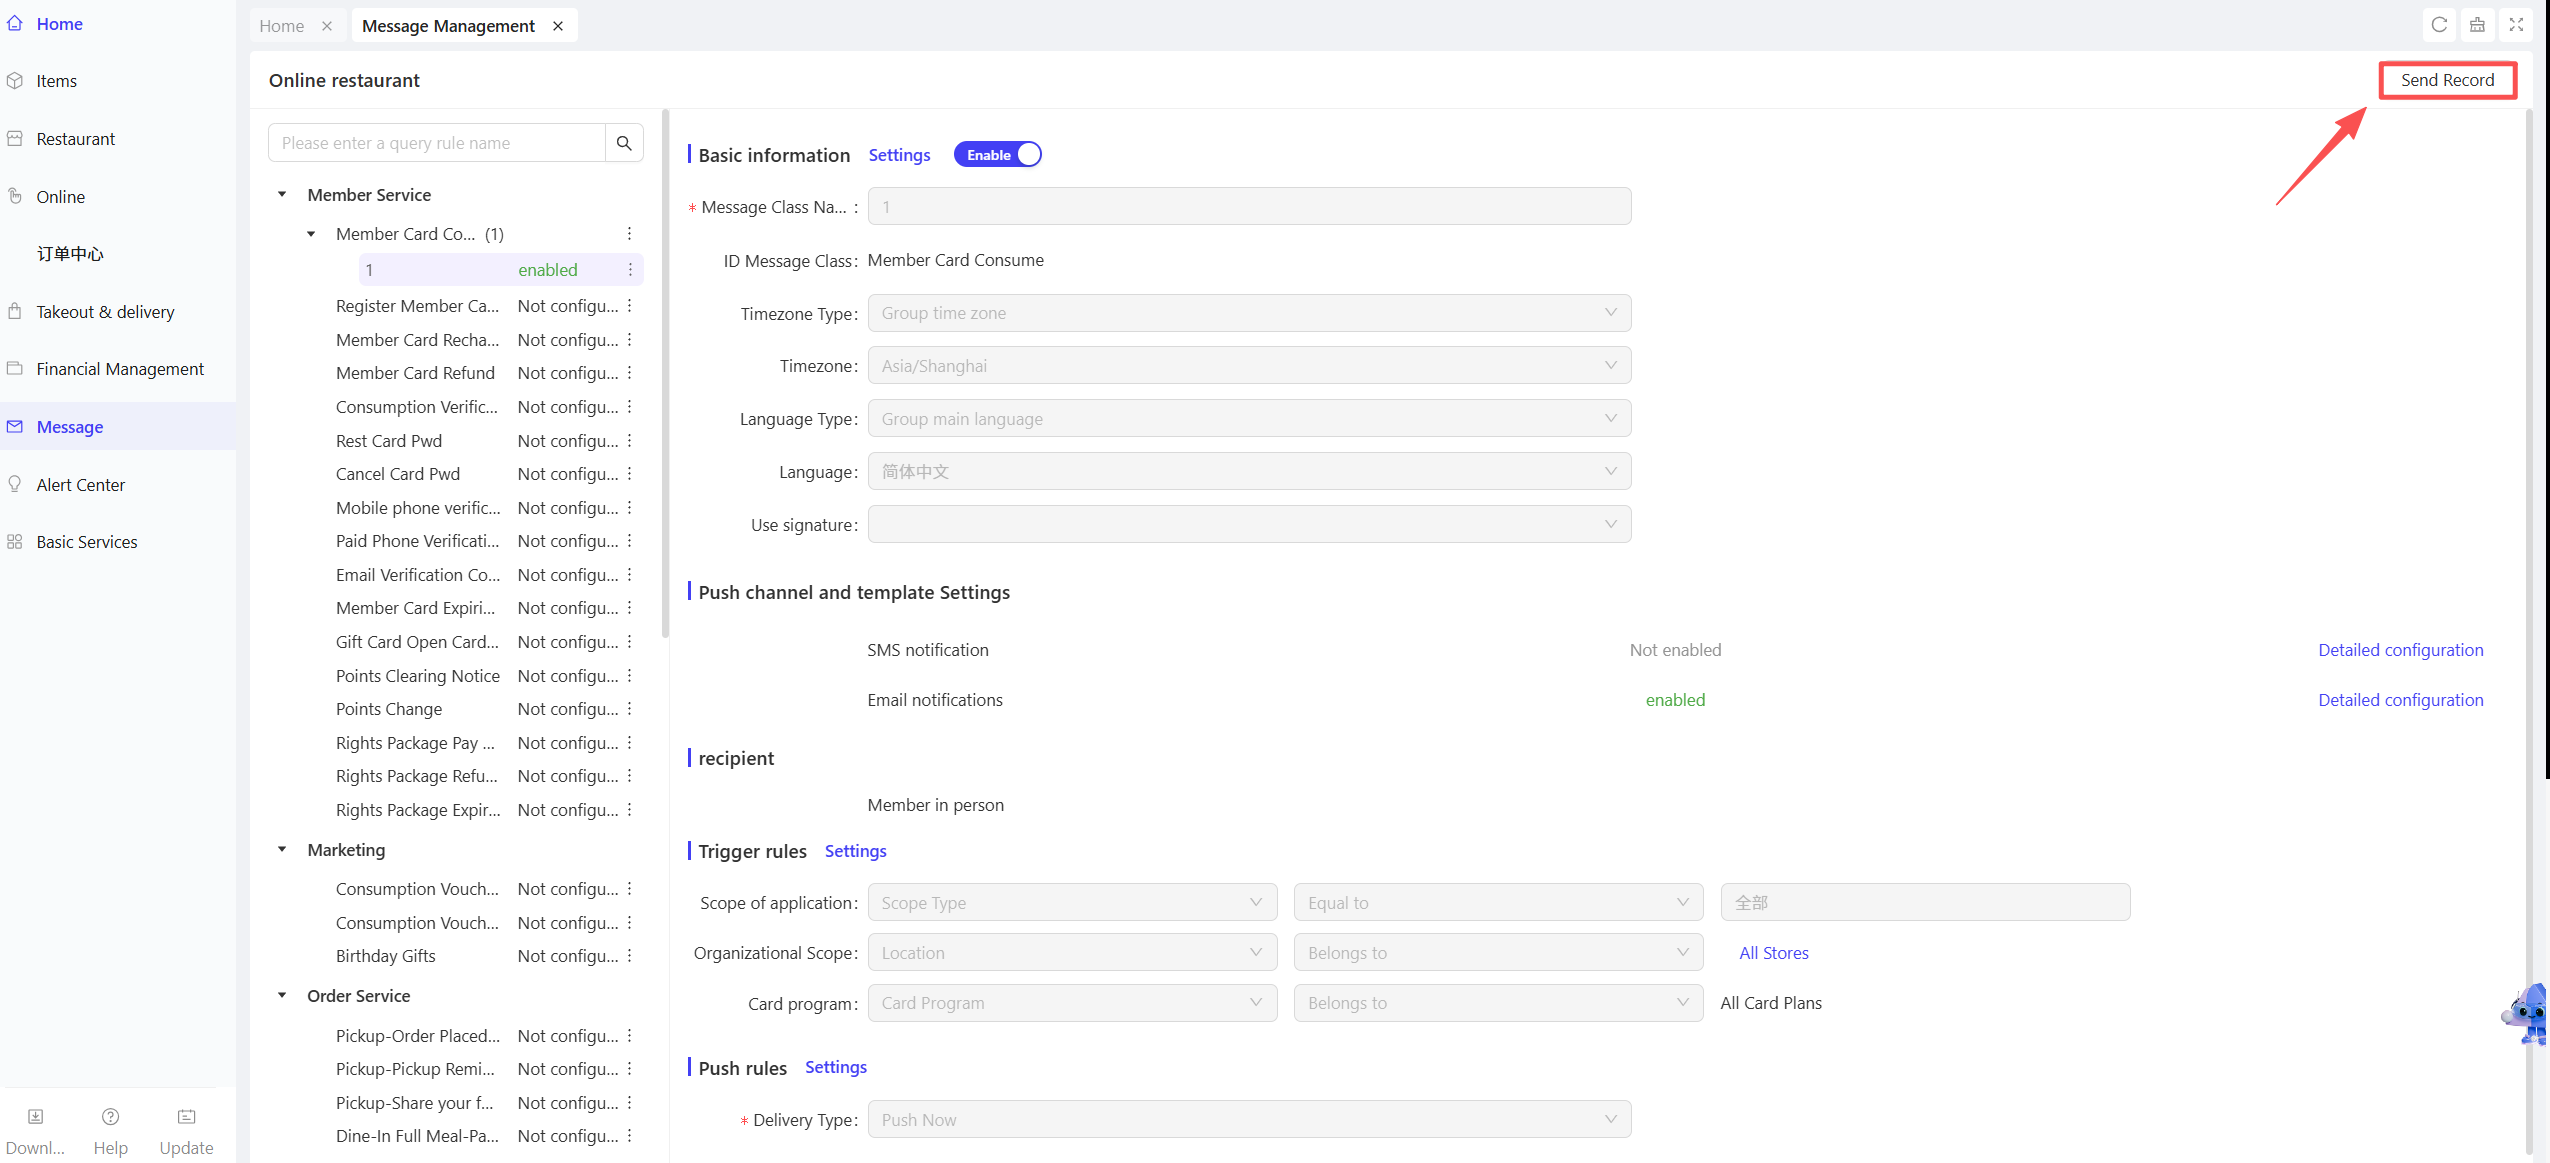
STEP 1: Select a specific transaction scenario under the target message type (e.g., 【Member Services】>【Member Consumption】). Click the 「・・・」 icon next to the scenario and select [Create Rule].
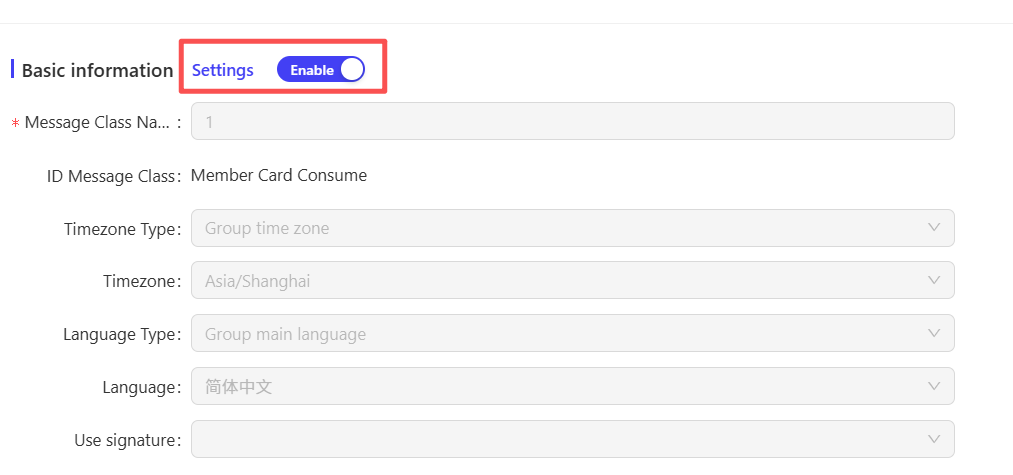
STEP 2: Enter a rule name, select the time zone and language, and check the SMS signature to be used (SMS signature settings must be completed in advance).

STEP 3: New rules are disabled by default. Configure the following settings:
- Push Channels & Template Settings: Select delivery channels (SMS Notification, Email Notification, WhatsApp, Group APP Notification, etc.).The system provides pre-built templates for each scenario; use them directly or customize edits. In the 「Benefit Account」 field, specify the account from which balance points will be deducted when sending messages.
- Trigger Rules: Set the organisational scope (Store/Brand) for which the message applies.
- Push Rules: Select the push type (Immediate Push / Delayed Push / Time Window Push).
- Activate the Message Rule
STEP 1: After completing all configurations, click [Enable] next to the rule.
STEP 2: Once activated, the system will send messages according to the configured template and channel when the corresponding scenario is triggered.
- View Message Send Records
STEP 1: Access the menu path: 【Operation Centre】>【Message Center】>【Send Records】
STEP 2: Query all triggered message records, including message content, delivery channel, send status, and other details.
4 Bulk Messages
- Switch to Group Management View
(Follow the same steps as 【Message Settings】>【1. Switch to Group Management View】)
- Access the Bulk Messages Page
STEP 1: Access the menu path: 【Operations Center】>【Message Center】>【Bulk Messages】
STEP 2: The page displays historical bulk message records, including send count, send status, etc. Click [Send Details] to view specific information.
- Create a Bulk Message
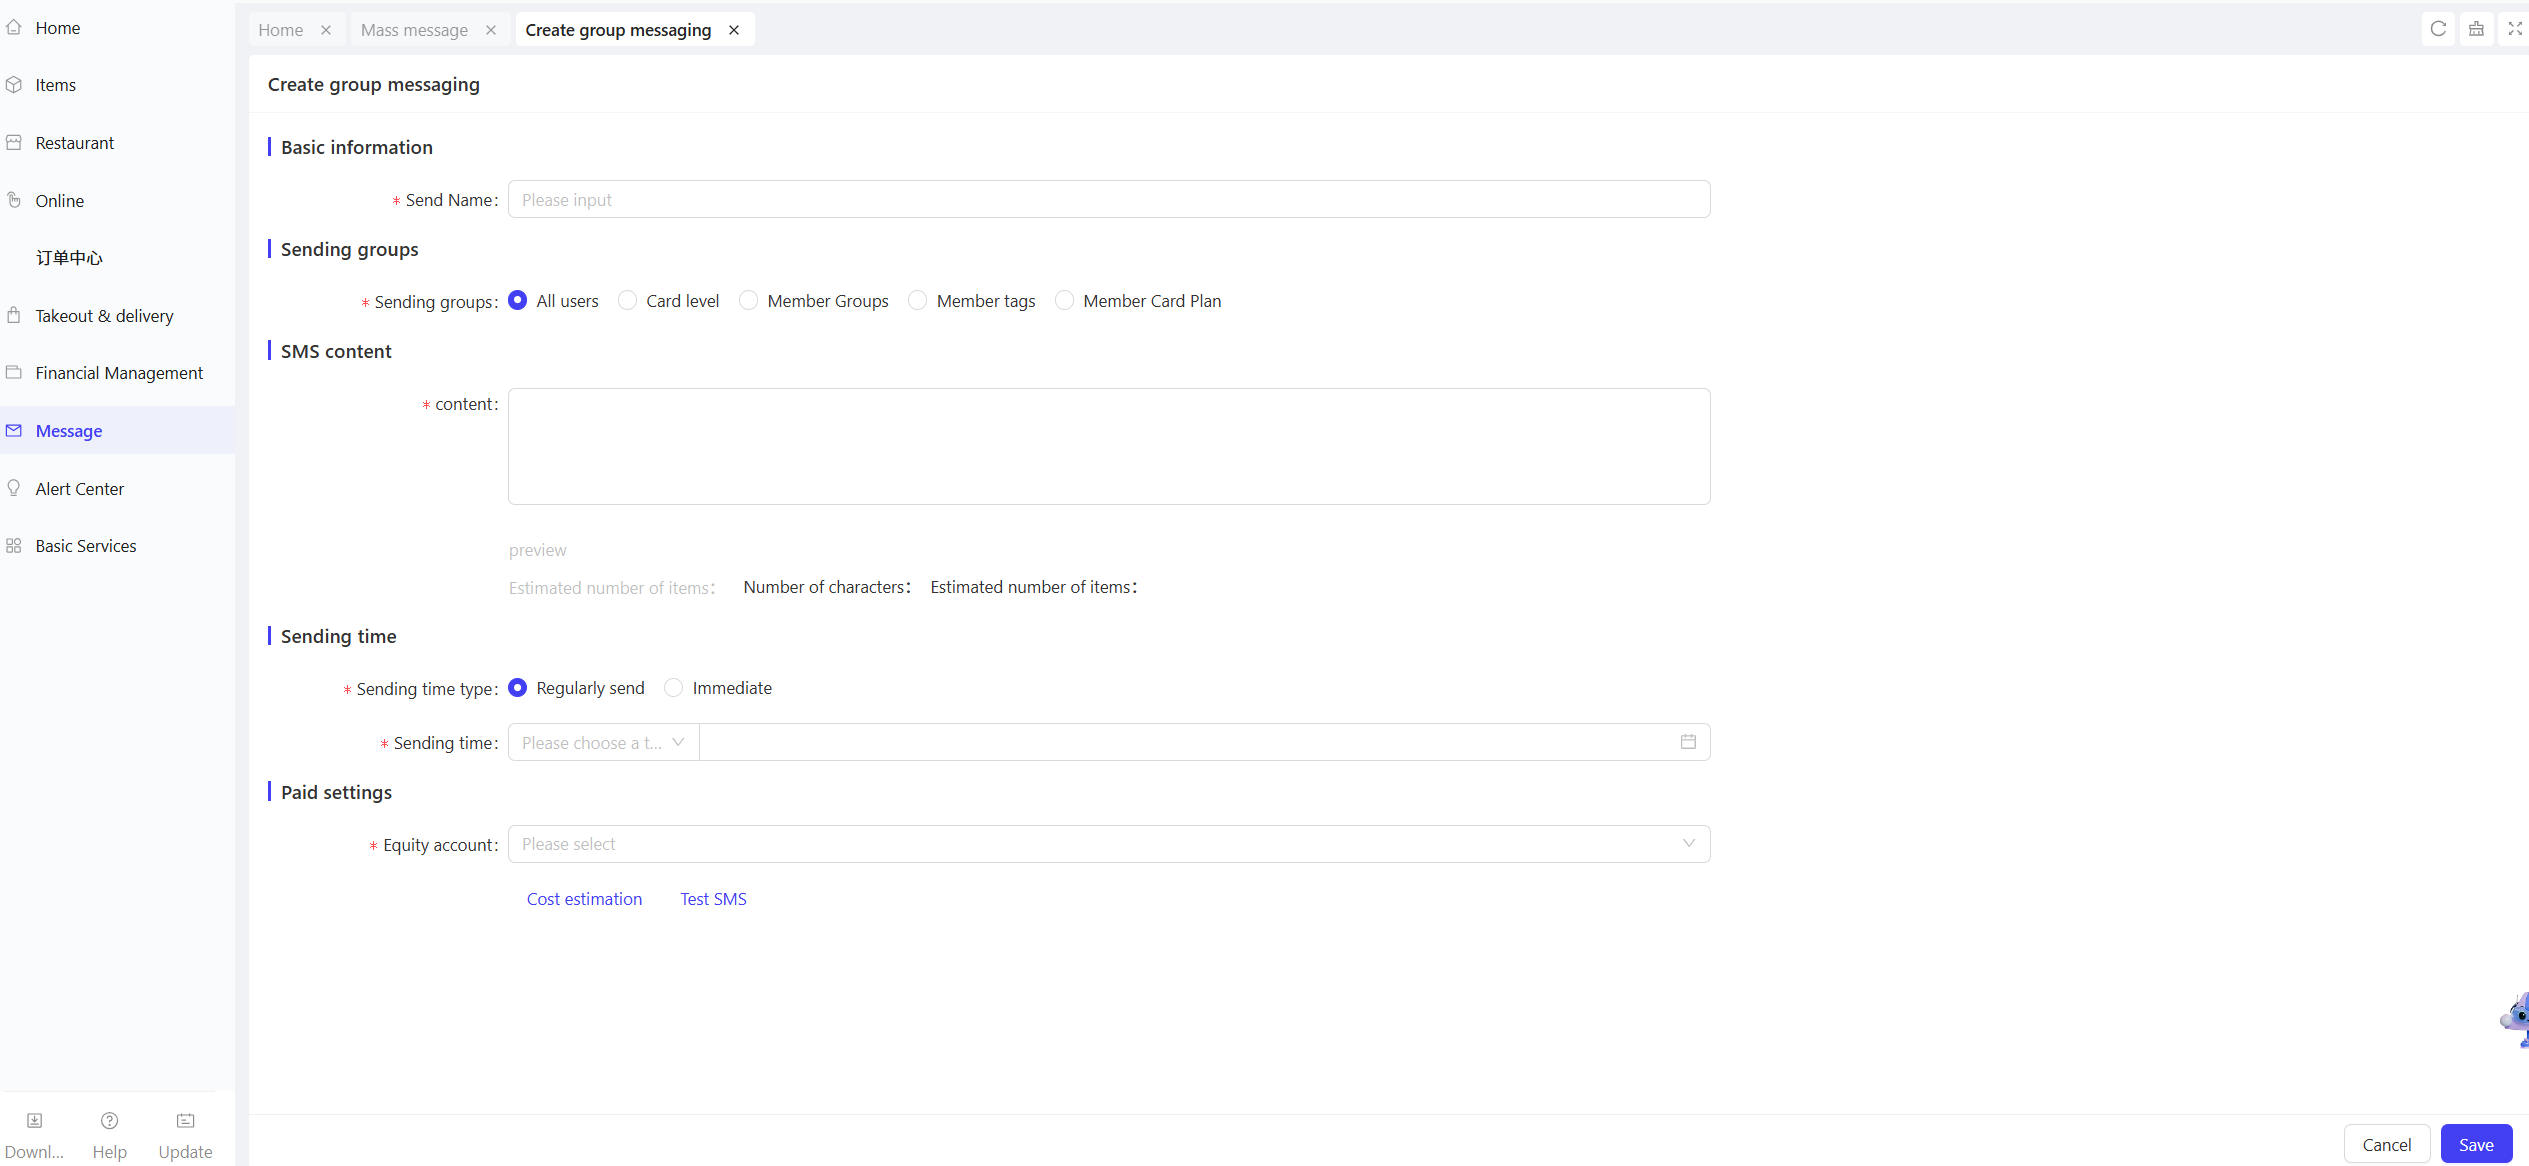
STEP 1: Click【Create】in the top-right corner.
STEP 2: Configure the following parameters:
- Recipient Group: Select the target audience (All / Member Card Tier / All Members / Member Tags / Member Card Plan).
- Send Time Type: Choose Immediate Send or Scheduled Send.
- Payment Settings: Select the benefit account from which points will be deducted for sending the message.
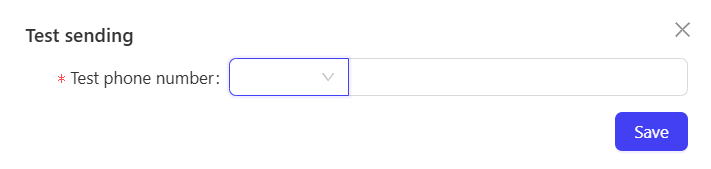
- Test Bulk Message Effect
STEP 1: Click the [Test SMS] function on the creation page.

STEP 2: Manually enter a phone number and click [Save] to preview how the message appears on a mobile device.
5 Notification Center
- Switch to Group View
(Follow the same steps as 【Message Settings】>【1. Switch to Group Management View】)
- Access the Alert Rules Page
STEP 1: Access the menu path:
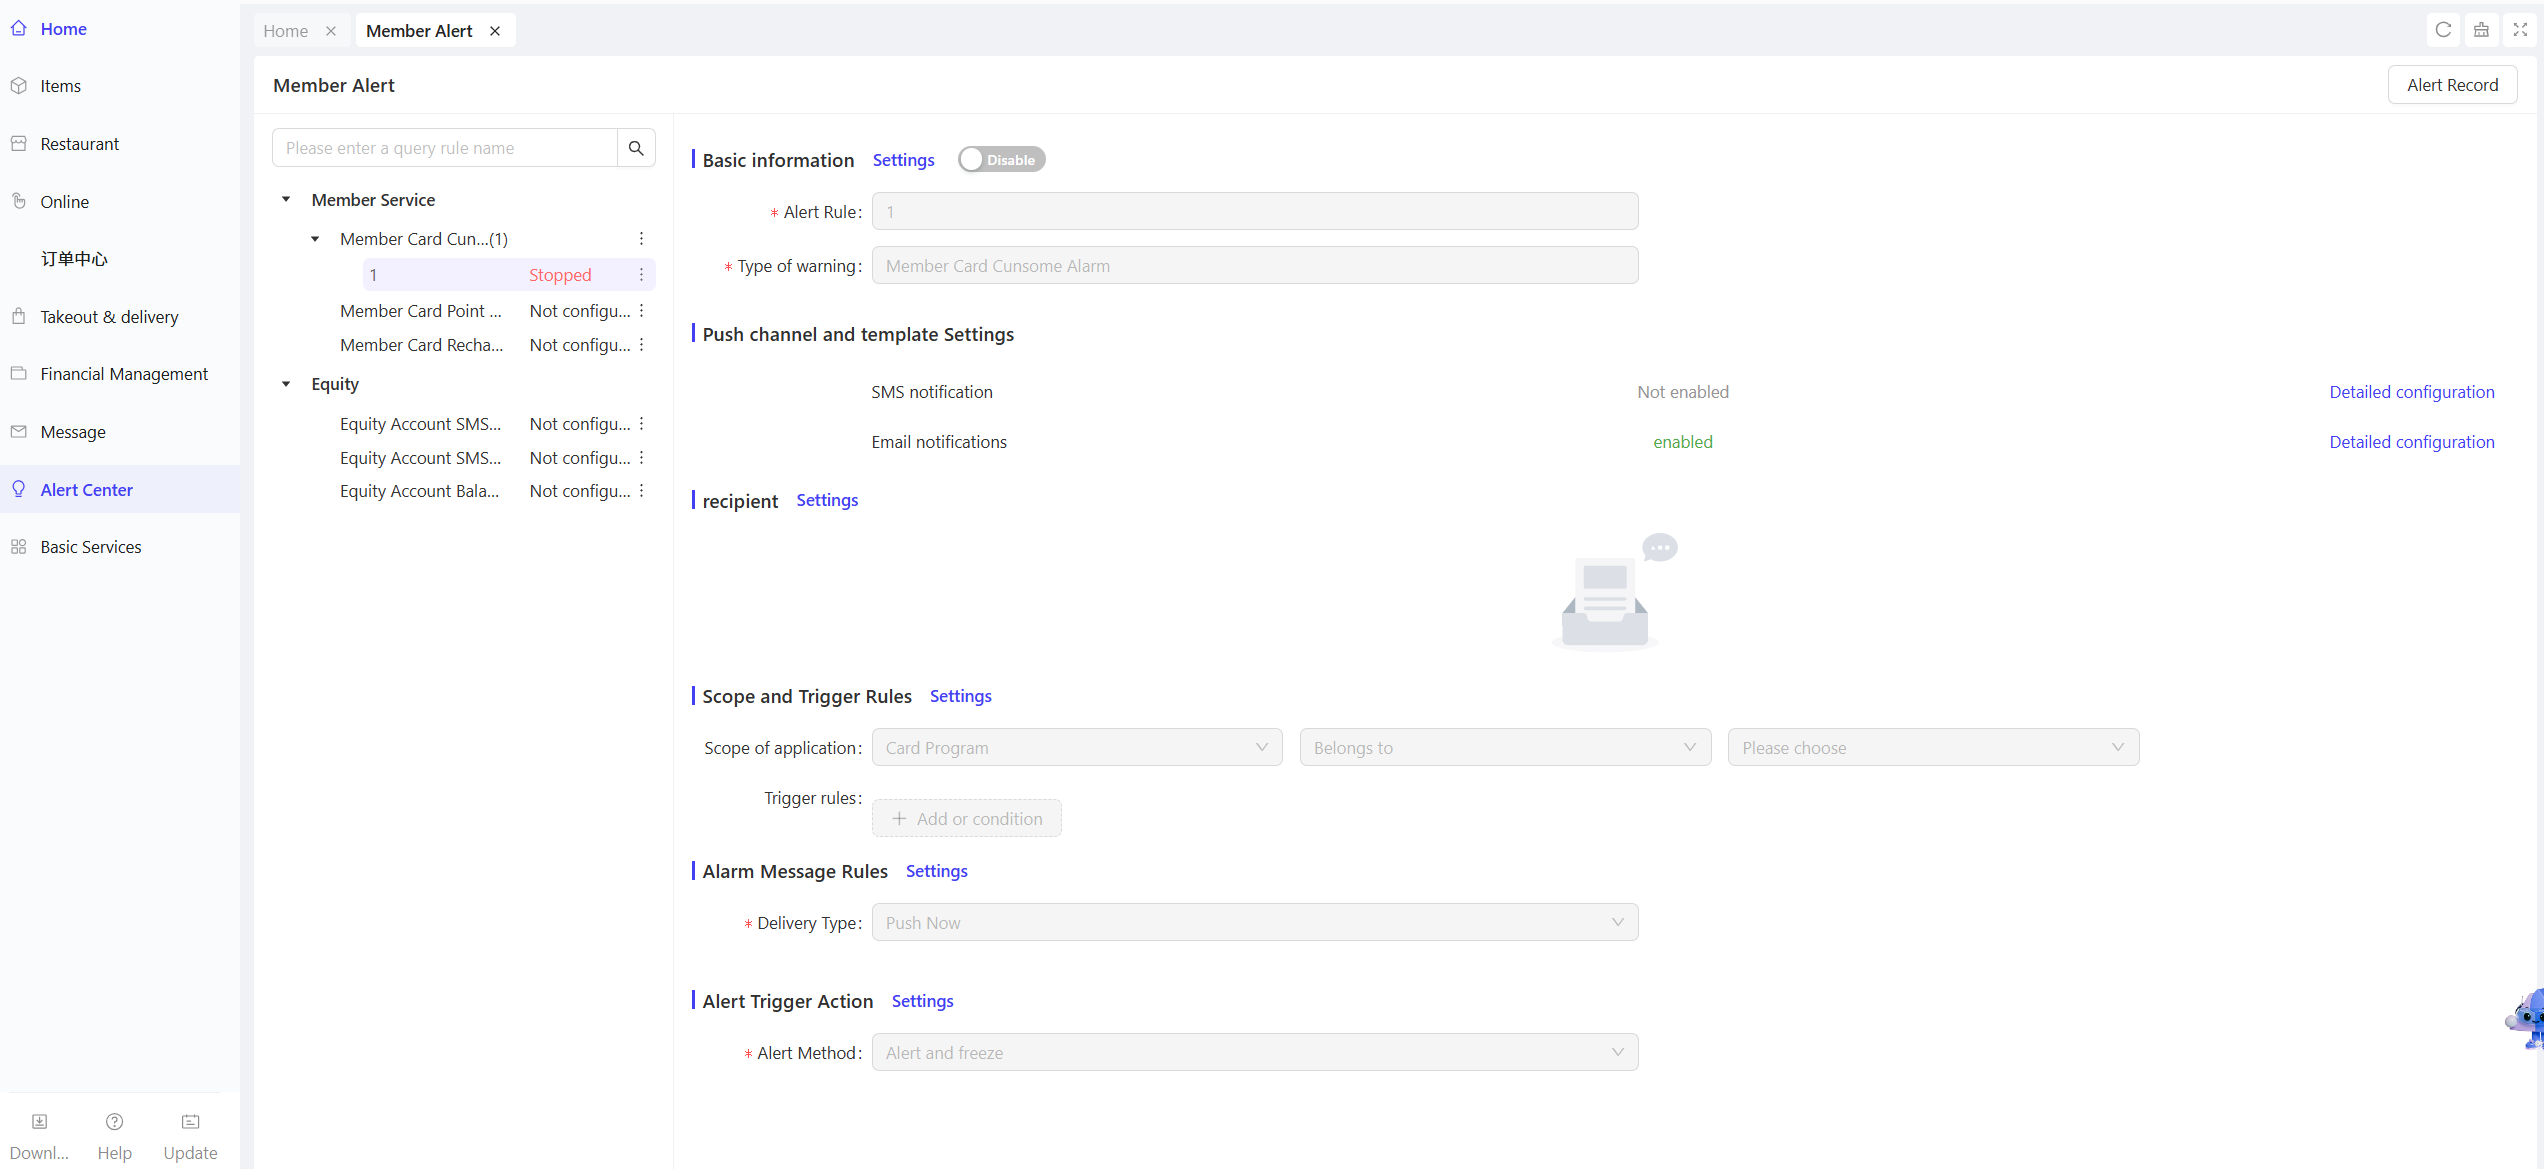
【Operation Centre】>【Alert Centre】>【Alert Rules】>【Member Alerts】
STEP 2: Supported alert types include: Member Services, Benefit Account.
- Create an Alert Rule
STEP 1: Select a specific scenario under the target alert type (e.g., 【Member Services】>【Member Consumption Alert】). Click the 「・・・」 icon next to the scenario and select [Create Rule].
STEP 2: Enter a rule name. New rules are disabled by default. Configure the following settings:
- Delivery Channels & Template Settings: Select delivery channels (SMS Notification, Email Notification, etc.).The system provides pre-built alert templates for each scenario; use them directly or customize edits. In the 「Benefit Account」 field, specify the account from which points will be deducted when sending alert messages.
- Recipients: Set the responsible person(s) for receiving alerts at each store.
- Applicable Scope & Trigger Rules: Define the organisational scope (Store/Brand/Specified Card Plan) for which the alert applies.
- Alert Message Rules: Select the push type (Immediate Push / Delayed Push / Time Window Push).
- Alert Trigger Action: Choose the alert mode (Alert Only / Alert and Freeze).
- Activate the Alert Rule
STEP 1: After completing all configurations, click [Enable] next to the rule.
STEP 2: Once activated, the system will send alert messages according to the configuration when the corresponding scenario is triggered.
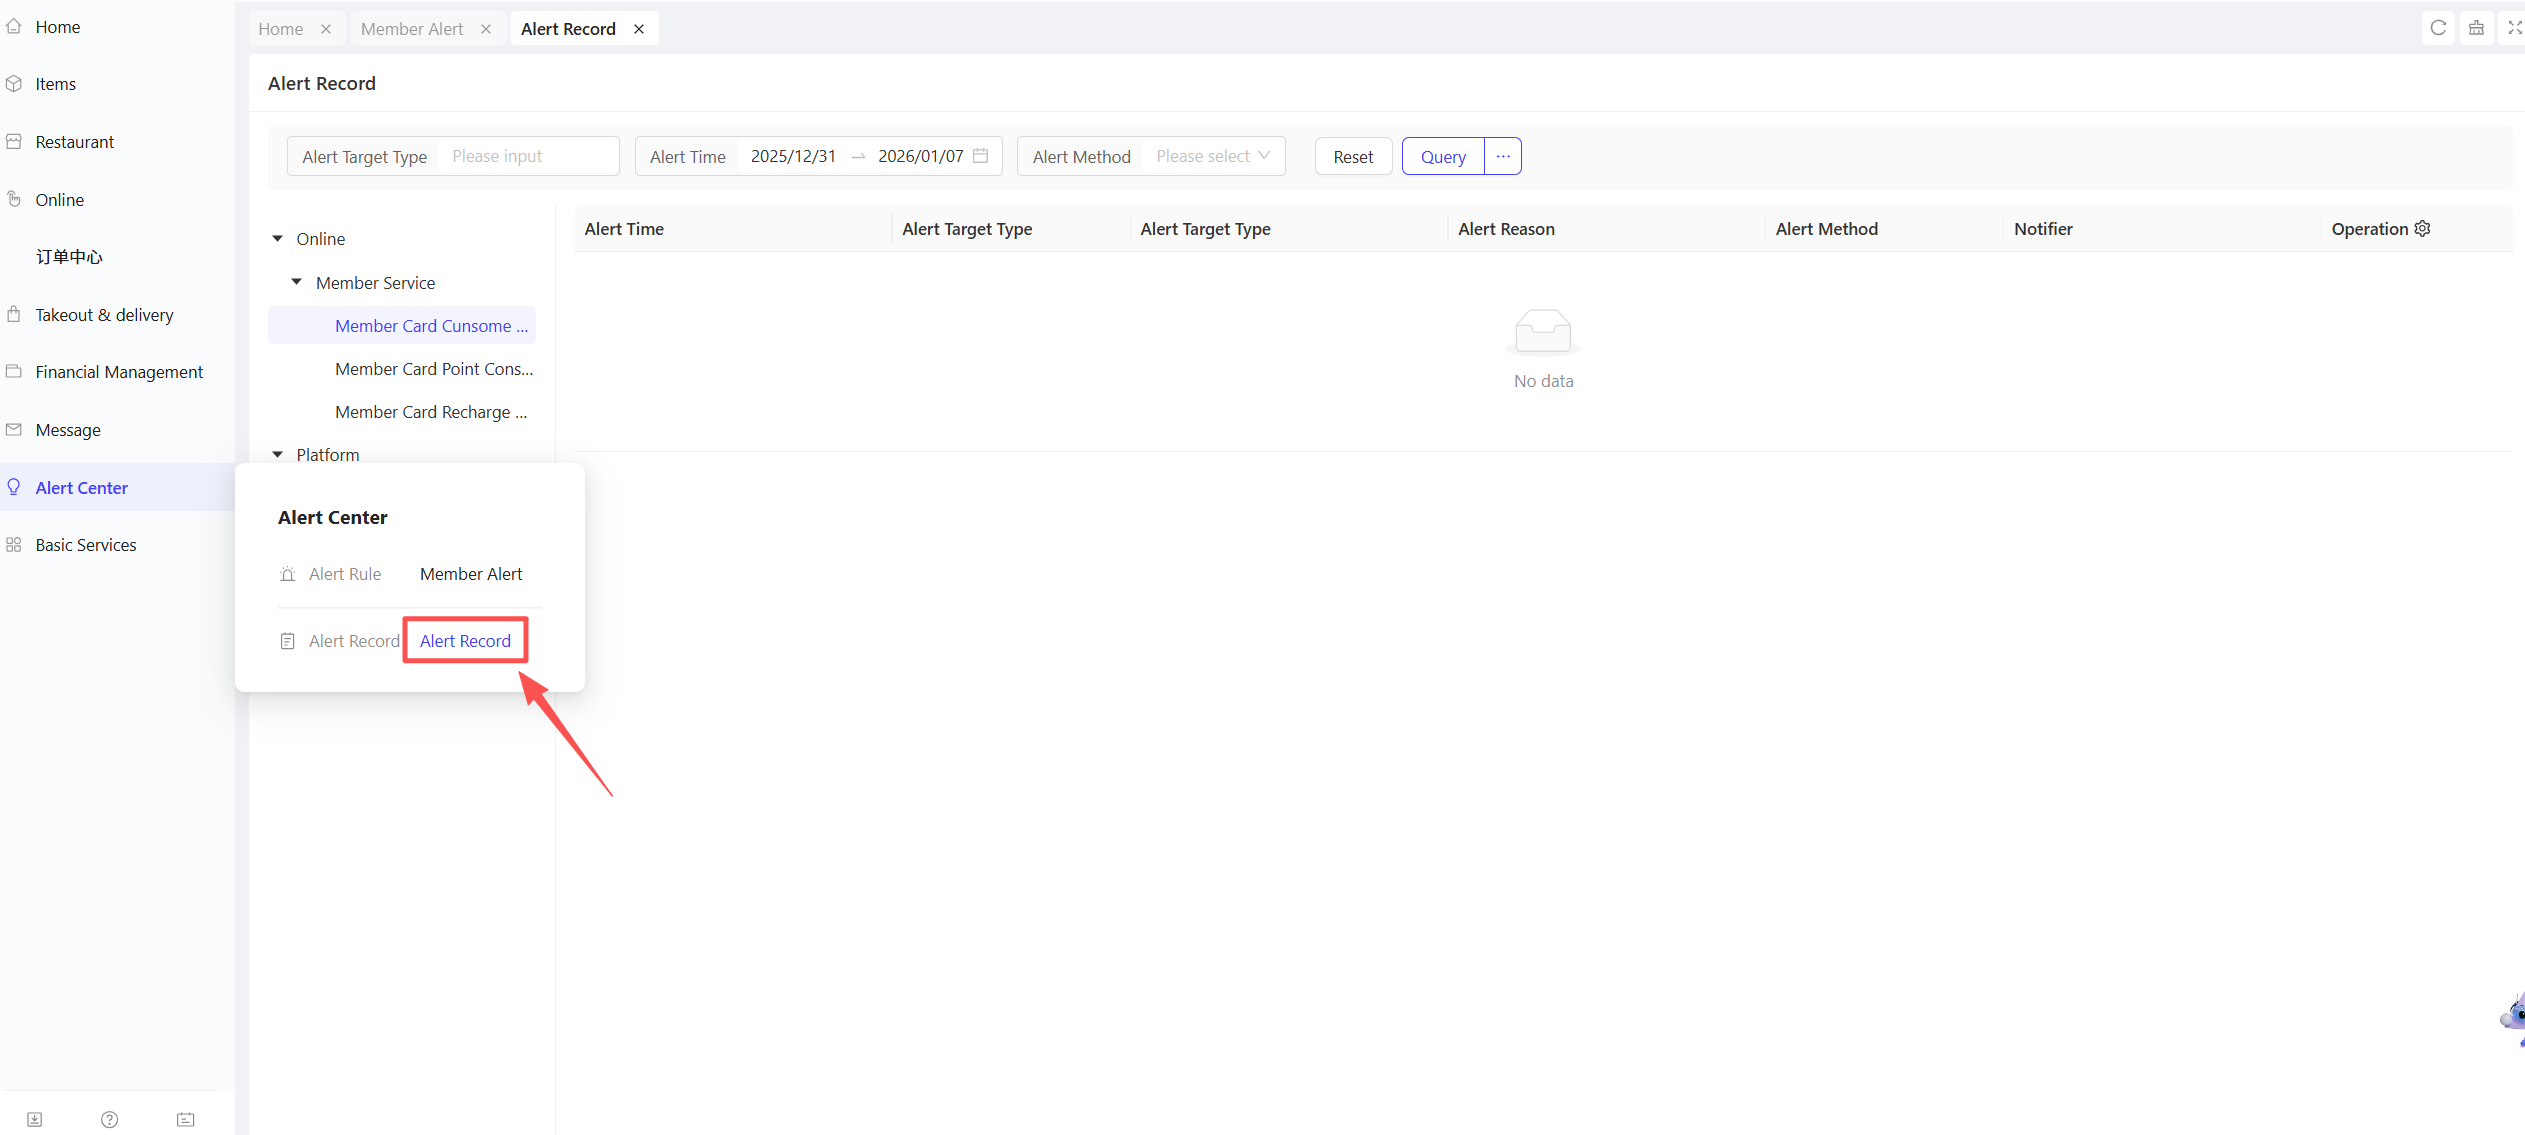
- View Alert Records & Card Operations
STEP 1: Access the menu path: 【Operations Center】>【Alert Center】>【Alert Records】
STEP 2: Query all triggered alert records, including message content, delivery status, etc.
STEP 3: For Benefit Account-related alert records, click [Card Operations] to set the specified member card to [Freeze] or [Restore Normal] status.